
To grow Alocasia bulbs successfully indoors, ensure they receive bright, indirect light, maintain a warm and humid environment, and use well-draining soil. Water them thoroughly but let the soil dry slightly between waterings. Fertilize during the growing season to promote healthy growth.
Understanding Alocasia Bulbs
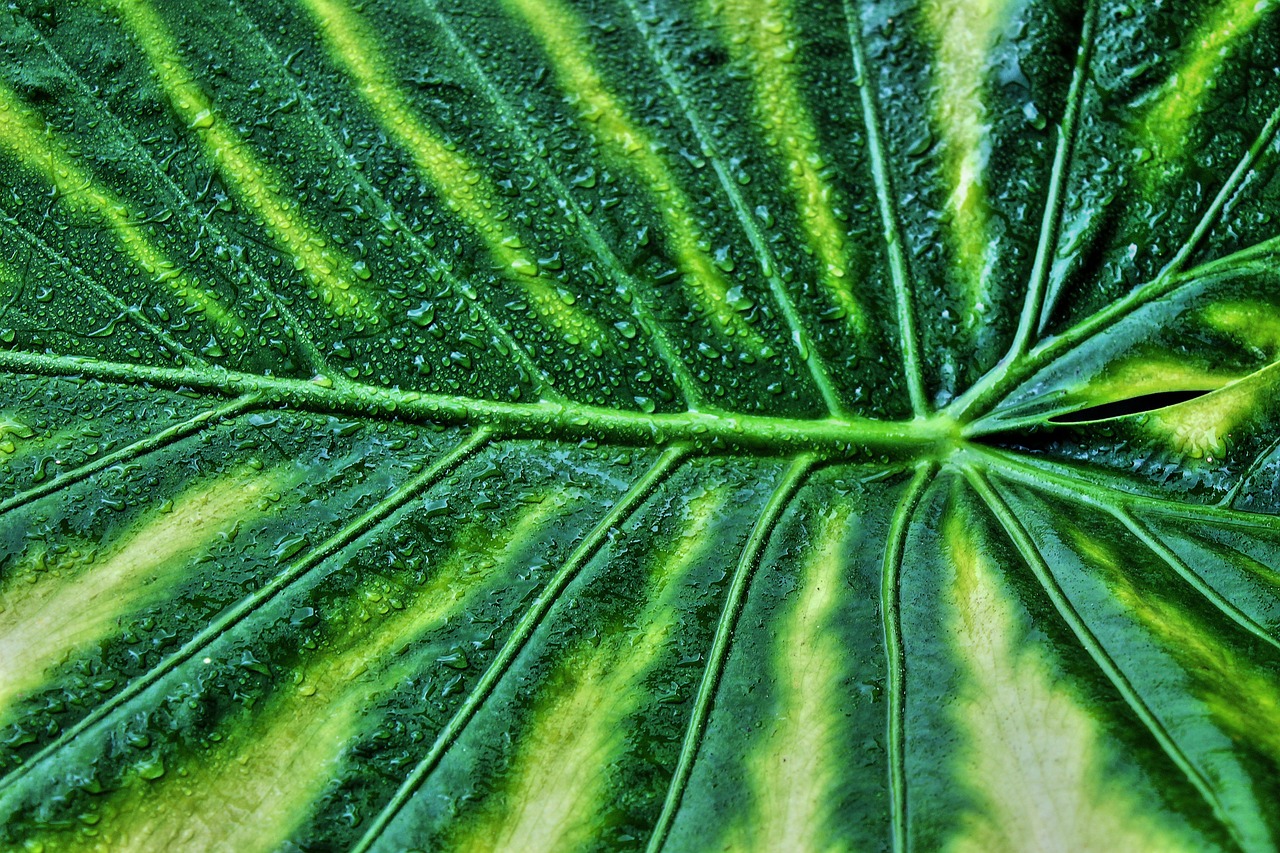
Alocasia, often known as elephant ear plants, are popular ornamental plants known for their striking foliage and unique shapes. The bulbs of these plants are essential for their growth, providing the nutrients and energy needed to develop lush leaves. These tropical plants thrive in warm and humid conditions, making them suitable for indoor gardening, especially in areas that replicate their natural habitat.
Growing Alocasia bulbs indoors can be a rewarding experience. However, it requires a bit of knowledge about their specific needs and care requirements. Understanding the right conditions for growth will help you cultivate these beautiful plants successfully.
Choosing the Right Bulbs
When starting with Alocasia bulbs, selecting high-quality bulbs is crucial. Look for bulbs that are firm, plump, and free from any signs of rot or disease. Healthy bulbs will provide a better chance for vigorous growth.
- Size: Larger bulbs typically produce bigger plants.
- Variety: Different Alocasia varieties may have specific care requirements.
- Source: Purchase from reputable nurseries or garden centers to ensure quality.
Soil Requirements
The soil you choose is vital for the successful growth of Alocasia bulbs. A well-draining potting mix is essential to prevent waterlogging, which can cause the bulbs to rot. Here are some recommended soil components:
- Pine bark or orchid bark for aeration
- Perlite or sand for drainage
- Peat moss or coconut coir for moisture retention
A balanced potting mix that combines these elements will provide the optimal environment for your Alocasia bulbs to thrive.
Lighting Conditions
Light plays a significant role in the growth of Alocasia plants. They prefer bright, indirect sunlight. Direct sunlight can scorch their leaves, while insufficient light can stunt their growth. Here are tips for ensuring proper lighting:
- Place your Alocasia near a window with filtered light.
- If natural light is limited, consider using grow lights.
- Rotate the pot regularly to ensure all sides receive even light exposure.
Watering Practices
Proper watering is crucial for Alocasia bulbs. They prefer a consistent moisture level but should not sit in waterlogged soil. Follow these watering guidelines:
- Water thoroughly when the top inch of soil feels dry.
- Avoid letting the bulbs sit in standing water.
- Reduce watering during the dormant season (fall and winter).
Humidity Levels
Alocasia plants thrive in high humidity. Indoor environments can often be too dry, especially during winter months. To maintain adequate humidity, consider the following options:
- Use a humidifier in the room where the plants are located.
- Group plants together to create a microclimate.
- Mist the leaves regularly to boost humidity levels.
Temperature Preferences
The ideal temperature range for Alocasia plants is between 65°F to 80°F (18°C to 27°C). They are sensitive to cold drafts and sudden temperature changes. Ensure that your indoor environment remains stable and warm. Here are some tips:
- Avoid placing them near heating vents or air conditioners.
- Monitor temperatures closely during winter months.
Fertilization Techniques
To encourage healthy growth, fertilizing your Alocasia bulbs during the growing season is essential. Use a balanced liquid fertilizer diluted to half strength every month from spring through early fall. This will provide the necessary nutrients for robust foliage development.
By understanding these key factors—bulb selection, soil composition, light exposure, watering habits, humidity needs, temperature preferences, and fertilization—you can create an ideal environment for growing Alocasia bulbs indoors successfully.
Pest and Disease Management
Alocasia plants, while relatively hardy, can be susceptible to various pests and diseases. Early detection is crucial to prevent severe damage. Understanding common issues can help you address problems quickly and effectively.
Common Pests
Several pests may invade Alocasia bulbs and leaves. Here are the most common ones to watch for:
- Aphids: Small, soft-bodied insects that can distort new growth.
- Spider Mites: Tiny pests that thrive in dry conditions and create fine webbing.
- Mealybugs: White, cottony masses that feed on sap and can weaken the plant.
- Thrips: Small, slender insects that can cause discoloration on leaves.
Regularly inspect your plants for any signs of these pests. If detected, take immediate action to control their spread.
Pest Control Methods
Here are some effective methods for managing pests on Alocasia plants:
- Insecticidal Soap: A safe option for treating soft-bodied insects like aphids and mealybugs. Spray the affected areas thoroughly.
- Neem Oil: A natural pesticide that disrupts the life cycle of various pests. Apply it every few weeks as a preventive measure.
- Manual Removal: For small infestations, you can remove pests by hand using a cotton swab dipped in rubbing alcohol.
- Companion Planting: Some plants can deter pests naturally. Consider placing herbs like basil or mint nearby.
Disease Prevention
Diseases can also affect Alocasia plants, primarily due to improper care. Here are some common diseases and ways to prevent them:
- Root Rot: Caused by overwatering and poorly draining soil. Ensure your pot has drainage holes and allow the soil to dry between waterings.
- Leaf Spot: Fungal infections that cause dark spots on leaves. Improve air circulation around the plant and avoid wetting the foliage when watering.
- Powdery Mildew: A fungal disease that appears as a white powder on leaves. Increase humidity levels but ensure good air circulation to combat this issue.
Repotting Alocasia Bulbs
As your Alocasia plants grow, they may outgrow their pots. Repotting is essential for providing ample space for root development. Knowing when and how to repot will keep your plants healthy.
When to Repot
Generally, repot your Alocasia plants every 1-2 years. Signs that indicate it’s time to repot include:
- The roots are growing out of the drainage holes.
- The plant is becoming top-heavy or unstable.
- The soil dries out too quickly after watering.
Repotting Steps
Follow these steps to repot your Alocasia bulbs successfully:
- Choose a pot that is 1-2 inches larger in diameter than the current pot.
- Prepare fresh potting mix with the recommended components for Alocasia.
- Gently remove the plant from its current pot by loosening the edges of the soil.
- Inspect the roots for any signs of rot and trim any unhealthy sections.
- Place the plant in the new pot and fill with fresh soil, ensuring the bulb sits just below the soil surface.
- Water thoroughly and place in a well-lit area, monitoring moisture levels closely after repotting.
Propagation Techniques
Propagating Alocasia bulbs is an exciting way to expand your indoor garden. While propagation can be done through offsets or division, it requires careful handling to ensure success.
Offsets Method
Many Alocasia varieties produce offsets, or small bulbs, around the main bulb. Here’s how to propagate using offsets:
- Wait until the offsets are at least one-third the size of the parent bulb.
- Carefully remove the parent bulb from its pot.
- Gently separate the offsets from the main bulb, ensuring each has some roots attached.
- Plant each offset in its own pot with appropriate soil mix.
- Water well and place in a warm, humid environment until they establish roots.
Division Method
If you have a mature Alocasia plant, you can propagate by division:
- Remove the plant from its pot carefully.
- Divide the root ball into sections with at least one healthy bulb and roots in each section.
- Re-pot each section into fresh soil, providing adequate space for growth.
- Water thoroughly and place in a suitable light condition to encourage growth.
This propagation method not only helps you create new plants but also revitalizes the parent plant by allowing it to grow more robustly in its new setting.
Seas

onal Care for Alocasia Bulbs
Understanding the seasonal changes is vital for the successful growth of Alocasia bulbs. As these plants naturally experience cycles of growth and dormancy, adjusting their care throughout the year can significantly enhance their health and vitality.
Spring Care
Spring is the primary growing season for Alocasia plants. During this time, they will show increased growth and may require more attention. Here are some care tips for spring:
- Increase Watering: As temperatures rise, your Alocasia will need more frequent watering. Check the soil moisture regularly and water when the top inch is dry.
- Fertilization: Begin fertilizing your plants every month with a balanced liquid fertilizer to support new growth.
- Repotting: If necessary, spring is an excellent time to repot your Alocasia before it becomes too established in its current pot.
Summer Care
Summer brings warmth and humidity, which are ideal for Alocasia plants. However, they also require consistent care during this season:
- Monitor Humidity: Ensure humidity levels remain high, as summer heat can dry out the air. Consider using a humidifier or placing a pebble tray filled with water under the plants.
- Pruning: Trim any yellowing or damaged leaves to promote healthy growth and airflow.
- Pest Inspection: Keep an eye out for pests, as warmer weather can lead to infestations. Regularly inspect leaves and stems.
Fall Care
As temperatures begin to cool in the fall, your Alocasia will start to slow its growth. Adjusting care during this transitional period is essential:
- Reduce Watering: With decreased light and cooler temperatures, cut back on watering to prevent root rot.
- Decrease Fertilization: Stop fertilizing by late fall, as the plant enters dormancy.
- Check for Dormancy Signs: Some varieties may begin to lose leaves or stop growing entirely. This is normal; ensure the bulbs are still healthy.
Winter Care
Winter can be challenging for indoor plants due to lower light levels and dry air. Here’s how to care for your Alocasia during this season:
- Maintain Temperature: Keep indoor temperatures stable, avoiding drafts and sudden changes. Aim for 65°F to 75°F (18°C to 24°C).
- Humidity Control: Continue using a humidifier or misting the leaves to maintain humidity levels, as indoor heating can dry out the air.
- Minimal Watering: Water less frequently, allowing the top few inches of soil to dry out completely before watering again.
Common Issues and Troubleshooting
Even with proper care, you may encounter some challenges while growing Alocasia bulbs indoors. Recognizing and addressing these issues early can help keep your plants healthy.
Leaf Yellowing
If your Alocasia leaves start to turn yellow, it can indicate various issues:
- Overwatering: Excess water can lead to root rot. Check the soil drainage and adjust your watering schedule.
- Nutrient Deficiency: Yellowing may also be a sign of nutrient deficiency. Consider fertilizing if you haven’t done so recently.
- Pest Infestation: Inspect for pests that could be damaging the leaves. Treat accordingly if pests are found.
Wilting Leaves
Wilting can occur due to several factors:
- Underwatering: Check the soil moisture; if it feels dry, give your plant a thorough watering.
- Temperature Stress: Ensure your plant is not exposed to cold drafts or extreme temperature changes.
Lack of Growth
If your Alocasia bulbs are not growing as expected, consider these possibilities:
- Poor Lighting: Ensure the plant receives adequate indirect light. If necessary, move it closer to a window or use grow lights.
- Brittle Roots: Check for root health if you suspect they are constricted or unhealthy due to pot size or soil quality.
Caring for Varieties of Alocasia
Different Alo
casia varieties may have specific needs or characteristics. Understanding these differences can enhance your success when caring for them indoors.
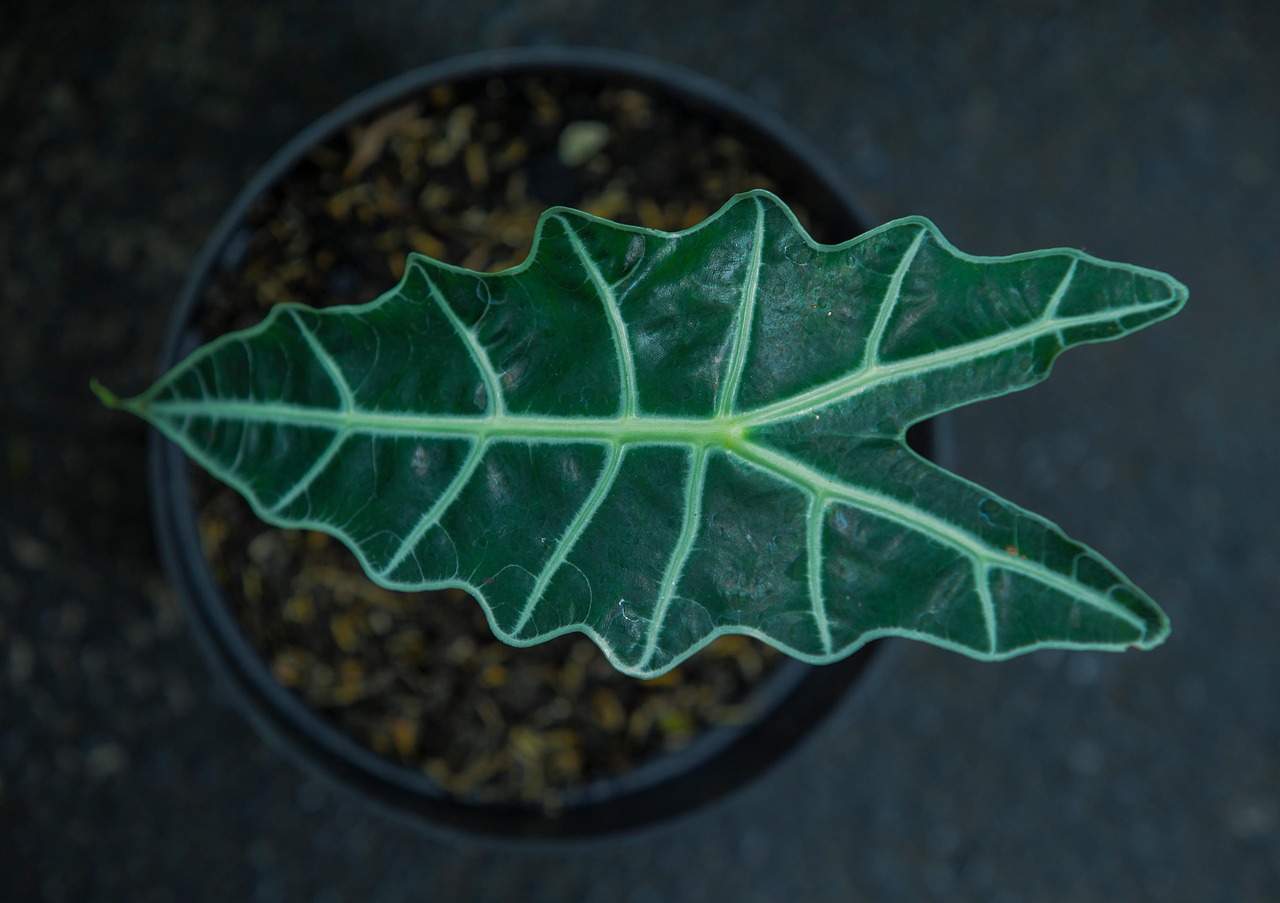
Alocasia Polly (African Mask Plant)
This popular variety features striking arrow-shaped leaves with white veins. It prefers bright, indirect light and high humidity levels. Water when the top inch of soil dries out and avoid letting it sit in water.
Alocasia Zebrina
The Zebrina is known for its distinctive zebra-striped stems. It enjoys similar conditions but can tolerate slightly lower humidity compared to other varieties. Keep an eye on watering to prevent root rot.
Alocasia Macrorrhiza (Giant Taro)
This variety produces large leaves and requires ample space. It thrives in bright light and high humidity but can also adapt to lower humidity levels. Ensure consistent watering practices.
Caring for different Alocasia varieties involves understanding their unique preferences while maintaining core care principles across all types. By tailoring your approach, you can enjoy beautiful, thriving plants indoors throughout the year.
Special Care Tips for Indoor Alocasia
In addition t
o the general care guidelines already discussed, there are specific strategies you can adopt to ensure your Alocasia bulbs flourish indoors. These tips can help you create an ideal environment and avoid common pitfalls.
Choosing the Right Location
The placement of your Alocasia plants can significantly impact their growth. Here are some considerations for selecting the right spot:
- Light Exposure: Choose a location where the plants will receive bright, indirect sunlight. Avoid direct sunlight, which can scorch the leaves.
- Temperature Stability: Ensure the area maintains a consistent temperature, avoiding drafty windows or doors.
- Accessibility: Position your plants where they can be easily accessed for watering and maintenance.
Maintaining Soil Health
Healthy soil is critical for the success of your Alocasia bulbs. Consider these tips for maintaining soil health:
- Regularly Refresh Soil: Replace old soil every 1-2 years during repotting to ensure nutrients remain available.
- Soil Testing: Occasionally check the pH and nutrient levels of the soil to make adjustments as necessary.
- Avoid Soil Compaction: Loosen the soil gently when watering, as compacted soil can restrict root growth and water intake.
Seasonal Adjustments
As seasons change, so do the needs of your Alocasia plants. Here’s how to adjust your care throughout the year:
- Fall/Winter Dormancy: During dormancy, reduce watering and stop fertilization. Monitor for any signs of distress and adjust care accordingly.
- Spring Awakening: As temperatures warm, gradually increase watering and resume fertilization to encourage new growth.
- Summer Growth: Provide additional humidity and keep a close eye on watering, as higher temperatures can dry out the soil quickly.
Final Thoughts
Growing Alocasia bulbs indoors can be a delightful endeavor, offering unique visual appeal and lush greenery to your living space. By understanding their specific requirements—such as light, humidity, watering, and temperature—you can set the stage for vibrant growth and a thriving indoor garden.
Remember that patience is key when caring for these plants. They may require some time to adjust to their new environment after repotting or during seasonal changes. By regularly monitoring their health and making necessary adjustments, you can foster a robust and beautiful collection of Alocasia plants.
In conclusion, whether you’re a seasoned plant enthusiast or a beginner looking to enhance your indoor space, Alocasia bulbs can be a rewarding addition to your plant family. With proper care and attention, these stunning plants will bring joy and elegance into your home for years to come. Embrace the journey of growing Alocasia bulbs, and enjoy the vibrant beauty they contribute to your indoor environment!