
You can grow a pineapple plant from a pineapple by cutting off the crown and rooting it in water or soil. It’s a fun and rewarding project that can lead to delicious fruit right from your home.
Table of Contents
Understanding Pineapple Plants
What is a Pineapple Plant?
The pineapple plant, known scientifically as Ananas comosus, is a tropical fruit-bearing plant that belongs to the bromeliad family. It’s not just a delicious fruit but also a fascinating plant that can be grown indoors or outdoors in suitable climates. I always find it amazing how such a vibrant fruit can originate from a simple crown of green leaves. Understanding the pineapple plant’s nature can help us appreciate its growing process and the joy it brings when we finally enjoy our homegrown pineapple. Read Interesting article: Is Pineapple a Citrus Fruit | Lotusmagus
Botanical Characteristics of Pineapples
Pineapple plants are characterized by their rosette of stiff, spiky leaves which can grow up to 4 feet long. The plant itself can reach a height of about 3 feet. What’s unique about pineapples is that they produce fruit only once, but from that same plant, you can grow new ones using the crowns, slips, or suckers that form around the base. I’ve always been fascinated by how a single plant can continue to give us new beginnings.
The fruit itself is a collective berry, formed from many small flowers that fuse together. Each little bump on the surface of the pineapple represents an individual flower. This makes the fruit not only delicious but also a marvel of nature. When I first learned about this, it made me appreciate the pineapple on my table even more.
Benefits of Growing Pineapple Plants
Growing pineapple plants at home has numerous benefits, and I can personally attest to the joy it brings. First off, it’s incredibly satisfying to see a plant grow from a fruit that you once bought at the store. There’s something deeply rewarding about nurturing a pineapple from a simple crown into a flourishing plant.
Moreover, pineapples are packed with nutrients, including Vitamin C, manganese, and bromelain, an enzyme with potential health benefits. By growing them yourself, you also gain access to fresh fruit that’s free from pesticides and chemicals, which is a huge plus for me. I love the idea of knowing exactly where my food comes from and how it’s grown.
On a more practical level, pineapple plants also serve as beautiful indoor decor. Their tropical look can brighten up any space, and I’ve found that they can be effective air purifiers too. Having one in my living room has sparked many conversations, and it’s always nice to share the story of how I grew it from a pineapple!
Choosing the Right Pineapple
Selecting a Fresh Pineapple
Choosing the right pineapple is crucial for a successful growing experience. When I go to the store, I always look for a pineapple that feels heavy for its size, indicating ripeness and juiciness. The leaves should be vibrant green and fresh-looking, not wilted or brown. One trick I’ve learned is to gently tug on the inner leaves; if they come out easily, it’s ripe and ready for planting. This method has never failed me!
Avoid pineapples with dark spots or mushy areas, as they may be overripe or starting to rot. It’s important to select a healthy fruit because a strong crown will increase your chances of successful rooting. I remember my first attempt, where I didn’t pay attention to these details. The pineapple was beautiful, but it just didn’t have the right qualities to thrive.
Identifying the Best Pineapple Variety for Planting
There are several varieties of pineapples, but the most common one we see in stores is the ‘Smooth Cayenne.’ This variety is sweet, juicy, and has a good balance of acidity, making it ideal for both eating and growing. I’ve learned through trial and error that this is one of the best choices for home cultivation. Another variety I enjoy is the ‘Queen’ pineapple, known for its small size and intense sweetness. However, it’s less commonly found in markets.
When selecting a variety, consider the space you have at home. Some varieties can grow larger, while others remain compact. Understanding what works best for your living environment can help you enjoy this journey even more. I tend to prefer the smaller varieties for indoor growing, as they’re easier to manage.
In my experience, the variety you choose can also influence the taste of the fruit. So, if you ever get the chance to try growing different types, I highly recommend it. You might discover a personal favorite along the way!
Preparing the Pineapple for Planting
How to Cut the Crown of the Pineapple
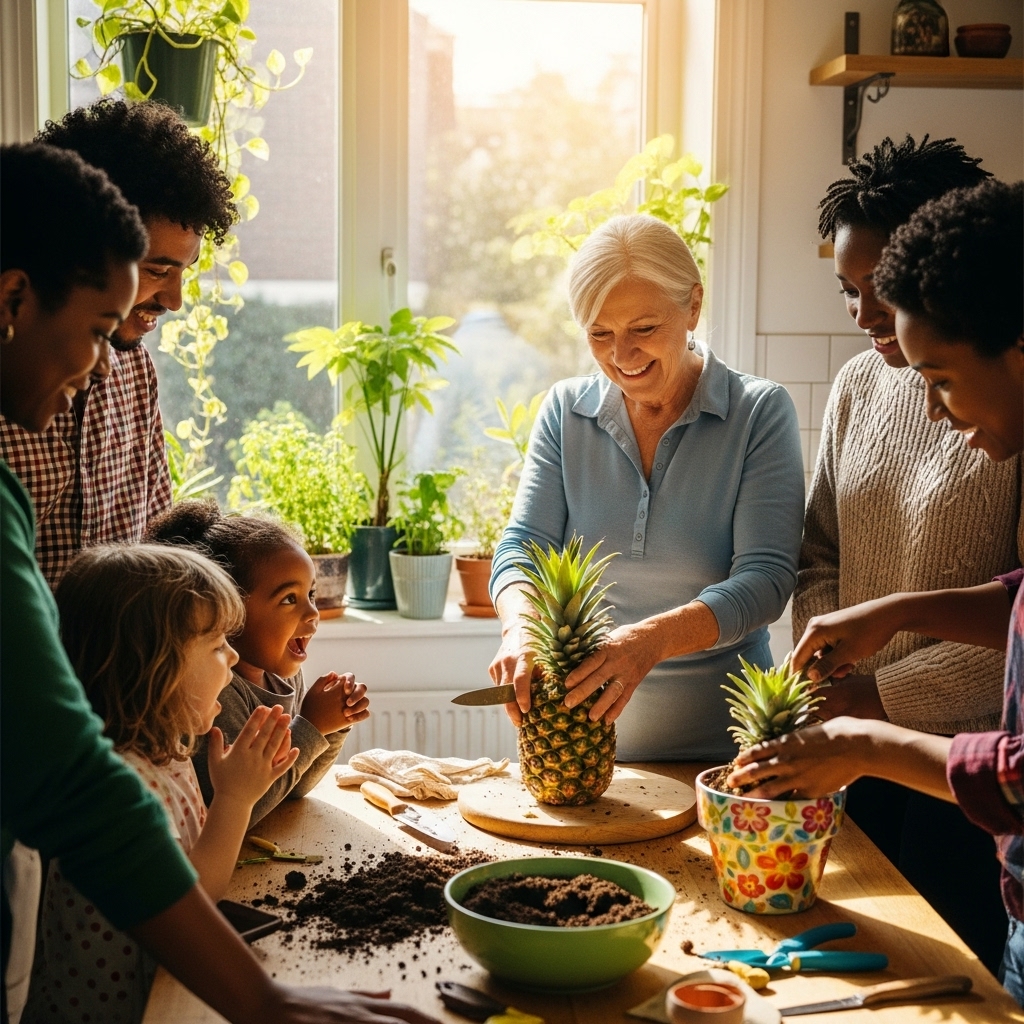
Preparing the crown for planting is crucial, and I remember feeling a mix of excitement and nervousness the first time I did it. The first step is to cut the crown off the pineapple. I always place the pineapple on a sturdy cutting board, then using a sharp knife, I slice about half an inch below the leaves. It’s essential to make sure you’re cutting straight across. I found that a clean cut helps the crown root more effectively.
After the cut, I gently twist the crown to separate it from the fruit. This can feel a bit like a mini ceremony—watching the crown come free made me feel connected to the whole process. I also make sure to remove any excess fruit attached to the base of the crown because this can lead to rot in the water or soil. Just be gentle; I’ve learned that being too rough can damage the crown, which is something we definitely want to avoid!
Removing Excess Fruit Flesh
Once I have the crown cut, the next step is to remove any remaining flesh. This part is important because leftover fruit can cause mold when rooting. I carefully trim away any fruit using a small paring knife, taking care not to cut into the crown itself. I’ve noticed that leaving too much fruit can lead to disappointing results, so taking the time to do this step right is worth it. I recall the first time I didn’t remove enough flesh, and the crown sat there, sad and moldy, instead of flourishing. Lesson learned!
Drying the Crown: Why It’s Important
After trimming, I always let the crown dry out for a couple of days. This step may seem simple, but it’s crucial for preventing rot. I usually place it in a cool, dry spot, away from direct sunlight. I learned this from a gardening friend who emphasized how drying the crown allows the cut end to callous over. This callusing process helps protect it when I eventually place it in water or soil.
During this drying phase, I find it helpful to reflect on the journey ahead. It’s amazing to think that this little crown is the start of what could become a delicious, homegrown pineapple. I often feel motivated to keep nurturing it, knowing that patience will lead to sweet rewards. After a couple of days of drying, I feel ready to start the rooting process!
Rooting the Pineapple Crown
Water Propagation vs. Soil Propagation
When it comes to rooting the pineapple crown, I’ve explored both water and soil propagation methods. Each has its perks, so it really depends on what works best for you. Personally, I prefer water propagation because I enjoy watching the roots develop. It’s mesmerizing to see the little tendrils grow and spread out. However, soil propagation can be just as effective and is sometimes easier for those who want to skip the water stage.
Water propagation involves placing the crown in water until roots form, while soil propagation means planting it directly into soil. From what I’ve experienced, both methods can lead to success, but I’ve found that the water method gives me a sense of instant gratification. It’s like having a front-row seat to nature’s magic!
Steps for Water Propagation
If you decide to go the water route, it’s pretty straightforward. After your crown has dried, fill a glass or jar with water and place the crown in it, ensuring that the base is submerged but the leaves are above water. I usually use a clear container so I can easily monitor root growth. I change the water every few days to keep it fresh, and within a couple of weeks, I start to see roots forming. I remember the excitement when I first spotted those little white roots peeking out—it felt like I was nurturing a tiny miracle!
Steps for Soil Propagation
If you prefer soil propagation, I recommend using a well-draining potting mix. I often mix in some sand or perlite to ensure good drainage. After preparing the soil, I create a hole for the crown, placing it in the pot with the leaves above the soil. Gently pack the soil around the base to secure it. I find that giving it a little shake can help settle the soil without damaging the crown. Then, I water it lightly to moisten the soil without soaking it.
Best Conditions for Rooting
For both propagation methods, I’ve learned that environmental conditions play a significant role in success. Ideally, the temperature should be warm, around 70 to 85°F. I’ve found that placing the crown in a bright, indirect light spot encourages faster growth. Too much direct sunlight can be harsh for the little guy, so I keep it in a well-lit area without scorching rays. Patience is key here! I usually check on my crowns regularly, and I love to track their progress as they grow their roots.
Whether you choose to propagate in water or soil, it’s all about nurturing and watching your pineapple plant take its first steps. I believe this part of the process is truly rewarding, offering a glimpse of the potential that lies ahead!
Transplanting the Pineapple
Choosing the Right Pot and Soil
After successfully rooting my pineapple crown, the next exciting step is transplanting it into a pot. I’ve realized that choosing the right pot is crucial for the plant’s growth. I usually opt for a pot that is at least 6-8 inches in diameter. This gives the pineapple enough room to grow while still being manageable for indoor spaces. I prefer pots with drainage holes to prevent waterlogging because I’ve learned the hard way how detrimental it can be for the roots.
As for soil, I like to use a well-draining potting mix. A combination of potting soil, sand, and perlite works wonderfully for me. This mix ensures that the roots have adequate drainage while still retaining some moisture. I remember my first attempt when I used regular garden soil, and it led to root rot. Now, I always check that my mix is airy and light to promote healthy root development.
How to Transplant the Rooted Crown
Transplanting the rooted crown is a moment I look forward to. First, I fill my chosen pot with the soil mix, leaving about an inch of space at the top. I gently remove the rooted crown from its water or original container, being careful not to damage the delicate roots. I place it in the center of the pot, making sure the base of the crown is level with the soil surface. Then, I pack the soil around it gently to secure the crown in place.
I always take a moment to admire the roots; seeing them is like witnessing the potential of my future pineapple! After that, I lightly water the crown to help settle the soil around the roots. I’ve found that keeping it moist but not soggy is the key to helping it adjust to its new environment. It’s a bit like a new home for the plant, and I want to make it as comfortable as possible!
Watering and Fertilizing After Transplanting
Once transplanted, I keep a close eye on my pineapple plant’s watering needs. I generally water it lightly every few days, allowing the top inch of soil to dry out between waterings. Too much water can quickly lead to problems, especially right after transplanting when the roots are still adjusting. I’ve learned that patience is crucial during this time.
After a few weeks, I start thinking about fertilizing. I usually wait until I see new growth, which is a sign the plant is settling in. I apply a balanced, water-soluble fertilizer diluted to half strength. I do this every month during the growing season, which helps give my pineapple a nutrient boost while avoiding over-fertilization. It’s amazing how quickly they respond to a little extra care!
Caring for Your Pineapple Plant
Ideal Growing Conditions (Light, Temperature, Humidity)
Caring for my pineapple plant has been a learning experience, and I’ve discovered how important the right growing conditions are. Pineapples thrive in bright, indirect sunlight, so I make sure to place mine near a window where it can soak up the light without getting scorched. I’ve found that they enjoy warmth, ideally between 70 to 85°F. I’ve noticed that when the temperature dips too low, the growth slows down significantly.
Humidity also plays a role in their happiness. While they don’t require a tropical environment, I try to maintain a bit of humidity, especially during dry winter months. I sometimes mist the leaves or place a small humidifier nearby to keep the air moist. I’ve seen my pineapple perk up when it gets just the right balance of light and humidity!
Watering Guidelines
Watering my pineapple plant has taught me the importance of finding the right balance. I usually water it when the top inch of soil feels dry to the touch. This method helps prevent overwatering, which I learned is crucial for healthy growth. I’ve also found that using room-temperature water is best; cold water can shock the plant, and I want to keep it happy!
When watering, I like to ensure that the excess drains out of the bottom of the pot, as this means the roots are getting enough moisture. I’ve seen my plant thrive when I’m attentive to these details, and it’s always satisfying to see new growth as a reward for my efforts.
Pest and Disease Management
As with any plant, my pineapple isn’t immune to pests and diseases. I keep an eye out for common pests like mealybugs and aphids. I’ve found that a gentle spray of water can dislodge many of these pesky critters. If they persist, I’ll use insecticidal soap, which is effective and safe for my plant. It’s essential to act quickly when I notice any signs of infestation to prevent further damage.
Additionally, I’m mindful of fungal issues, especially if I’ve been watering too much. I’ve learned to keep the leaves dry and ensure good air circulation around the plant to reduce the risk of mold. I regularly inspect the leaves for any unusual spots or discoloration and take action as soon as I spot anything concerning.
Fertilizing Your Pineapple Plant
Fertilizing is another aspect of care that I’ve come to appreciate. I usually begin fertilizing about a month after transplanting, as I mentioned earlier. I prefer a balanced fertilizer to ensure my plant receives a mix of nutrients. I’ve found that every 4 to 6 weeks during the growing season is the sweet spot to encourage growth without overwhelming the plant.
When applying fertilizer, I dilute it to half strength to avoid burning the roots. I focus on watering it in well, as this helps the nutrients reach the roots effectively. Over time, I’ve noticed that a little extra care goes a long way, and my pineapple plant rewards me with vibrant growth and the promise of future fruit.
Frequently Asked Questions
Can you grow a pineapple plant from a store-bought pineapple?
Yes, you can grow a pineapple plant by cutting off the crown of a store-bought pineapple and rooting it in water or soil.
What is the scientific name of the pineapple plant?
The scientific name of the pineapple plant is Ananas comosus.
What are the key characteristics of pineapple plants?
Pineapple plants have a rosette of stiff, spiky leaves that can grow up to 4 feet long and can reach a height of about 3 feet. They produce fruit only once, but new plants can be grown from crowns, slips, or suckers.
What nutrients do pineapples provide?
Pineapples are packed with nutrients, including Vitamin C, manganese, and bromelain, an enzyme with potential health benefits.
How do you select a fresh pineapple for planting?
Choose a pineapple that feels heavy for its size, has vibrant green leaves, and avoid those with dark spots or mushy areas. A good method is to gently tug on the inner leaves; if they come out easily, it’s ripe for planting.
What is the best pineapple variety for home cultivation?
The most common variety for home cultivation is the ‘Smooth Cayenne,’ which is sweet and juicy. The ‘Queen’ pineapple is another option but is less commonly found in markets.
How should you prepare the crown of the pineapple for planting?
To prepare the crown, cut it off about half an inch below the leaves, remove excess fruit flesh to prevent mold, and let it dry for a couple of days to allow the cut end to callous over.
What are the methods for rooting a pineapple crown?
You can root a pineapple crown using water propagation by placing it in water until roots form, or soil propagation by planting it directly into well-draining soil.
What conditions are ideal for growing pineapple plants?
Pineapple plants thrive in bright, indirect sunlight, with temperatures between 70 to 85°F. Maintaining some humidity is also beneficial, particularly in dry conditions.
How often should you fertilize a pineapple plant?
Fertilization should begin about a month after transplanting, using a balanced fertilizer diluted to half strength every 4 to 6 weeks during the growing season.
Read Interesting article: 10 Easy Fruits You Can Grow in Buckets
Read Interesting article: Pineapple Spiritual Meaning: Unveiling the Mystical Power Within