
Growing aloe vera plants successfully at home is all about providing the right care and conditions, making it a rewarding experience. With their low maintenance needs and numerous benefits, aloe vera plants can thrive with just a little attention. For tips on maintenance, you might want to read our easy care guide.
Understanding Aloe Vera: The Basics
What is Aloe Vera?
Aloe vera is a succulent plant species that belongs to the Asphodelaceae family. It’s well-known for its fleshy, green leaves, which are packed with a clear gel renowned for its healing properties. For me, one of the most fascinating aspects of aloe vera is how it has been used for centuries in various cultures for its medicinal benefits. I remember the first time I used it on a sunburn; the soothing relief was instant and unforgettable.
Benefits of Growing Aloe Vera
The benefits of growing aloe vera at home are immense. Not only does it serve as a beautiful decorative plant, but it also provides numerous health and wellness advantages. Aloe vera gel, for instance, is a fantastic natural remedy for burns, cuts, and skin irritations. I’ve often reached for a leaf when I’ve had a minor kitchen mishap, and it never fails to impress me with its effectiveness. Additionally, having aloe vera at home promotes air purification, making it a great companion for indoor spaces.
Common Varieties of Aloe Vera
While many people are familiar with the standard aloe vera plant (Aloe barbadensis miller), there are several other varieties worth mentioning. For example, I’ve seen Aloe aristata, commonly known as lace aloe, which features unique, spiky leaves that are equally stunning. Then there’s Aloe ferox, known for its tall flower spikes. Each variety has its charm, and I find it exciting to collect different types as they each bring something unique to my home. Choosing which aloe to grow can depend on personal preference, but I always recommend starting with the classic aloe vera for its versatility and ease of care.
Essential Care Requirements for Aloe Vera
Light Conditions: Sunlight and Shade
One of the most critical aspects of successfully growing aloe vera is providing it with the right amount of light. Aloe vera plants thrive in bright, indirect sunlight. I’ve learned through experience that placing them near a window that gets filtered light can make a significant difference in their growth. However, too much direct sun can scorch their leaves. If I notice the tips turning brown, it’s usually a sign that they’re getting too much sun. In my case, I found that a south-facing window works wonders for my aloe, giving it the perfect balance of light. For more on how to manage your watering routine to avoid root rot, check out this article.
Soil Type: Choosing the Right Mix
When it comes to soil, aloe vera prefers a well-draining mix. I’ve experimented with various soil types, and my favorite combination is a cactus or succulent mix blended with perlite. This blend allows excess water to escape quickly, which prevents root rot—a common issue for aloe plants. I also recommend checking the pot for drainage holes; this simple aspect can save your plant from many problems. I once neglected this detail, and let me tell you, my aloe suffered greatly!
Watering: Frequency and Techniques
Watering aloe vera can be tricky. I’ve found that it’s better to underwater than overwater. Generally, I water my aloe every two to three weeks, depending on the season. During the active growth months of spring and summer, they require more water, while in the winter, a light touch is best. A good rule of thumb is to let the top inch of soil dry out before watering again. I use a moisture meter to make this easier, but you can also stick your finger in the soil to check. Trust me, it saves a lot of guesswork!
Temperature and Humidity Preferences
Aloe vera enjoys warm temperatures and moderate humidity. They thrive best in temperatures ranging from 60°F to 75°F. I’ve found that keeping them indoors during the winter months helps maintain a stable environment for them. If you live in a region with harsh winters, bringing your aloe inside is essential. They can tolerate low humidity, which is one reason they’re great houseplants. I remember one year when I had to deal with a particularly dry winter, and my aloe still flourished despite the dry air. A little bit of care goes a long way!
Planting Aloe Vera at Home
Choosing the Right Container
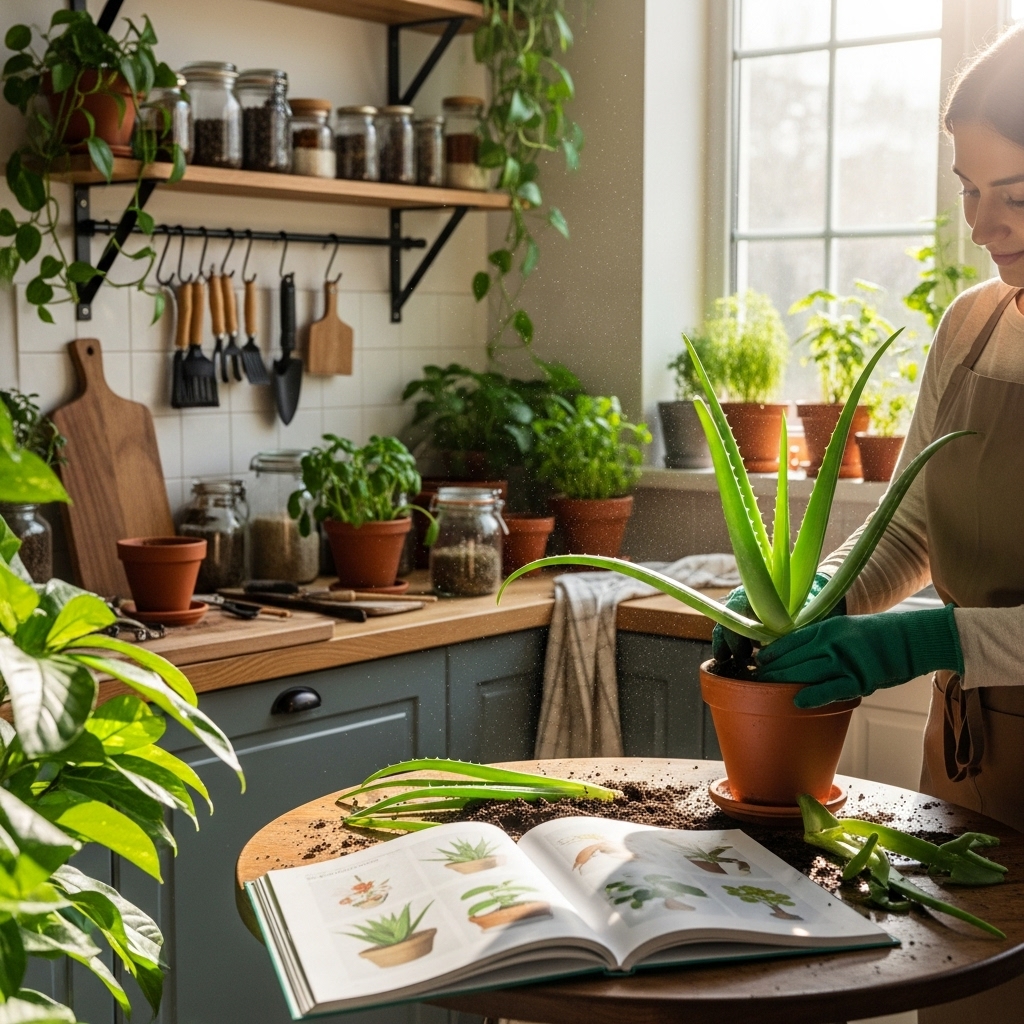
When it comes to planting aloe vera, selecting the right container is crucial for its health and growth. I’ve found that a pot with good drainage is a must. Terracotta pots are my personal favorite because they allow moisture to evaporate from the sides, which helps prevent overwatering. I remember one time when I used a plastic pot, thinking it would be easier to manage, but my aloe didn’t thrive as well. Make sure the pot has drainage holes at the bottom; this simple feature can save your plant from drowning in excess water.
Additionally, I prefer to choose a pot that is slightly larger than the root ball of the aloe plant. This allows enough room for growth without overwhelming the roots. It’s tempting to go for a big pot, but my experience has taught me that aloe vera doesn’t like to have its roots too spread out. A snug fit works wonders!
Propagation Methods: Seeds vs. Offsets
Propagation can be one of the most rewarding parts of growing aloe vera. I’ve tried both seeds and offsets, but I lean towards offsets, or “pups,” as they’re often called. These are small plants that grow from the base of the parent plant. I remember the thrill of seeing my first pup appear; it felt like a little miracle! They’re easier to transplant and grow quickly, making them a perfect choice for beginners.
To propagate using pups, I gently remove the offset from the parent plant using a clean knife, ensuring it has some roots attached. I let it sit for a day or two to help the cut heal, reducing the risk of rot. Then, I plant it in its own pot with well-draining soil. On the other hand, growing from seeds is a bit more challenging. If you choose this route, make sure to keep the seeds in a warm, humid environment until they sprout. I’ve seen both methods work, but for simplicity and success, offsets are the way to go in my opinion.
Step-by-Step Planting Guide
Planting aloe vera is a straightforward process, and I can walk you through the steps I follow to make sure everything goes smoothly:
- Gather Your Materials: You’ll need a healthy aloe vera plant, a suitable container, well-draining soil, and a small shovel or your hands for planting.
- Prepare the Container: Before adding soil, I always ensure the pot has drainage holes. Then, I pour a layer of gravel or small stones at the bottom to enhance drainage.
- Add the Soil: Fill the pot with your well-draining soil mix, leaving space at the top for the aloe plant.
- Plant the Aloe: Gently remove the aloe plant from its original pot, taking care not to damage the roots. Place it in the new pot, ensuring the base of the leaves is just above the soil level.
- Water Sparingly: After planting, I give it a light watering, just enough to settle the soil. Then, I wait a week before watering again to let it adjust to its new home.
- Find the Right Spot: Set the pot in a location that receives bright, indirect sunlight. I usually keep it near a window, making sure it’s not getting too much direct sun.
Following these steps has always led to successful plantings for me. It’s amazing how a little care in the planting process can set up your aloe for a healthy future!
Maintaining Healthy Aloe Vera Plants
Fertilizing: When and How
Fertilizing aloe vera is not something I do often, as these plants are quite forgiving when it comes to nutrients. Typically, I fertilize my aloe once in the spring and once in the summer. I prefer using a diluted cactus fertilizer—something with a balanced ratio, like 10-10-10 or 20-20-20, works well for me. I’ve learned that using too much fertilizer can harm the plant, so I always err on the side of caution.
To fertilize, I mix the fertilizer with water according to the package instructions and apply it directly to the soil. I usually skip fertilizing in the fall and winter when the plant goes dormant. This approach has kept my aloe healthy and thriving!
Pest Control: Common Pests and Solutions
Even though aloe vera plants are relatively resilient, they can fall prey to pests like aphids, mealybugs, and spider mites. I noticed this firsthand one summer when I saw tiny insects on my plant. It was alarming! To tackle this, I use a mixture of water and mild soap, spraying it directly on the affected areas. This natural remedy has worked wonders for me, and it’s safe for the plant.
For more stubborn pests, I’ve found that neem oil is another effective solution. It’s a natural pesticide that helps deter pests without harming the plant. Just remember to read the instructions carefully, as I’ve discovered that too much can stress the plant.
Signs of Overwatering and Underwatering
Understanding how to recognize the signs of overwatering and underwatering has been a game-changer for me. Overwatering usually leads to mushy, yellowing leaves and a general droopiness. If I see this happening, I know to cut back on watering and let the soil dry out completely before giving it another drink.
On the flip side, underwatering can cause the leaves to become wrinkled and shriveled. I remember panicking when I thought I’d lost my aloe to underwatering, but a good watering brought it back to life. Keeping a consistent watering schedule and observing my plant’s behavior has helped me become more confident in my care routine.
Pruning and Repotting Techniques
Pruning aloe vera isn’t something I do very often, but when I do, it’s usually to remove any dead or damaged leaves. I use clean scissors to snip them off at the base, being careful not to harm the healthy leaves. It’s amazing how a little pruning can rejuvenate a plant!
Repotting is another important aspect of maintenance. I typically repot my aloe every couple of years or if it starts to outgrow its container. When I do this, I gently remove it from the old pot, shake off any excess soil, and place it into a slightly larger pot with fresh soil. I try to do this in the spring when the plant is actively growing; it seems to help it recover faster.
Common Issues and Troubleshooting
Yellowing Leaves: Causes and Solutions
One of the most common issues I’ve faced with my aloe vera plants is yellowing leaves. It’s always a bit alarming to see those vibrant green leaves start to lose their color. From my experience, yellowing can be caused by a few different factors, the most prevalent being overwatering. When I notice this, I usually take a closer look at the soil. If it feels soggy or has a foul smell, it’s time to cut back on watering and let the plant dry out.
Another culprit for yellowing leaves can be a lack of nutrients. I’ve found that after several months without fertilizing, my aloe could use a little boost. Adding a diluted fertilizer during the growing season often helps restore its color. If I see yellowing leaves but the soil seems dry and the plant is otherwise healthy, it’s usually a sign that it’s time for some nutrients.
Lastly, I’ve learned that pests can also be a cause of yellowing. When I found tiny insects tucked away in the leaf axils, I knew I had to act fast. A good wash with soapy water usually helps, and I make sure to keep a close eye on any pests in the future.
Root Rot: Prevention and Treatment
Root rot is a real concern for aloe vera lovers like us. I remember when I first encountered it; my plant was wilting despite having a proper watering schedule. It was a tough lesson learned. Root rot typically stems from excessive moisture in the soil, and I found that the signs can sometimes be subtle. If I notice my aloe looking mushy or if the leaves feel soft, it’s time to investigate the roots.
To treat root rot, I carefully remove the plant from its pot and inspect the roots. Any brown, mushy roots need to be trimmed away with clean scissors. After that, I let the healthy roots dry out for a few hours before repotting in fresh, dry soil to help it recover. In my opinion, prevention is the best approach. I always ensure my pot has excellent drainage, and I’ve made it a point to check my watering habits frequently. Making sure the soil dries out between waterings has drastically reduced the risk of root rot for me.
Why Your Aloe Vera Isn’t Growing
If you’re finding that your aloe vera plant isn’t growing as expected, I’ve been there too. It can be frustrating, especially when you’re putting in all the right care. One factor I’ve noticed that often leads to slow growth is insufficient light. Aloe vera thrives in bright, indirect light, and if it’s not getting enough, its growth can stall. I’ve found that moving my plant closer to a window or providing supplemental lighting can make a big difference.
Another reason for stunted growth can be the size of the pot. If the plant is root-bound, it won’t have the space it needs to grow. I remember my aloe stopped growing altogether until I decided to repot it into a larger container. I was amazed at how quickly it took off once it had more room! It’s a simple fix that can have a big impact.
Lastly, lack of nutrients can lead to poor growth. If I haven’t fertilized in a while, I make sure to give it a little boost during the growing season. A good fertilizing routine usually helps my aloe thrive and encourages new growth.
Harvesting Aloe Vera: How and When
Identifying Mature Leaves
When it comes to harvesting aloe vera, knowing when to do it is key. I’ve learned that mature leaves are typically the outermost ones; these are the ones that are thick and have a deep green color. I always look for leaves that are at least 8 inches long. I remember the first time I harvested, I was so eager that I cut a smaller leaf, and while it was usable, it didn’t have the same amount of gel as a mature one. Patience pays off!
Another thing to keep in mind is that I always wait until my aloe plant is at least 12 inches tall before taking any leaves. This gives the plant time to establish itself and ensures that I’m not taking too much at once. I usually only harvest a leaf or two at a time to avoid stressing the plant. This way, it can continue growing and producing more leaves for future use.
Harvesting Techniques for Maximum Benefits
When I’m ready to harvest, I grab a clean, sharp knife. I make a clean cut at the base of the leaf, close to where it meets the stem. I learned that cutting too far down can harm the plant, so I always aim for a clean slice. After cutting, I hold the leaf upright for a few minutes to let any sap drain out; this sap can be irritating to the skin, so I always take care to avoid it.
Once I have my leaf, I cut it open lengthwise to access the gel inside. I use a spoon to scoop out the gel, which I find is the best way to get as much as possible without wasting any. The gel is the star of the show, and I’ve discovered that it can be stored in the fridge for up to a week, making it easy to use whenever I need it. Harvesting the gel has become a satisfying routine for me, and I love knowing I’m getting all those benefits straight from my plant!
Frequently Asked Questions
What is Aloe Vera?
Aloe vera is a succulent plant species known for its fleshy, green leaves that contain a clear gel with renowned healing properties. It has been used for centuries in various cultures for its medicinal benefits.
What are the benefits of growing Aloe Vera at home?
Growing aloe vera at home provides numerous benefits, including serving as a decorative plant, offering health advantages such as healing burns and skin irritations, and promoting air purification in indoor spaces.
What light conditions are best for Aloe Vera?
Aloe vera plants thrive in bright, indirect sunlight. It’s best to place them near a window that receives filtered light, as too much direct sunlight can scorch their leaves.
What type of soil is ideal for Aloe Vera?
Aloe vera prefers a well-draining soil mix, such as a cactus or succulent mix blended with perlite. This helps prevent root rot by allowing excess water to escape quickly.
How often should I water my Aloe Vera?
Watering should be done every two to three weeks, depending on the season. During spring and summer, aloe vera requires more water, while in winter, watering should be minimal, allowing the top inch of soil to dry out between waterings.
What is the best temperature range for Aloe Vera?
Aloe vera thrives in warm temperatures, ideally between 60°F to 75°F. They can tolerate lower humidity levels, making them suitable houseplants even in dry conditions.
How can I propagate Aloe Vera?
Aloe vera can be propagated using offsets, or “pups,” which are small plants that grow at the base of the parent plant. These are easier to transplant and grow quickly compared to seeds.
What should I do if my Aloe Vera has yellowing leaves?
Yellowing leaves can indicate overwatering, lack of nutrients, or pest issues. It’s essential to check the soil for moisture levels, consider fertilizing if it’s been a while, and inspect for pests to address the yellowing.
What are the signs of root rot in Aloe Vera?
Signs of root rot include wilting, mushy leaves, and a general droopiness. To treat it, inspect the roots, trim any brown, mushy parts, and repot the plant in fresh, dry soil.
How do I know when to harvest Aloe Vera leaves?
Mature leaves for harvesting are typically the outermost ones that are at least 8 inches long and have a deep green color. It’s best to wait until the plant is at least 12 inches tall before harvesting to avoid stressing the plant.