
Growing an avocado pit into a plant is a rewarding process that can take anywhere from two to six weeks for germination, depending on the method you choose. I’ve found that it’s not just about patience—it’s also about understanding the steps involved and giving the pit the right environment to thrive. If you’re curious about the potential dangers, you might want to check out Is Avocado Seed Poisonous? Revealing Myths & Exploring Facts.
Understanding Avocado Plants
What is an Avocado Pit?
The avocado pit, or seed, is the hard inner part of the avocado fruit that contains the genetic material to grow a new avocado plant. I remember the first time I cut open an avocado and saw the large, round pit nestled inside. It always fascinated me how something so small could potentially grow into a tall tree producing delicious avocados. The pit is not just a seed; it’s a powerhouse of nutrients and energy that the young plant will rely on during its initial growth stages.
Benefits of Growing Your Own Avocado Plant
There are so many reasons to grow your own avocado plant! For starters, it’s a fun and educational project, especially if you’re doing it with kids or friends. There’s something incredibly satisfying about watching that pit sprout roots and eventually a stem. Plus, homegrown avocados taste better, in my opinion. They’re fresh, flavorful, and you get to enjoy the fruits of your labor (literally!). Growing avocados can also save you money in the long run, especially if you consume them frequently. And let’s not forget the aesthetic appeal of having a lush green plant in your home or garden.
Overview of Avocado Varieties
When growing avocados, it’s helpful to know that there are different varieties. The most popular ones include Hass, Fuerte, and Bacon. Each has its unique flavor, texture, and growing requirements. I personally love the Hass variety because of its creamy texture and rich taste. It’s also the most commonly grown avocado in the world. Fuerte avocados are a bit smoother and have a milder flavor, making them great for salads. I remember trying a Bacon avocado once, and while it wasn’t as rich, it was quite refreshing. Understanding these varieties can help you decide which one you want to grow, depending on your taste preferences and climate conditions. If you’re interested in the classification of avocados, read more in Is an Avocado a Fruit Or Vegetable | Lotusmagus.
Preparing the Avocado Pit
Choosing the Right Avocado
Choosing the right avocado is crucial for your pit-planting adventure. I recommend starting with a ripe, organic avocado. I once made the mistake of using an under-ripe fruit, and the pit didn’t germinate at all. When picking your avocado, look for one that yields slightly to gentle pressure, indicating it’s ripe and ready. Organic avocados are best because they’re less likely to be treated with chemicals that could hinder the germination process. Plus, they taste better! Once you have your avocado, it’s time to get that pit out safely.
How to Remove the Pit Safely
Removing the pit can be a bit tricky, but with some care, it’s straightforward. I usually slice the avocado in half lengthwise, being careful not to cut too deeply into the pit. Then, I twist the halves gently to separate them. If the pit is stubborn, I gently tap a knife into the pit’s flesh and twist it out. Remember to be cautious; this is where accidents can happen! Once I’ve got the pit out, I carefully wipe it clean to remove any remaining avocado flesh. Being thorough at this stage can help prevent mold during the germination process.
Cleaning the Pit: Best Practices
Cleaning the pit is an essential step that some people overlook. After removing it from the fruit, I rinse the pit under lukewarm water to wash off any residual fruit. This helps prevent any mold from developing later on. I also make sure to avoid using soap, as it can leave a residue that might harm the germination. After rinsing, I gently pat it dry with a paper towel and allow it to sit for a few hours to fully dry. This little step has made a big difference in my avocado growing journey.
Methods for Germinating Avocado Pits
Water Method: Step-by-Step Guide
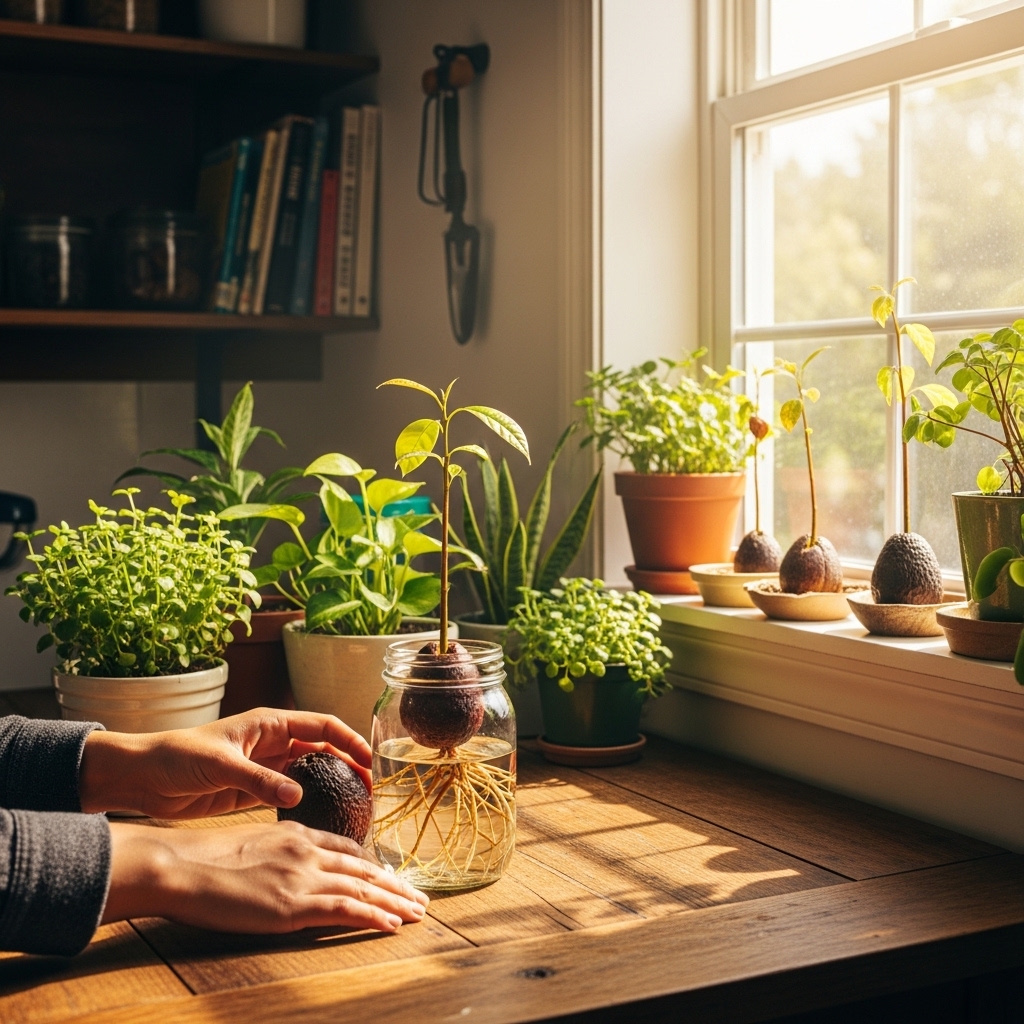
One of the most popular methods for germinating avocado pits is the water method. I remember my excitement when I first tried this technique. It felt like a mini science experiment! Here’s how I do it:
- Prepare the Pit: After cleaning the pit as described earlier, I grab three or four toothpicks. I insert them into the pit about halfway down, angled downward. This allows the bottom half of the pit to be submerged in water while the top half stays above.
- Fill a Glass or Jar: I place the pit, held by the toothpicks, into a glass or jar filled with water. The water should cover just the bottom half of the pit. I usually use a clear container so I can easily monitor the progress.
- Find a Sunny Spot: I place the glass in a warm, sunny location, as this encourages growth. Remember, I often rotate the jar every few days to ensure even sunlight exposure.
- Change the Water Regularly: It’s important to change the water every few days to keep it fresh and free of bacteria. I’ve learned that stagnant water can lead to mold, which you definitely want to avoid.
With a little patience, usually within two to six weeks, I start to notice roots growing from the bottom of the pit and a sprout emerging from the top. It feels like magic!
Soil Method: Step-by-Step Guide
If you prefer to skip the water and go directly to soil, I totally get that! The soil method works well too. Here’s how I do it:
- Prepare the Pit: Clean the pit in the same manner as before, ensuring it’s free from residue.
- Planting the Pit: I fill a small pot with moist potting soil, leaving a little space at the top. I then bury the pit about an inch deep, ensuring that the pointed end is facing up. This orientation helps the sprout grow out more easily.
- Watering: After planting, I water the soil lightly to ensure it’s damp but not soggy. Too much water can lead to rot.
- Place in a Warm Area: I find a warm spot with indirect light for the pot. It’s essential to avoid direct sunlight at this stage, as it can be too harsh for the emerging plant.
In my experience, the soil method may take a bit longer for the pit to sprout compared to the water method, but it can be just as successful. Plus, I love the idea of planting it right into soil from the start! For more tips on accelerating your homegrown avocado tree growth, check out Top 10 Expert Tips to Accelerate Your Homegrown Avocado Tree Growth.
Choosing the Right Container and Soil
When it comes to growing avocados, choosing the right container and soil is crucial for the plant’s health. I’ve learned a few things along the way:
- Container Size: I usually start with a small pot, about 6-8 inches in diameter. Once the plant starts to grow and outgrows its container, I can always transplant it to a larger pot later.
- Drainage is Key: It’s important to select a pot with drainage holes. I’ve made the mistake of using a pot without holes, and trust me, that leads to waterlogged soil—definitely not good for our little avocado friend!
- Soil Type: I prefer using a light, well-draining potting mix. A soil blend that’s designed for succulents or cacti works well because it prevents water from sitting around the roots. I’ve found that avocado plants love a good balance of moisture without being waterlogged.
By taking the time to choose the right container and soil, I feel like I’m giving my avocado pit the best chance to thrive. It’s all about setting the stage for success!
Care for Your Germinating Avocado Pit
Sunlight Requirements
Once you’ve started the germination process, sunlight becomes vital in ensuring your avocado pit develops into a healthy plant. I learned early on that avocado plants thrive with plenty of bright, indirect light. If I notice my plant reaching for the light or becoming leggy, I know it’s time to adjust its placement. Ideally, I try to give it around six hours of light each day. If my indoor space isn’t bright enough, I sometimes consider using a grow light to supplement.
Watering Guidelines
Finding the right balance with watering is something I’ve had to learn through trial and error. For germinating avocado pits, I typically water the soil when the top inch feels dry to the touch. It’s essential not to let the soil dry out completely, but I also make sure not to overwater it. I once lost a plant to root rot because I wasn’t paying attention. I’ve found that keeping a consistent watering schedule helps, and I always make sure the excess water can drain away.
Temperature and Humidity Considerations
Temperature plays a significant role in the growth of avocado plants. I usually aim to maintain a temperature between 65°F and 85°F. If my home is particularly dry, especially in winter, I sometimes mist the plant lightly or place a small humidifier nearby. I’ve noticed that a bit of humidity can encourage faster growth and healthier leaves. It’s all about mimicking the tropical environment where avocados thrive!
Transplanting Your Avocado Plant
When to Transplant: Signs of Growth
Transplanting can feel like a big step in the journey of growing an avocado plant. I always look for specific signs that let me know it’s time to move my plant to a larger pot. Typically, when I see that the roots are starting to peek out of the drainage holes at the bottom of the pot, or if the plant has grown to about 6 inches tall, I know it’s time to make a move. Another indicator is when the leaves start to look a bit crowded in the pot. In my experience, waiting too long can stunt growth, so it’s good to keep an eye on these signs!
How to Transplant Your Avocado Seedling
When it’s time to transplant, I find it’s best to do so carefully to minimize stress on the plant. Here’s how I go about it:
- Choose the Right Time: I usually transplant in the morning or late afternoon when the sun isn’t too harsh. This helps prevent shock to the plant.
- Prepare a New Pot: I select a new pot that’s one size larger than the current one, ensuring it has proper drainage holes. I fill it with fresh potting mix, creating a small hole in the center for the seedling.
- Remove the Seedling: Gently squeeze the sides of the current pot to loosen the soil. I carefully tilt the pot and tap the bottom to release the seedling. It’s important to handle the plant by its leaves or the base, avoiding any damage to the fragile roots.
- Position the Seedling: I place the seedling in the hole of the new pot, ensuring the top of the pit is just above the soil surface. Then, I fill in around the edges with more potting mix, lightly pressing it down to provide support.
- Watering: After transplanting, I give the plant a good drink of water. This helps settle the soil around the roots and reduces transplant shock.
Transplanting can be a little nerve-wracking, but seeing your avocado plant take off in its new home is incredibly rewarding!
Choosing the Right Pot for Your Avocado Plant
The pot you choose can make all the difference in how well your avocado plant thrives. I’ve learned a few important factors to consider:
- Size: A pot that’s too small can restrict growth, while one that’s too large may retain too much moisture. I usually aim for a pot that’s about 10-12 inches in diameter for a medium-sized avocado plant.
- Material: Terracotta pots are great because they allow for better airflow and drainage. I’ve often used plastic pots, but I make sure they have drainage holes to prevent water from pooling.
- Shape: A wider pot can help with stability as the plant grows taller. I prefer pots that are slightly wider than they are deep, which gives the roots room to spread out.
By carefully selecting the right pot, I feel like I’m ensuring my avocado plant has the best chance to flourish.
Ongoing Care for Your Avocado Plant
Fertilizing Your Avocado Plant
As my avocado plant grows, I know that it will need nutrients to continue thriving. I usually start fertilizing when my plant is about six months old. I’ve found that a balanced, slow-release fertilizer works wonders. I apply it every four to six weeks during the growing season. If I notice the leaves are turning yellow, it often means my plant needs more nutrients. Just a little sprinkle around the base, followed by a good watering, is all it takes!
Pruning Techniques for Healthy Growth
Pruning is another essential part of keeping my avocado plant healthy. I’ve discovered that trimming back some of the leaves and branches encourages bushier growth. I typically wait until my plant is about a foot tall before I start pruning. I look for any dead or unhealthy leaves to remove and then cut back the top to encourage side branching. This technique has helped my plant develop a fuller shape, and I find it to be a great way to keep my avocado plant looking vibrant.
Common Pests and Diseases to Watch For
As much as I love caring for my avocado plant, I’ve had to deal with a few pests along the way. Aphids and spider mites are two of the most common culprits. I’ve found that regularly inspecting the leaves helps catch these pests early. If I see them, I usually spray the leaves with a mix of water and a few drops of dish soap. This natural remedy tends to knock them off without harming the plant. Additionally, root rot is something to be mindful of, especially if I’ve been overwatering. I’ve learned to keep a close eye on the drainage and never let the pot sit in water.
Frequently Asked Questions
What is an avocado pit?
The avocado pit, or seed, is the hard inner part of the avocado fruit that contains the genetic material to grow a new avocado plant. It is a powerhouse of nutrients and energy that the young plant relies on during its initial growth stages.
How long does it take for an avocado pit to germinate?
Germination can take anywhere from two to six weeks, depending on the method you choose for growing the pit.
What are the benefits of growing your own avocado plant?
Growing your own avocado plant is a fun and educational project, especially for kids or friends. Homegrown avocados taste better, can save money in the long run, and add aesthetic appeal to your home or garden.
What are the popular varieties of avocados?
The most popular avocado varieties include Hass, Fuerte, and Bacon. Each has unique flavor, texture, and growing requirements, with Hass being the most commonly grown due to its creamy texture and rich taste.
How do you choose the right avocado for planting?
Choose a ripe, organic avocado that yields slightly to gentle pressure. Organic avocados are recommended because they are less likely treated with chemicals that could hinder germination.
What is the water method for germinating avocado pits?
In the water method, you insert three or four toothpicks into the pit and place it in a glass of water so that the bottom half is submerged. The glass should be kept in a warm, sunny location, and the water should be changed regularly to keep it fresh.
What is the soil method for germinating avocado pits?
In the soil method, you bury the cleaned pit about an inch deep in moist potting soil with the pointed end facing up. It should be placed in a warm area with indirect light and watered lightly to keep the soil damp, avoiding sogginess.
How can you tell when it’s time to transplant your avocado plant?
Transplanting is necessary when roots start to peek out of the drainage holes, the plant reaches about 6 inches tall, or the leaves look crowded in the pot. It’s important to act before waiting too long, which can stunt growth.
What are the ongoing care requirements for an avocado plant?
Ongoing care includes fertilizing every four to six weeks with a balanced, slow-release fertilizer starting at about six months old, pruning for healthy growth, and monitoring for common pests and diseases such as aphids, spider mites, and root rot.
What should you do to prevent root rot in avocado plants?
To prevent root rot, ensure proper drainage by using pots with holes and avoiding overwatering. Regularly check the drainage and never let the pot sit in water.