
Growing haldi, or turmeric, at home is entirely possible and can be quite rewarding. With the right conditions and care, you can cultivate this vibrant and beneficial plant right in your garden or even in pots. If you’re interested in similar plants, you might want to check out how to plant ginger at home (How to Plant Ginger at Home (Simple Guide)).
Understanding Haldi (Turmeric)
What is Haldi (Turmeric)?
Haldi, known as turmeric, is a flowering plant belonging to the ginger family. It’s primarily cultivated for its rhizome, which is the underground stem that we commonly use as a spice. When harvested and processed, the rhizome has a bright yellow-orange pigment, which gives curry its distinctive color. I remember the first time I saw turmeric in its raw form; it looked so different from the ground spice I was used to, and I was fascinated by its vibrant hue.
Health Benefits of Turmeric
Turmeric is not just a culinary delight; it’s packed with health benefits. The active compound in turmeric, curcumin, is known for its anti-inflammatory and antioxidant properties. I’ve read studies highlighting how it may aid in reducing inflammation, improving digestion, and even supporting brain health. Personally, I’ve incorporated turmeric into my daily routine, often in smoothies or golden milk, and I truly believe it contributes positively to my health.
Culinary Uses of Turmeric
In the kitchen, turmeric is incredibly versatile. It’s a staple in many Indian dishes, adding flavor and color to curries, rice, and lentil soups. I love using fresh turmeric in my cooking; it adds a depth of flavor that dried spices just can’t replicate. Beyond savory dishes, turmeric can also be used in teas and smoothies. Just the other day, I made a turmeric latte that was both comforting and health-boosting!
Getting Started with Growing Turmeric at Home
Essential Growing Conditions
Before diving into the planting process, it’s essential to understand the ideal growing conditions for turmeric. I’ve learned that turmeric thrives in specific climates and soil types, and knowing this can make a big difference in your success.
Climate Requirements
Turmeric loves warmth and humidity. It grows best in tropical and subtropical climates, but I’ve found that it can also thrive in warm temperate zones. Ideally, the temperature should range between 68°F to 95°F (20°C to 35°C). If you live in a cooler area, you can still grow turmeric in pots and bring them indoors during colder months. I’ve tried this method, and it works wonderfully; just be sure to give them plenty of light.
Soil Type and Preparation
The soil for planting turmeric should be rich, well-draining, and slightly acidic to neutral (pH 5.5 to 7). I usually mix well-rotted compost or organic matter into my soil to enhance its nutrient content. This step has been crucial in ensuring my turmeric receives the right nutrients. Additionally, ensuring that the soil drains properly is vital, as turmeric doesn’t like to sit in water. I often find myself checking the soil moisture regularly, especially after watering.
Choosing the Right Turmeric Variety
There are several varieties of turmeric, and choosing the right one for your home garden can be important for your growing success. I’ve experimented with a couple of varieties, and I love the unique flavors they bring.
Common Turmeric Varieties
Some common varieties include Alleppey, Lakadong, and Bangladeshi turmeric. Each has its unique characteristics, flavor profiles, and uses. For instance, I’ve found that the Alleppey variety is particularly fragrant and has a vibrant color that really stands out in dishes. When selecting a variety, consider what you’ll be using it for in your cooking.
Where to Buy Turmeric Rhizomes
You can buy turmeric rhizomes at your local garden center or online. I prefer to purchase organic rhizomes to ensure that I’m starting with healthy plants. It’s also possible to find turmeric at local farmers’ markets, which is where I’ve had the best luck finding fresh, healthy rhizomes. Just be sure to select ones that are firm and free of mold or blemishes.
Planting Your Turmeric
When to Plant Turmeric
Timing is everything when it comes to planting turmeric. I’ve noticed that the best time to plant turmeric rhizomes is in the spring when the soil temperature has warmed up to at least 68°F (20°C). This is typically around late March to early April in many regions. However, if you’re in a warmer climate, you might find that you can plant a little earlier. I always keep an eye on the local weather and soil conditions before planting; it really helps ensure a successful start.
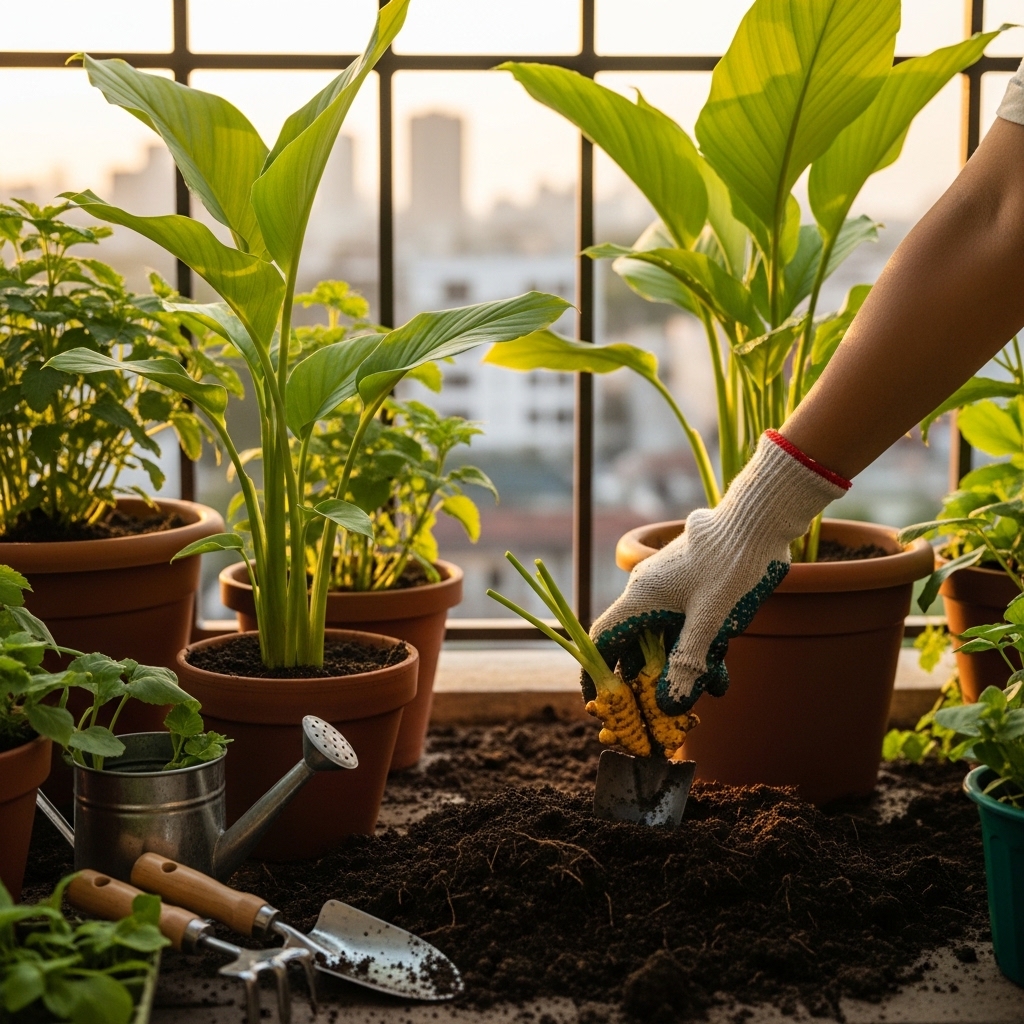
How to Plant Turmeric Rhizomes
Planting turmeric is quite straightforward, and I’ve learned a few simple steps that make it easier. The key is to ensure that you’re planting healthy rhizomes that have visible buds, which indicates they’re ready to sprout.
Preparing the Planting Site
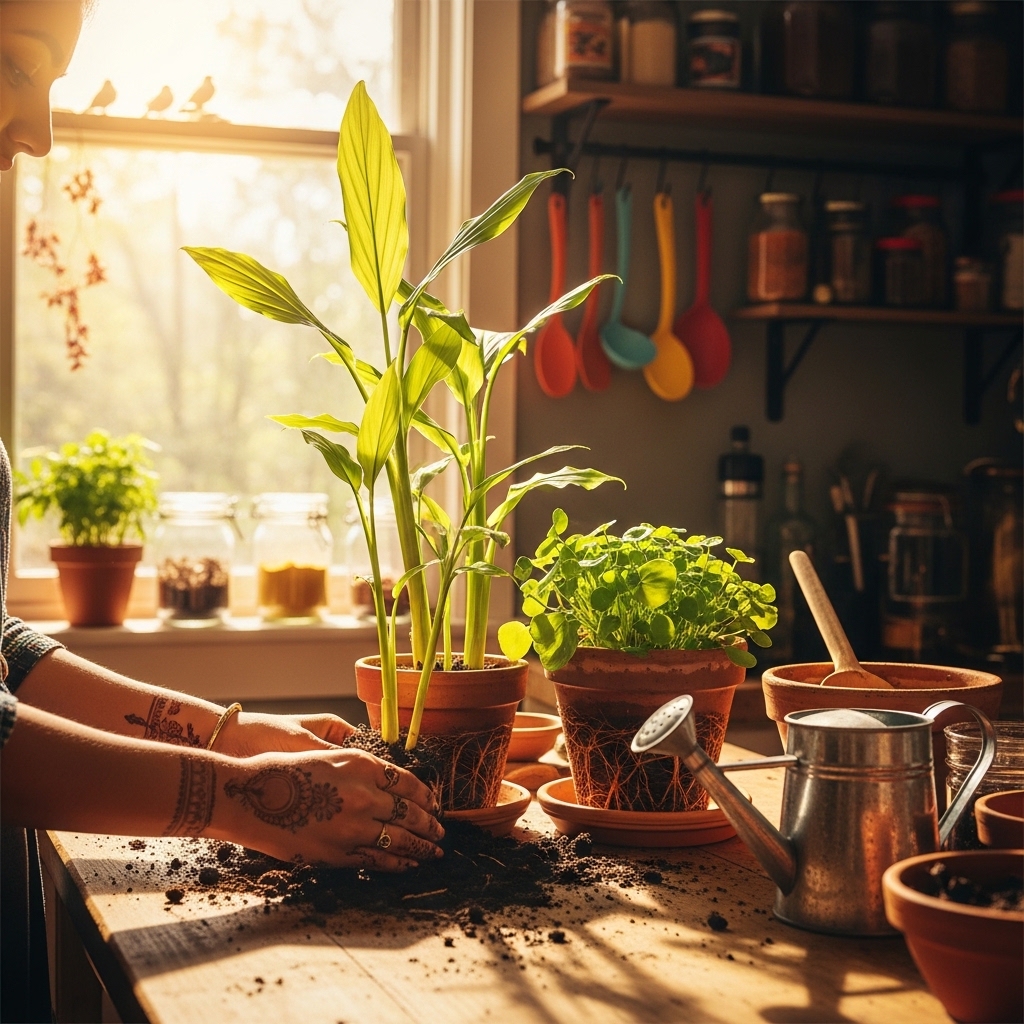
Before diving into planting, I always prepare the site. If you’re planting in the ground, make sure to clear the area of weeds and debris. I usually dig up the soil to a depth of about 12 inches and mix in some organic compost to enrich it. For potted plants, I recommend using a large pot with plenty of drainage holes. I’ve found that a pot at least 12 inches deep works well, allowing the rhizomes to grow without restriction.
Planting Depth and Spacing
When it comes to planting depth, I typically place the rhizomes about 2 to 4 inches deep in the soil. It’s important to position them with the buds facing upward. If you’re planting multiple rhizomes, I recommend spacing them about 12 to 15 inches apart to give them room to grow. I remember the first time I planted turmeric; I was so eager I crowded the pots, and it taught me a valuable lesson about spacing! Proper spacing ensures that each plant has access to light, nutrients, and water, which is crucial for healthy growth.
Care and Maintenance for Turmeric Plants
Watering Requirements
Watering is one of the most critical aspects of maintaining turmeric plants. I’ve found that turmeric likes a consistent level of moisture, but it doesn’t thrive in soggy soil. I usually water my plants when the top inch of the soil feels dry to the touch. During the hot summer months, I often water them more frequently, ensuring they get enough moisture to support their growth. I’ve even taken to using mulch around the base of the plants to help retain soil moisture and keep the weeds at bay.
Fertilizing Turmeric Plants
Fertilizing is another important factor. Turmeric is a heavy feeder, and I’ve learned that giving it the right nutrients can significantly boost its growth. I usually start with a balanced fertilizer when planting and then follow up with additional feedings every few months as the plants grow.
Best Fertilizers for Turmeric
For my turmeric, I prefer using organic fertilizers like fish emulsion or compost tea. I’ve found that these options provide a slow release of nutrients that keep my plants healthy over time. It’s amazing how much of a difference the right fertilizer can make. I also occasionally use a seaweed-based fertilizer, especially during the growing season, to give my plants an extra boost.
Organic vs. Chemical Fertilizers
In my gardening journey, I’ve chosen to stick with organic fertilizers. I feel more comfortable knowing that I’m not introducing harsh chemicals into my garden. While chemical fertilizers may provide quick results, I’ve noticed that organic options contribute to healthier soil in the long run. It’s a choice that aligns with my values, and I truly believe it makes a difference in the quality of my harvest.
Pest and Disease Management
Like any plant, turmeric can face its fair share of pests and diseases. I’ve had my moments of concern, but with a little vigilance and care, I’ve managed to keep my plants healthy. It’s all about being proactive and knowing what to look for.
Common Pests Affecting Turmeric
Some pests that I’ve encountered while growing turmeric include aphids, spider mites, and root-knot nematodes. I’ve found that keeping the area clean and free from debris helps minimize these pests. If I spot any infestations, I usually spray my plants with a mild soap solution or neem oil, both of which have worked well for me in controlling pests without harming the plants.
Preventing and Treating Diseases
Turmeric can also be susceptible to diseases like leaf spot and fungal issues. To prevent these, I ensure good air circulation around the plants by not overcrowding them. I’ve learned that avoiding overhead watering helps reduce the risk of fungal diseases as well. If I do notice any signs of disease, I promptly remove affected leaves and apply a fungicide if necessary. Staying on top of these issues has been key to keeping my turmeric thriving.
Harvesting Turmeric
When to Harvest Turmeric
Harvesting turmeric is one of the most exciting parts of the growing journey. I remember the thrill I felt when my plants reached maturity, and I knew it was time to dig them up. Generally, turmeric is ready to be harvested about 8 to 10 months after planting. The best indicator for me has been watching the leaves; when they start to yellow and die back, it’s a clear sign that the rhizomes are ready. I often check the weather too because harvesting right before a rain can make it messy!
How to Harvest Turmeric Rhizomes
Harvesting turmeric can be done carefully to ensure you don’t damage the rhizomes. I usually start by gently loosening the soil around the base of the plant with a garden fork or shovel. Being cautious is key; I’ve learned the hard way that rushing can lead to broken rhizomes. Once the soil is loosened, I pull the plant up by its base, shaking off the excess soil. It’s always such a rewarding moment to see the vibrant color of the rhizomes beneath the earth.
Tools Needed for Harvesting
Having the right tools makes the harvesting process smoother. When I harvested my turmeric, I found that a garden fork, a trowel, and a pair of gardening gloves were essential. The garden fork helps to loosen the soil without damaging the rhizomes, while the trowel can help dig around them. Gloves keep my hands clean and protected as I work. I sometimes also use a bucket to collect the harvested rhizomes, which makes it easy to transport them for cleaning.
Post-Harvest Processing
Once I’ve harvested my turmeric, the next step is to clean and prepare it for storage or use. I rinse the rhizomes under cold water to remove any dirt. I’ve learned that it’s important not to scrub too hard, as this can damage the skin. After rinsing, I let them dry completely before deciding how I want to store or use them. I often slice some of the fresh turmeric to use in recipes right away, while the rest I store for later. It’s amazing how the aroma fills the kitchen during this process — it’s a delightful reminder of all the hard work that went into growing them!
Storing and Using Your Home-Grown Turmeric
How to Store Fresh Turmeric
Storing fresh turmeric properly is crucial to keep it flavorful and usable. I usually keep my fresh turmeric rhizomes in a cool, dark place, like a pantry, where they can last for several weeks. I find that wrapping them in a paper towel or placing them in a paper bag helps absorb excess moisture, which is essential for preventing rot. If I have a larger harvest, I sometimes consider freezing some rhizomes. I wash and peel them, then slice before freezing, making it easy to grab and use later. It’s like having a little stash of sunshine in the freezer!
Using Turmeric in Cooking
Using my home-grown turmeric in cooking is one of the most rewarding experiences. Fresh turmeric has a much more intense flavor compared to the dried spice, and I love incorporating it into various dishes. I often add it to soups, stews, and even stir-fries for that extra kick. Just the other day, I made a delicious turmeric-infused rice that had everyone asking for the recipe! I’ve also enjoyed grating fresh turmeric into my smoothies, which adds a vibrant color and health benefits.
Recipes Featuring Fresh Turmeric
One of my favorite recipes using fresh turmeric is a simple turmeric ginger tea. I boil water with sliced turmeric and ginger, adding a bit of honey and lemon for flavor. It’s a cozy drink, especially during cold months. I also love making turmeric hummus, blending chickpeas with tahini, garlic, lemon, and freshly grated turmeric. It gives a lovely color and taste twist to a classic dip! For more recipes, you can explore How to Plant Ginger Root for Fast Sprouting.
Health Supplements with Turmeric
In addition to cooking, I’ve explored health supplements that feature turmeric. I often look for organic turmeric capsules or powders that highlight curcumin’s benefits. I’ve found that they can be a convenient way to incorporate turmeric into my diet, especially on days when I’m busy. However, I always ensure that the products I choose are high quality and sourced from reputable brands. It’s important to make informed choices, especially when it comes to health supplements. Additionally, for more information on health and safety, check out Can You Eat an Aloe Plant? Safety Guide.
Frequently Asked Questions (FAQs)
Can I grow turmeric indoors?
Absolutely! I’ve successfully grown turmeric indoors in pots. The key is to provide sufficient sunlight, ideally around 6-8 hours a day. Using grow lights can also help if natural light is limited. Just keep in mind that turmeric still needs enough space to grow, so choose a large enough pot.
How long does it take for turmeric to grow?
From my experience, turmeric takes about 8 to 10 months to mature. It’s a waiting game, but seeing the plants flourish is rewarding. I often found myself counting down the months while nurturing them along the way!
What are the signs of a healthy turmeric plant?
A healthy turmeric plant has vibrant green leaves and a sturdy stalk. I’ve noticed that if the leaves start to yellow prematurely or if there’s stunted growth, it may be a sign of issues like nutrient deficiencies or pest problems. Keeping an eye on the plants has helped me catch any potential issues early.
Is turmeric easy to grow at home?
In my opinion, yes! I think turmeric is relatively easy to grow with the right care and conditions. It’s forgiving and can thrive in various environments. As long as you provide warmth, moisture, and good soil, you’ll likely find success in growing your own turmeric at home!
Frequently Asked Questions
“`html
Can I grow turmeric indoors?
Absolutely! I’ve successfully grown turmeric indoors in pots. The key is to provide sufficient sunlight, ideally around 6-8 hours a day. Using grow lights can also help if natural light is limited. Just keep in mind that turmeric still needs enough space to grow, so choose a large enough pot.
How long does it take for turmeric to grow?
From my experience, turmeric takes about 8 to 10 months to mature. It’s a waiting game, but seeing the plants flourish is rewarding. I often found myself counting down the months while nurturing them along the way!
What are the signs of a healthy turmeric plant?
A healthy turmeric plant has vibrant green leaves and a sturdy stalk. I’ve noticed that if the leaves start to yellow prematurely or if there’s stunted growth, it may be a sign of issues like nutrient deficiencies or pest problems. Keeping an eye on the plants has helped me catch any potential issues early.
Is turmeric easy to grow at home?
In my opinion, yes! I think turmeric is relatively easy to grow with the right care and conditions. It’s forgiving and can thrive in various environments. As long as you provide warmth, moisture, and good soil, you’ll likely find success in growing your own turmeric at home!
What are the ideal climate conditions for growing turmeric?
Turmeric loves warmth and humidity. It grows best in tropical and subtropical climates, ideally at temperatures ranging between 68°F to 95°F (20°C to 35°C). It can also thrive in warm temperate zones, and if you live in a cooler area, you can grow it in pots and bring them indoors during colder months.
How should I prepare the soil for planting turmeric?
The soil for planting turmeric should be rich, well-draining, and slightly acidic to neutral (pH 5.5 to 7). Mixing well-rotted compost or organic matter into the soil enhances its nutrient content, and ensuring proper drainage is vital since turmeric doesn’t like to sit in water.
What type of fertilizers are best for turmeric plants?
Organic fertilizers like fish emulsion or compost tea are great for turmeric, providing a slow release of nutrients. Seaweed-based fertilizers can also be used during the growing season for an extra boost. I prefer organic options as they contribute to healthier soil in the long run.
When is the best time to plant turmeric rhizomes?
The best time to plant turmeric rhizomes is in the spring when the soil temperature has warmed up to at least 68°F (20°C), typically around late March to early April in many regions. In warmer climates, planting a little earlier may be possible.
How do I store fresh turmeric after harvesting?
To store fresh turmeric, keep it in a cool, dark place like a pantry, where it can last for several weeks. Wrapping them in a paper towel or placing them in a paper bag helps absorb excess moisture, preventing rot. For larger harvests, consider freezing some rhizomes after washing and peeling them.
What pests are commonly associated with turmeric plants?
Common pests affecting turmeric include aphids, spider mites, and root-knot nematodes. Keeping the area clean and free from debris helps minimize these pests, and using a mild soap solution or neem oil can effectively control infestations without harming the plants.
“`