
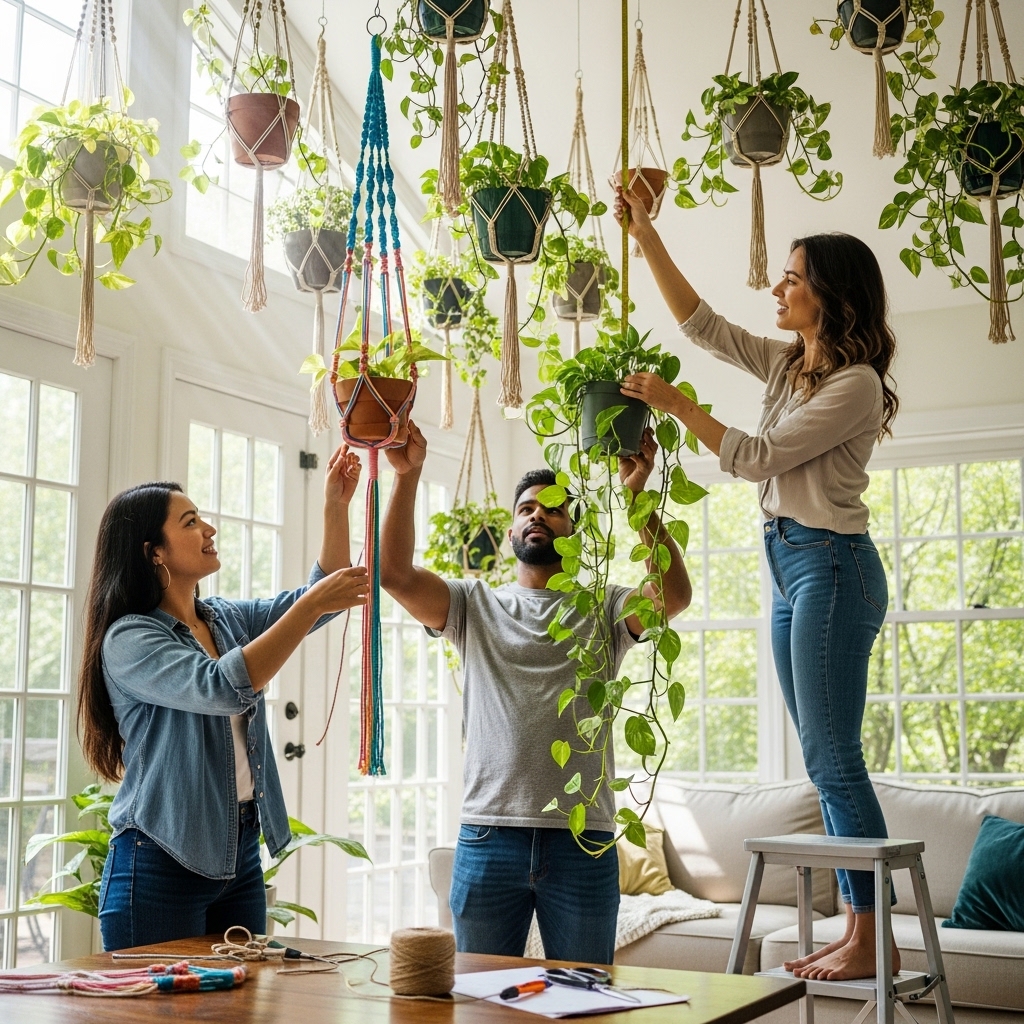
Hanging plants from the ceiling is a delightful way to bring greenery into your home while saving floor space. With just a few tools and materials, you can create a stunning display that enhances your living environment. Read Interesting article: Vertical Vegetable Garden Techniques: Innovative Ideas for Your Project
Overview of Hanging Plants
Benefits of Hanging Plants in Your Home
When I first started incorporating hanging plants into my space, I was surprised by how much they transformed the atmosphere. Hanging plants not only add a touch of nature but also help improve air quality. They can reduce stress, enhance mood, and create a more inviting environment. Plus, they’re a fantastic way to utilize vertical space, particularly in smaller homes or apartments where every inch counts.
Another benefit I noticed is how versatile hanging plants can be. They can be placed in various locations, from bright kitchens to cozy living rooms, and they add a dynamic visual element that makes any room feel more alive. I’ve found that they can also serve as natural dividers in open spaces, creating cozy nooks without the bulk of furniture.
Types of Plants Suitable for Hanging
Choosing the right plants is essential for creating a beautiful hanging garden. I’ve experimented with many types, and here are a few of my favorites:
- Pothos: This hardy plant is almost foolproof and can thrive in various lighting conditions. Its trailing vines look stunning when hung from the ceiling.
- Spider Plant: Known for its air-purifying qualities, the spider plant produces adorable “baby” shoots that dangle beautifully.
- String of Pearls: This succulent is unique with its bead-like leaves that create a beautiful cascading effect when hung. Read Interesting article: Master Succulent Care with This Ultimate Beginner’s Guide!
- Boston Fern: If you’re looking for something lush, the Boston fern’s graceful fronds provide a lovely visual and soften any space.
- Philodendron: With its heart-shaped leaves, this plant adds a touch of elegance and thrives in indirect light.
Each of these plants has its own charm, and depending on the vibe you want to create, you can mix and match them for a stunning display. I’ve discovered that having a variety of plants can make the hanging area feel more dynamic and lively.
Essential Tools and Materials
Tools Needed for Hanging Plants
Before you dive into hanging your plants, it’s important to gather some essential tools. When I first attempted this DIY project, I realized that being prepared made all the difference. Here’s what you’ll need:
- Drill: If you’re installing hooks or brackets, a drill is necessary. I recommend a lightweight one that you can easily handle.
- Screwdriver: You’ll need this for securing hooks or brackets in place.
- Stud Finder: This tool is crucial for finding safe spots to hang your plants. Trust me, it saves a lot of headaches.
- Measuring Tape: Precise measurements ensure that your plants hang at the right height and look visually appealing.
- Level: It helps ensure that your plants are perfectly straight. I learned this the hard way, as crooked plants can be distracting.
Materials to Consider (Hangers, Hooks, etc.)
Once you have your tools ready, it’s time to think about materials. Here are some of my top picks that have worked well for me:
- Ceiling Hooks: These are ideal for hanging lightweight plants. Look for heavy-duty options if your plants are larger.
- Macramé Plant Hangers: These add a bohemian touch and are perfect for adding texture to your space.
- Hanging Planters: Choose planters that come with built-in hangers or chains for an all-in-one solution.
- Brackets: If you prefer a more structured look, brackets can hold pots securely and allow for easy access to water them.
In my experience, the right materials can enhance your design and ensure that your plants thrive. I’ve mixed and matched different types of hangers to create unique displays, and I always feel proud of the results.
Choosing the Right Location
Indoor vs. Outdoor Hanging Plants
Deciding where to hang your plants can be just as important as choosing the plants themselves. I’ve experimented with both indoor and outdoor settings, and each has its unique set of considerations. Indoor plants can brighten up a room and create a cozy atmosphere, while outdoor plants can create a vibrant, lush garden feel. Think about your lifestyle and how you want your space to feel.
Light Requirements for Different Plant Types
One crucial aspect to consider when hanging plants is their light requirements. Some plants thrive in bright, indirect light, while others prefer low-light conditions. I’ve learned to assess the natural light in my home and choose plants accordingly. For instance, I placed my string of pearls in a sunny corner, while my pothos does perfectly well in a shadier spot. Understanding these needs will help ensure your plants flourish.
Safety Considerations for Ceiling Hanging
Before hanging anything from the ceiling, safety should be a top priority. I’ve made it a habit to check that my installation points are secure and can handle the weight of the plants. Always use a stud finder to locate beams or joists. This extra step can prevent any accidents, like falling plants, which I’ve sadly witnessed before. It’s better to take your time to ensure everything is safe than to rush and regret it later.
Now that we’ve covered the basics, you’re well on your way to creating a beautiful hanging plant display in your home. I can’t wait to share some methods for hanging plants in the next sections!
Methods for Hanging Plants from the Ceiling
Using Ceiling Hooks
One of the simplest and most effective ways I’ve found to hang plants is by using ceiling hooks. These hooks can usually support a good amount of weight, and they’re relatively easy to install. When I first started, I was a bit nervous about drilling into my ceiling, but I quickly realized that with the right tools, it was a straightforward process. After finding a stud with my stud finder, I marked my spots, drilled a small hole, and twisted the hooks in. It was so satisfying to see the plants hanging securely in place! I recommend choosing hooks that are heavy-duty, especially if you’re using larger pots.
Macramé Plant Hangers
Macramé plant hangers add a beautiful, artistic flair to any space. I absolutely love the bohemian vibe they create! When I first discovered macramé, I was amazed by how it could transform a simple hanging plant into a stunning piece of art. These hangers come in various designs, from simple knots to intricate patterns, allowing you to showcase your plants uniquely. I started with a few basic ones and gradually collected more elaborate designs. They’re quite easy to install, and the best part is that you can often find DIY kits to make your own, which can be a fun project to tackle.
Using Shelving Brackets
If you’re looking for a more structured approach, shelving brackets can be a great option. I’ve used brackets to create a tiered effect with my plants, which not only looks visually appealing but also maximizes space. It’s like creating a mini plant shelf right from the ceiling! To install, I simply marked where I wanted the brackets, drilled into the ceiling, and attached them securely. Then, I placed my pots on the brackets. This method allows for easy access to watering and changing plants, which I find so convenient.
Hanging Planters with Chains
Another method I’ve enjoyed is using hanging planters equipped with chains. These planters often come with built-in hooks, making them easy to attach to ceiling hooks or beams. I love the flexibility they offer; you can adjust the height of the plants simply by moving the chains. When I hang my string of pearls this way, it creates a lovely cascading effect that draws the eye. One tip I learned is to ensure that the chains are sturdy and can handle the weight of the planter, especially when it’s filled with soil and water.
Step-by-Step DIY Guide
Measuring and Marking the Ceiling
Before you start hanging your plants, it’s essential to measure and mark the ceiling where you want your hooks or brackets to go. I learned this the hard way after my first few attempts ended up uneven. Grab your measuring tape and determine how far down you want your plants to hang. I usually leave a space of at least 20 to 30 inches between the ceiling and the plant. Once you have that figured out, use a pencil to mark the spots where you’ll be drilling. This step ensures everything is aligned and visually pleasing.
Installing Ceiling Hooks or Brackets
With your marks in place, it’s time to install the hooks or brackets. This is where the stud finder comes in handy. Once you locate the studs, drill holes and insert the hooks or brackets securely. Make sure they’re tightly fastened, as the last thing you want is your plants falling down! I always double-check that everything feels stable before moving on to the next step. It’s a simple process, but it’s crucial for safety.
Preparing the Plants for Hanging
Once the hooks or brackets are up, it’s time to prepare your plants for hanging. If you’re using pots, ensure they have drainage holes to prevent water from accumulating. I like to line the bottom of my pots with small rocks or pebbles to further aid drainage. After that, potting soil goes in, and then I carefully place my plants inside. I’ve found that gently loosening the roots before placing them in the new pot encourages better growth. This is also a great time to check for any pests or damages that might need attention.
Hanging the Plants Securely
Now comes the fun part—hanging the plants! For me, this is the moment when everything comes together. I carefully lift each plant and attach it to the hooks or brackets. While doing this, I always make sure the pots are secure and that they’re not swaying too much. After hanging, I step back and admire the arrangement. It’s like art in motion, and seeing the plants in their new spot always brings me joy. Remember to check the stability of each plant periodically to ensure they remain secure over time.
Maintenance Tips for Hanging Plants
Watering Considerations for Suspended Plants
Taking care of hanging plants can be a bit different from traditional potted plants. I’ve learned that they often dry out faster because they’re elevated and exposed to more air circulation. It’s essential to keep an eye on the moisture level of the soil. I usually check the top inch of soil; if it feels dry, I give it a good soak. A tip that’s worked well for me is to use a watering can with a long spout, which allows me to water without having to climb or stretch awkwardly. This way, I can ensure that the water reaches the roots without causing a mess.
Another thing I’ve noticed is that some plants, like the pothos, prefer slightly drier conditions, while others, like the Boston fern, enjoy more humidity. I’ve found that keeping a small humidity tray filled with water beneath the ferns helps maintain the moisture they crave. Just remember to adjust your watering schedule based on the plant’s needs and the climate in your home.
Pruning and Care Techniques
Pruning is a vital part of keeping hanging plants looking their best. I’ve learned that regular trimming not only keeps the plants healthy but also encourages new growth. For instance, with my spider plants, I frequently snip off any brown tips or dead leaves. This not only enhances their appearance but also helps the plant channel its energy into producing new shoots.
When it comes to vines like the string of pearls, I love to prune them back a bit to maintain their cascading shape. I find that this makes them look fuller and more lively. Plus, I often propagate the cuttings in water, which is a fun way to create new plants! Just ensure that you use clean, sharp scissors to avoid any damage to the plant.
Managing Plant Health and Pests
Every plant parent fears pests, and I’m no exception. I’ve had my share of battles with little critters, especially when I didn’t pay attention to the leaves. Regularly inspecting my hanging plants has become part of my routine. I often give the leaves a gentle wipe with a damp cloth, which helps remove dust and makes it easier to spot any unwanted guests.
If I do discover pests, like spider mites or aphids, I usually start with a simple solution: a mixture of water and mild soap in a spray bottle. Spraying it on the affected areas usually does the trick without harming the plant. I make it a habit to treat my plants at the first sign of trouble, as it’s much easier to manage issues when they’re caught early.
Additionally, I try to rotate my plants occasionally. This gives each one equal exposure to light and helps prevent any imbalances that might attract pests. I’ve found that by being proactive and attentive, my plants thrive and stay healthy, making the whole hanging plant experience even more rewarding.
Creative Ideas for Displaying Hanging Plants
Combining Different Plant Types
One of the most enjoyable aspects of having hanging plants is the ability to mix and match different types. I’ve had a blast experimenting with various combinations. For instance, I love pairing my pothos with a trailing string of pearls. The contrast between the rich green of the pothos and the unique texture of the string of pearls creates a stunning visual effect. When I hang them together, it feels like I’m crafting a living piece of art!
Another fun idea I’ve tried is creating a thematic collection. For example, I once decided to group all my succulents together. Using macramé hangers, I displayed them at varying heights, which added dimension to the arrangement. It’s amazing how just a bit of creativity can completely transform a space!
Creating a Vertical Garden Effect
If you’re looking to make a bold statement, why not consider creating a vertical garden? I’ve seen some incredible displays that incorporate multiple hanging plants in a grid or cascading arrangement. This approach not only maximizes space but also adds a lush, green backdrop to any room. I once installed a series of hooks in a staggered pattern, and it looked like a mini jungle! It was a fun project that brought so much life to my living room. Read Interesting article: 20 Benefits of Fiddle Leaf Fig Trees: Owning The Best Tree (How It Feels)
To achieve this look, I recommend using a variety of plant types and textures. Mixing trailing plants with bushier ones creates a dynamic effect. I also love incorporating colorful planters to add an extra pop to the display. It’s all about experimenting to find what works best for your space!
Seasonal Decor with Hanging Plants
Hanging plants can also serve as seasonal decor. I’ve found that switching up my plant arrangements according to the seasons brings new energy to my space. For instance, I like to introduce vibrant flowers in spring and summer, such as petunias or trailing geraniums, to brighten my hanging planters. In fall, I sometimes swap these for rich, leafy greens or even small decorative pumpkins nestled among my plants for a festive touch.
During the winter months, I may choose evergreen plants or even hang some holiday-themed decorations among my greenery. It’s a simple way to keep the decor fresh and engaging throughout the year. Plus, it keeps my creativity flowing!
Frequently Asked Questions
What are the benefits of hanging plants in my home?
Hanging plants add a touch of nature, improve air quality, reduce stress, enhance mood, and create an inviting environment. They also utilize vertical space, which is particularly beneficial in smaller homes or apartments.
What types of plants are suitable for hanging?
Some suitable plants for hanging include Pothos, Spider Plant, String of Pearls, Boston Fern, and Philodendron. Each plant has its unique charm and can contribute to a dynamic display.
What tools do I need to hang plants from the ceiling?
Essential tools include a drill, screwdriver, stud finder, measuring tape, and a level to ensure that your plants hang straight and securely.
What materials should I consider for hanging plants?
Materials to consider include ceiling hooks, macramé plant hangers, hanging planters, and brackets. Each material can enhance your design and help your plants thrive.
How do I choose the right location for hanging plants?
Consider if you want to hang plants indoors or outdoors based on the atmosphere you wish to create. Additionally, assess the light requirements of different plant types to ensure they thrive in their chosen location.
What safety considerations should I keep in mind when hanging plants?
Always check that your installation points are secure and can handle the weight of the plants. Using a stud finder to locate beams or joists is crucial for safety.
What methods can I use to hang plants from the ceiling?
Methods for hanging plants include using ceiling hooks, macramé plant hangers, shelving brackets, and hanging planters with chains. Each method offers a different aesthetic and functionality.
What maintenance tips should I follow for hanging plants?
Regularly check the moisture level of the soil, prune for health and appearance, and inspect for pests. Adjust your care based on the specific needs of each plant type.
How can I creatively display hanging plants?
You can combine different plant types for visual contrast, create a vertical garden effect with multiple plants, or change arrangements seasonally to keep your decor fresh and engaging.
What should I do if I discover pests on my hanging plants?
Inspect the leaves regularly and use a mixture of water and mild soap to treat affected areas. It’s important to address pest issues early for easier management.