
Planting a cherry pit and growing a tree is an exciting journey that can yield delicious fruit. With a little patience and care, you can transform a simple pit into a thriving cherry tree in your backyard.
Understanding Cherry Trees
Cherry trees are more than just beautiful ornamental plants; they are a source of sweet, juicy fruit that many of us love. When I first decided to plant a cherry pit, I was amazed by the variety and benefits these trees can offer. Understanding the different types of cherry trees and their benefits can help guide you on your journey. Read Interesting article: Cherry Plums – Everything You Need to Know about Sweet Fruits
Types of Cherry Trees
There are primarily two types of cherry trees: sweet cherries (Prunus avium) and sour cherries (Prunus cerasus). Sweet cherries are what most people envision when they think of cherries; they’re generally larger and are perfect for eating fresh. I remember the first time I bit into a fresh cherry from my own tree; it was sweet and bursting with flavor. On the other hand, sour cherries are smaller and often used in baking and cooking. They make amazing pies and jams, which I’ve come to appreciate over the years.
Another important category includes ornamental cherry trees, such as the Yoshino and Kwanzan varieties. These trees are cultivated primarily for their stunning blossoms rather than fruit. While I appreciate their aesthetic appeal, my heart lies with the sweet and sour varieties that bear fruit.
Benefits of Growing Cherry Trees
Growing cherry trees comes with a multitude of benefits. For one, they can enhance the beauty of your garden with their stunning flowers and lush foliage. I’ve seen neighbors stop to admire the blooms on my cherry tree every spring; it creates a vibrant display that’s hard to miss. Beyond aesthetics, cherry trees also provide delicious fruit that can be enjoyed fresh, in salads, or baked into pies – I can’t even count how many cherry pies I’ve made over the years!
Moreover, cherry trees are known to attract beneficial wildlife. Birds love the berries, and I’ve watched them flock to my tree during harvest season. Plus, they can improve air quality and provide shade in the warmer months. From my experience, planting a cherry tree feels like investing in a small ecosystem that can benefit you and your local wildlife. Additionally, if you’re considering planting other fruits alongside your cherry tree, it’s essential to think about spacing. Read Interesting article: How Far Apart to Plant Tomatoes for Best Yield
Preparing to Plant a Cherry Pit
Preparing to plant a cherry pit involves a few important steps. From selecting the right cherry variety to gathering necessary supplies, each step sets the stage for successful growth. I remember feeling a little overwhelmed at first, but breaking it down into manageable parts made the process enjoyable.
Choosing the Right Cherry Variety
Choosing the right cherry variety is crucial for your success. The climate in your region plays a big role in which type will thrive. For example, sweet cherries generally require warmer climates, while sour cherries can tolerate cooler temperatures. I learned this the hard way when I planted a sweet cherry in an area that didn’t get enough sunlight. After doing some research, I decided on a sour cherry tree, which has flourished beautifully in my yard.
Consider what you want from your cherry tree. If you’re leaning toward sweet cherries for fresh eating or baking, research varieties like Bing or Rainier. However, if you’re looking for cooking cherries, Montmorency is a classic choice. My favorite has been the Sour Pie Cherry, as it lends itself beautifully to homemade pies and jams.
Gathering Necessary Supplies
Once you’ve settled on a variety, it’s time to gather the necessary supplies. You’ll need a cherry pit (of course), potting soil, a pot with drainage holes, and water. I found that using a pot with a good drainage system was key, as it prevents root rot, which can be deadly for young plants. You might also want to invest in a small shovel or trowel, gloves, and some labels to keep track of what you’ve planted. I always find it helpful to have everything organized before I start planting.
Additionally, consider getting a small watering can or spray bottle. Proper watering is essential for young cherry plants, especially as they establish their roots. I remember how excited I felt setting up my little planting station in the backyard, ready to bring my cherry pit to life!
How to Extract a Cherry Pit
Extracting a cherry pit might sound simple, but I’ve learned that doing it correctly can make a difference in the success of growing your cherry tree. The process involves a few careful steps to ensure you’re left with a healthy pit ready for planting.
Removing the Pit from the Cherry Fruit
To start, you’ll need to select ripe cherries. I find that fully ripe cherries are easier to work with, as they tend to be juicier and more flavorful. Once I have my cherries, I cut them in half. I use a sharp knife and gently slice along the seam of the cherry to avoid squishing the flesh too much. This way, I can easily pop out the pit without too much hassle.
For those who prefer a less hands-on approach, a cherry pitter is an excellent tool. I remember the first time I used one; it felt like magic! You simply place the cherry in the pitter, squeeze, and out comes the pit, leaving the fruit intact. This tool not only saves time but also keeps my hands clean and my cherries whole.
Cleaning and Drying the Pit
Once I have the pit, the next step is cleaning it. I rinse it under cool water to remove any remaining fruit residue. I’ve found that if I skip this step, the leftover sugars can mold during the storage process. After rinsing, I let the pits dry completely on a paper towel or a clean dishcloth. It’s important to ensure that they are thoroughly dry, as moisture can lead to problems later on.
After drying, I store the pits in a cool, dark place. I find that an old paper bag or a small box works well for this. Keeping the pits in a breathable container helps prevent any unwanted moisture from accumulating. I usually label my container with the date so I can keep track of how long they’ve been stored. It’s fascinating how something as small as a cherry pit can hold so much potential!
Seed Stratification Process
Now that I have my clean, dry cherry pits, it’s time to prepare them for planting through a process called stratification. This step is vital for ensuring the seeds germinate successfully.
What is Stratification?
Stratification mimics the natural conditions that seeds would experience in the wild. In essence, it involves exposing the seeds to a period of cold and moist conditions. I learned that many tree seeds, including cherries, require this process to break dormancy, making them ready to germinate when the weather warms up. Without stratification, my cherry pits might sit idle for a long time, waiting for the right conditions that never come.
Cold Stratification Techniques
There are a couple of methods I’ve used for cold stratification. One of the simplest ways is to place the pits in a damp paper towel or vermiculite and then put them in a plastic bag. I seal the bag to keep moisture in and place it in the refrigerator. This mimics the cold winter conditions that the seeds would naturally endure.
Another approach is to plant the pits directly in pots filled with moist potting soil and then place them outside in a protected area during the winter months. I’ve tried both methods, and while the bag technique is quicker for me, planting them outside feels more natural.
Duration for Stratification
The stratification process usually takes about 10 to 12 weeks. I usually mark my calendar to remind myself when to check on my pits. I’ve had success in the past by starting the process in late fall or early winter, so they’re ready to plant in early spring when the ground warms up. Waiting for the right time is essential, but the excitement of seeing the first signs of growth makes it all worthwhile!
Planting the Cherry Pit
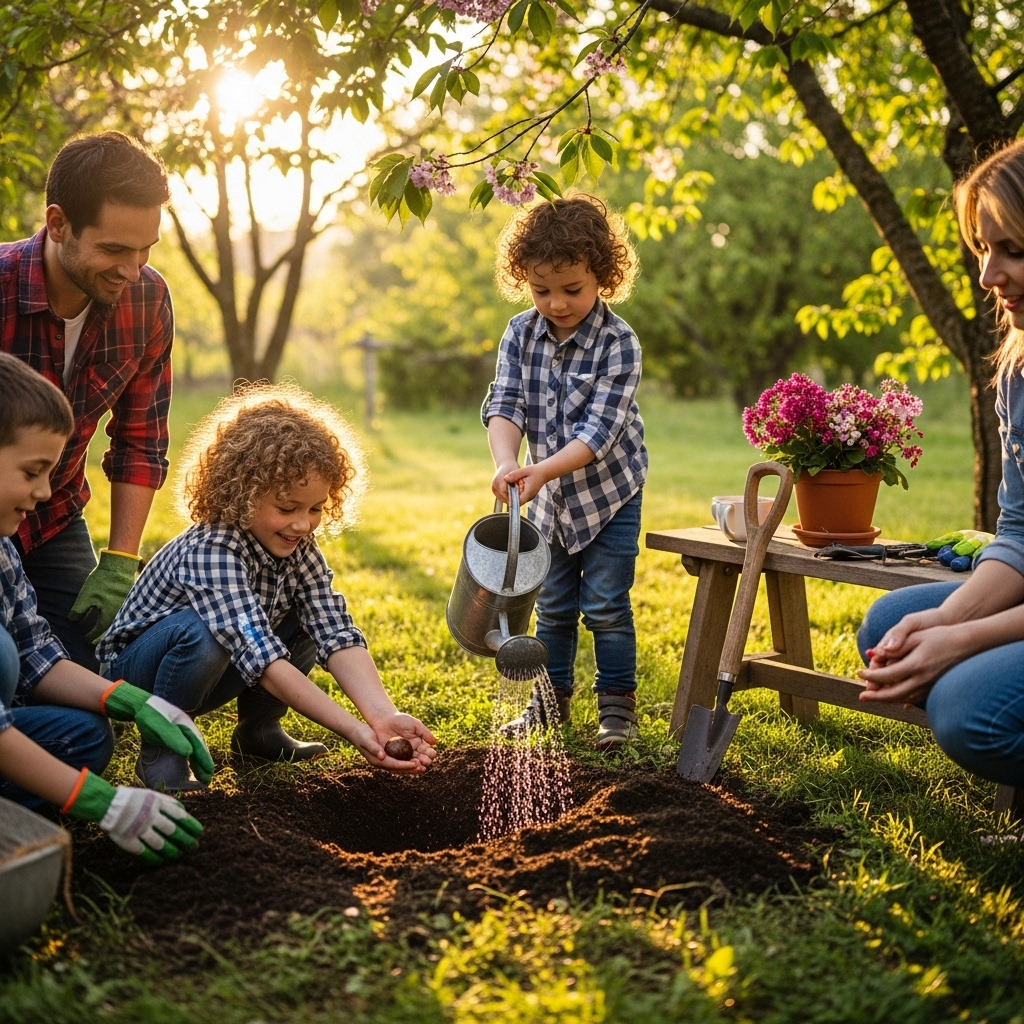
Now that I’ve successfully stratified my cherry pits and they’re ready to go, it’s time to plant them! This part of the journey is incredibly rewarding, as it’s where all the preparation comes together. I remember the thrill I felt the first time I planted my cherry pit; it felt like I was giving life to something special.
When to Plant Cherry Pits
Timing is everything when it comes to planting cherry pits. I’ve learned that the best time to plant is in early spring, just after the last frost has passed. This is crucial because cherry trees thrive in warmer soil and will struggle if they encounter frost while germinating. I usually keep an eye on the weather and mark my calendar for when the temperatures start to rise consistently. Watching the trees around me bud and bloom is a wonderful reminder that it’s time to plant.
Choosing the Right Location
Finding the right spot in my yard for the cherry tree was another exciting part of the process. I’ve realized that cherry trees love sunlight, so I always aim for a location that gets at least six to eight hours of direct sunlight each day. I remember walking around my yard, testing different areas, and finally settling on a space that was both sunny and sheltered from strong winds. This not only helps the tree grow strong but also keeps it safe from harsh weather.
Another factor to consider is spacing. I’ve found that cherry trees need room to grow, so I leave enough space between my cherry tree and other plants. This allows good air circulation and helps prevent diseases. Plus, when they’re fully grown, I want to enjoy the beauty of their full canopy without any obstructions!
Soil Preparation and Requirements
Now that I have my spot picked out, it’s time to think about the soil. I can’t stress enough how important good soil is for planting cherry pits. Ideally, cherry trees prefer well-draining soil that is rich in organic matter. I usually test the soil in my chosen area to make sure it drains well. If it feels heavy and clumpy, I mix in some compost or sand to improve the drainage. I remember how satisfying it felt to prepare the soil, knowing that my efforts would set the stage for future growth.
Before planting, I also make sure to loosen the soil about a foot deep. This creates a nice environment for the roots to spread out and grow strong. I’ve learned that the more care I take in preparing the soil, the healthier my cherry tree will be in the long run.
Planting Depth and Spacing
With the soil prepped, it’s finally time to plant the cherry pit! I usually dig a hole about two inches deep for each pit. I’ve found that planting too deep can hinder germination, while planting too shallow can expose the pit to too much air and heat. I gently place the pit in the hole, making sure the pointed end is facing down. It’s a bit like tucking a baby in for a nap! After placing the pit, I cover it with soil and lightly pat it down to remove any air pockets.
When planting multiple pits, I space them about 12 to 18 inches apart. I learned that giving them enough space helps prevent competition for nutrients and sunlight as they grow. It also means I have room to maneuver while caring for them later on.
After planting, I give the area a good watering. It feels great to know that I’ve taken the first big step toward growing my own cherry tree. Watching the little sprouts come up in a few weeks will be the icing on the cake!
Frequently Asked Questions
What types of cherry trees can I grow?
There are primarily two types of cherry trees: sweet cherries (Prunus avium) and sour cherries (Prunus cerasus). Sweet cherries are larger and ideal for fresh eating, while sour cherries are smaller and great for baking and cooking.
What are the benefits of growing cherry trees?
Growing cherry trees enhances the beauty of your garden with stunning flowers and lush foliage, provides delicious fruit for fresh eating or baking, attracts beneficial wildlife, improves air quality, and offers shade during warmer months.
How do I prepare to plant a cherry pit?
Preparing to plant a cherry pit involves choosing the right cherry variety based on your climate, gathering necessary supplies such as a cherry pit, potting soil, a pot with drainage holes, and water, and organizing everything before planting.
What should I consider when choosing a cherry variety?
Consider your climate and what you want from your cherry tree. Sweet cherries require warmer climates, while sour cherries tolerate cooler temperatures. Research different varieties based on your preferences for fresh eating or cooking.
How do I extract a cherry pit?
To extract a cherry pit, select ripe cherries, cut them in half, and remove the pit. You can use a sharp knife or a cherry pitter for easier extraction. Afterward, rinse the pit under cool water to remove any residue.
What is the stratification process for cherry pits?
Stratification mimics natural cold and moist conditions to break seed dormancy. It usually involves placing the pits in damp paper towels or vermiculite inside a sealed bag in the refrigerator or planting them in pots outside during winter.
How long does the stratification process take?
The stratification process usually takes about 10 to 12 weeks. It’s best to start this process in late fall or early winter so that the pits are ready to plant in early spring as the ground warms up.
When is the best time to plant cherry pits?
The best time to plant cherry pits is in early spring, just after the last frost has passed. This timing ensures that the cherry tree thrives in warmer soil without frost hindering germination.
What are the soil requirements for planting cherry pits?
Cherry trees prefer well-draining soil rich in organic matter. It’s important to test the soil for drainage, and if necessary, mix in compost or sand to improve it before planting.
How deep should I plant cherry pits?
Cherry pits should be planted about two inches deep. Planting too deep can hinder germination, while planting too shallow can expose the pit to too much air and heat. Space multiple pits about 12 to 18 inches apart.