
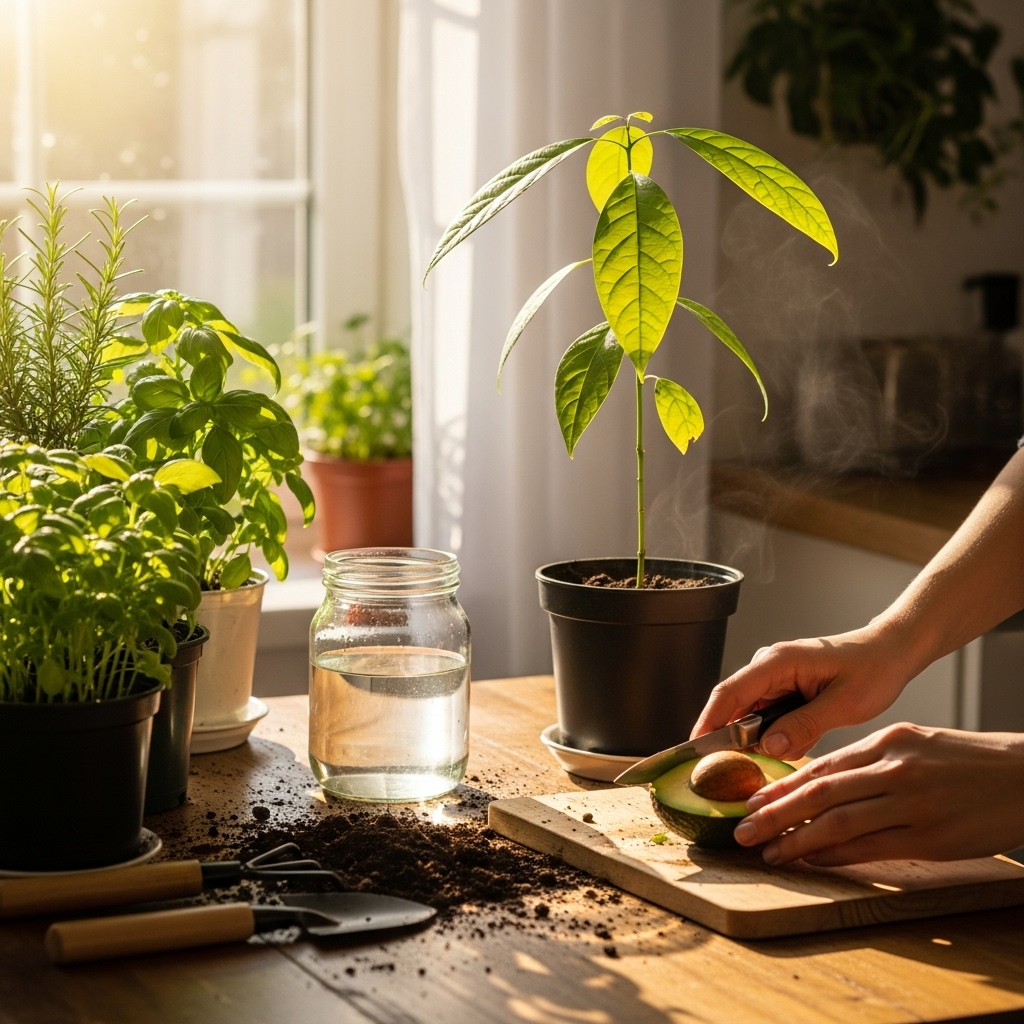
The best way to plant an avocado from a pit is to start by preparing the pit properly, then use either the water or soil method for germination. I’ve found that growing avocados from pits can be incredibly rewarding and surprisingly simple. Read Interesting article: How to Plant an Avocado Pit and Grow a Tree
Understanding Avocado Seeds
What is an Avocado Pit?
The avocado pit, or seed, is the large, round stone found inside the delicious avocado fruit. It’s fascinating because it holds the potential to grow into a new avocado tree. When I first learned about avocado pits, I was intrigued by how such a small object could lead to a flourishing plant. The pit has a hard outer shell and a softer interior, and it is this soft part that eventually sprouts into a new plant.
Benefits of Growing Avocado from Pit
Growing avocados from pits is not just a fun project; it comes with several benefits. First, it’s a cost-effective way to get your own avocado plant without spending money at the nursery. I remember feeling a sense of accomplishment when I saw my first sprout emerge after weeks of care. Additionally, homegrown avocados are fresher and tastier than most store-bought varieties. Plus, nurturing a plant can be a great stress reliever and brings a bit of nature into your home. Read Interesting article: How to Grow an Avocado Plant at Home (Easy Guide)
Varieties of Avocado Suitable for Planting
Not all avocado varieties are created equal when it comes to growing them from seed. The most common types are Hass, Bacon, and Fuerte. I’ve found that Hass avocados are particularly popular due to their creamy texture and rich flavor. Each variety has its own unique characteristics, but Hass is my favorite for both eating and planting. It’s essential to select a ripe, healthy avocado to ensure the pit has the best chance of germination.
Essential Tools and Materials
Gathering Your Supplies
To successfully plant an avocado from a pit, you’ll need a few basic supplies. First, you’ll need a ripe avocado to extract the pit from. After that, gather toothpicks, a glass of water, and some soil if you choose to use the soil method later on. I remember the excitement of gathering my supplies, knowing that I was about to embark on a little gardening adventure. It’s a simple process, but having everything ready makes it much easier.
Choosing the Right Avocado
Choosing the right avocado is crucial for seed germination. Look for avocados that are firm but slightly soft to the touch. I always check for any bruises or blemishes, as these can affect the seed’s viability. Once you’ve picked your avocado, cut it open carefully, and scoop out the pit without damaging it. The fresh pit is essential because older pits may not sprout. Trust me; the joy of seeing a sprout emerge from a healthy pit is worth the effort!
Tools for Planting and Care
Aside from the avocado pit itself, you’ll want to have some tools handy for planting and caring for your seedling. A small pot with drainage is essential if you plan to use soil. Also, having a spray bottle for watering can be very useful. I always keep a small watering can and a pair of scissors nearby for pruning as my plant grows. These tools make the care process smoother and more enjoyable.
Step-by-Step Guide to Planting Avocado from Pit
Step 1: Preparing the Avocado Pit
After extracting the pit from the avocado, you need to prepare it for planting. First, rinse the pit gently under cool water to remove any avocado residue. This step is important to prevent mold. Once clean, you can choose to remove the outer brown skin, though it’s not necessary. I usually leave it on for protection during germination. Let the pit dry for a couple of days to reduce the risk of rot before you start the germination process.
Step 2: Germination Methods
Now, it’s time to decide how you want to germinate your avocado pit. There are two popular methods: the water method and the soil method. Both have their benefits, and I’ve tried both with great results! Read Interesting article: How to Grow an Avocado Pit Into a Plant (Step-by-Step)
Water Method
In the water method, you’ll need three or four toothpicks. Insert them into the pit about halfway down, creating a stable base for it to rest on. Then, place the pit in a glass of water, with the bottom half submerged and the top half above water. I remember watching my pit in the water, eagerly anticipating the first signs of growth. Place the glass in a warm, sunny spot and change the water every few days to keep it fresh. It usually takes about 2-6 weeks for the roots to start sprouting.
Soil Method
If you prefer the soil method, fill a small pot with well-draining soil and plant the pit halfway, making sure the pointed end is facing up. Water it lightly and keep the soil moist but not soggy. I’ve found this method is more straightforward for some people and tends to yield robust seedlings. Place the pot in a warm spot with indirect sunlight. You should see roots emerging from the pit in a few weeks, and eventually, a sprout will emerge from the top.
Step 3: Caring for the Germinating Seed
Once your pit starts to germinate, it’s important to provide the right conditions for growth. This includes monitoring light and temperature, as well as keeping the right watering schedule.
Light and Temperature Requirements
Avocado seeds thrive in warm environments, so try to keep them in a room that’s at least 70°F (21°C). I’ve found that placing them near a sunny window works wonders, as they love bright but indirect sunlight. If you notice the leaves starting to stretch too much towards the light, it may mean they need a bit more direct sunlight. Watching my seedlings reach for the sun has always been a delightful sight.
Watering Tips and Frequency
Watering is crucial during the germination phase. If you’re using the water method, ensure the water level is always enough to submerge the bottom of the pit. For the soil method, keep the soil consistently moist but not overly wet. I usually check the soil with my finger; if it feels dry about an inch down, it’s time to water again. Finding the right balance can take a little practice, but it’s vital for the health of your avocado plant.
Step 4: Transplanting the Seedling
Once your avocado plant reaches about 6 inches tall and has a few leaves, it’s ready for transplanting. Carefully remove it from the water or soil and plant it in a larger pot with fresh, well-draining soil. I always use a pot with drainage holes to prevent water from pooling at the bottom. Gently bury the roots and the bottom of the stem, leaving the top leaves exposed. This transition is exciting, as it marks the next stage of growth for your avocado plant!
Step 5: Ongoing Care for Avocado Plants
Caring for your newly transplanted avocado plant is essential for its continued growth and health. I’ve learned that a little attention goes a long way!
Soil and Fertilization
Using well-draining soil is critical. You can use a commercial potting mix or create your own. I’ve had success with a mix of regular potting soil, perlite, and compost. As the plant grows, feeding it with a diluted liquid fertilizer every 4-6 weeks can help. I usually look for a fertilizer that’s high in nitrogen, which avocado plants need for healthy foliage.
Pruning and Shaping
As your avocado plant grows, it will benefit from occasional pruning. I’ve found that trimming the top leaves encourages bushier growth and helps the plant maintain a manageable size. When pruning, use clean scissors to avoid any risk of infection. It’s also a good idea to remove any dead or yellowing leaves to keep the plant healthy.
Common Challenges and Solutions
Pest and Disease Management
As I’ve gone through my journey of growing avocados, I’ve learned that pests and diseases can be a real concern. It’s essential to keep an eye on your plants because, like any other plant, they can attract unwanted guests. I remember finding aphids on my avocado plant one day, and I felt a wave of panic. I quickly researched some solutions and found that a simple spray of soapy water can help deter these little nuisances. Just mix a few drops of dish soap with water, and spray it on the affected areas. This method worked wonders for me, and I’ve continued to use it as a preventative measure since then.
Fungal diseases can also be a problem, especially if the plant is overwatered or not getting enough air circulation. I always try to ensure my plants have good airflow and that I don’t water them too frequently. If I do notice any mold or fungus, I remove affected leaves immediately to prevent spreading. And I’ve found that using a fungicide can be helpful if things get out of hand. Regular monitoring is key, and I’ve learned to check my plants frequently, especially in humid conditions.
Dealing with Slow Growth
Another challenge I faced was slow growth. After transplanting my seedlings, I was eager to see them flourish, but some seemed to take their sweet time. It can be frustrating when you’re excited about your plant’s potential. From my experience, several factors can affect growth rates. Light is a big one; if your avocado isn’t getting enough sunlight, it can stunt its growth. I always make sure mine are in a bright spot, ideally with some direct sunlight.
Soil quality is another important factor. I’ve learned that avocados prefer lighter, well-draining soil. If the soil is too compact or heavy, it can hinder growth. I once had a plant that didn’t seem to be thriving, and when I checked the soil, it was too dense. I decided to repot it with a mix of potting soil, perlite, and compost, and it made a huge difference. Patience is essential, too. Some varieties naturally grow slower than others, so I remind myself that every plant has its own timeline.
Preventing Root Rot
Root rot is another common challenge, and I can’t stress enough how important it is to prevent it. I’ve had a couple of plants suffer from this, and it was heartbreaking to see them decline. The main culprit for root rot is overwatering, so I’ve learned to be cautious with how much water I give my plants. I usually let the top inch of soil dry out before watering again. This method has worked well for me.
Using pots with drainage holes is crucial. When I first started, I didn’t realize how much water could build up at the bottom of a pot without drainage, and it led to root issues. Since then, I’ve made it a point to only use pots designed for drainage. If I ever notice that the roots are becoming mushy or dark, I don’t hesitate to repot the plant in fresh soil and trim away any affected roots. This proactive approach can save your avocado plant from the brink of disaster.
Lastly, maintaining proper air circulation around the plant can help prevent root rot. I often reposition my plants to ensure they’re not too crowded or sitting in a humid area. It’s these little adjustments that make a significant difference in keeping my avocado plants healthy.
Frequently Asked Questions (FAQs)
How long does it take for an avocado pit to sprout?
From my experience, it typically takes anywhere from 2 to 8 weeks for an avocado pit to sprout, depending on the method you choose and the conditions in which it’s germinating. I remember waiting eagerly for my first sprout, and it felt like forever! Patience is key, but once you see those roots, it’s so rewarding.
Can I plant an avocado pit directly in the soil?
Yes, you can plant an avocado pit directly into the soil, and I’ve done this with success. However, I’ve found that starting it in water can help kickstart the germination process. If you decide to plant it directly, just make sure to keep the soil moist and ensure good drainage to prevent rot.
What should I do if my avocado plant isn’t growing?
If your avocado plant isn’t growing, it’s time to check the basics: light, water, and soil. Make sure it’s getting enough indirect sunlight and isn’t sitting in waterlogged soil. Sometimes, repotting into fresh soil can stimulate growth. I’ve had a plant that hit a growth plateau, and after a little TLC, it bounced back beautifully.
Are there specific tips for indoor vs. outdoor planting?
Definitely! If you’re planting indoors, make sure your avocado gets plenty of light, as indoor conditions can sometimes be less than ideal. Outdoors, ensure your tree is protected from harsh winds and extreme temperatures. I’ve learned that avocado plants love warmth, so if I’m planting outside, I ensure they’re in a sheltered spot that gets plenty of sunlight.
Frequently Asked Questions
“`html
What is an avocado pit?
The avocado pit, or seed, is the large, round stone found inside the avocado fruit. It has a hard outer shell and a softer interior that eventually sprouts into a new plant.
What are the benefits of growing avocados from pits?
Growing avocados from pits is cost-effective, provides fresher and tastier avocados than store-bought varieties, and can be a great stress reliever while bringing nature into your home.
Which avocado varieties are suitable for planting?
The most common avocado varieties for planting include Hass, Bacon, and Fuerte. Hass avocados are particularly popular due to their creamy texture and rich flavor.
What tools and materials do I need to plant an avocado pit?
You will need a ripe avocado, toothpicks, a glass of water, and some soil if you choose to use the soil method for planting.
How do I prepare the avocado pit for planting?
After extracting the pit, rinse it gently under cool water to remove any residue, allow it to dry for a couple of days to reduce the risk of rot, and optionally remove the outer brown skin for protection during germination.
What are the two methods for germinating an avocado pit?
The two popular methods for germinating an avocado pit are the water method, where the pit is suspended in water, and the soil method, where the pit is planted in soil with the pointed end facing up.
How do I care for the germinating avocado seed?
Monitor light and temperature, ensuring the environment is warm (at least 70°F or 21°C), and maintain a proper watering schedule to keep the pit or soil moist, but not overly wet.
When should I transplant my avocado seedling?
Transplant your avocado seedling once it reaches about 6 inches tall and has a few leaves. Use a larger pot with fresh, well-draining soil.
What common challenges might I face when growing avocados?
Common challenges include pest and disease management, slow growth, and preventing root rot. Regular monitoring and proper care can help mitigate these issues.
How can I prevent root rot in my avocado plant?
To prevent root rot, avoid overwatering, ensure pots have drainage holes, let the top inch of soil dry out before watering, and maintain good air circulation around the plant.
“`