
To plant beans for maximum yield, choose the right variety, prepare your soil meticulously, and ensure optimal growing conditions. With a little care and attention, you can enjoy a bountiful harvest of fresh, delicious beans.
Understanding Beans: Types and Varieties
Beans are a versatile and nutritious crop that can thrive in various garden settings. They come in multiple types and varieties, each with its unique characteristics and growing requirements. Understanding these differences is crucial for maximizing your yield. Personally, I’ve found that knowing what type of bean I’m planting makes a huge difference when it comes time to care for them and harvest.
Common Bean Types: Bush vs. Pole Beans
When it comes to beans, you’ll typically encounter two main types: bush beans and pole beans. Bush beans grow to a compact size, usually around 1-2 feet tall, and are perfect for smaller gardens or containers. They mature quickly, making them a great choice if you want a rapid harvest. I remember planting bush beans in my first garden, and the ease of care was a game-changer for me.
Pole beans, on the other hand, can grow significantly taller, reaching heights of 6-10 feet or more. They require a trellis or some form of support to climb. While they take a bit longer to mature than bush beans, they often produce a larger yield because they can grow vertically. My experience with pole beans has been rewarding; they seem to provide more beans per square foot, making them ideal for maximizing space.
Popular Varieties: Pinto, Kidney, Black, and Green Beans
Within these two types, there are countless varieties to explore. Pinto beans, for instance, are favorites for their creamy texture and earthy flavor, often used in dishes like chili and refried beans. Kidney beans, known for their deep red color, are packed with protein and are staples in salads and stews. I’ve cooked countless meals with these beans and can vouch for their versatility.
Black beans, with their shiny appearance, are not only delicious but also rich in antioxidants and fiber. They make a fantastic addition to soups and tacos. Green beans, enjoyed for their snap and freshness, are a garden classic. I love picking green beans straight from the vine and tossing them into a stir-fry. Each variety has its unique growing needs, so it’s essential to choose based on what you want to grow, eat, and enjoy. Knowing when to plant green beans can significantly impact your yield.
Optimal Growing Conditions for Beans
Once you’ve chosen the type of beans you want to plant, it’s time to consider their growing conditions. Beans are relatively easy to grow, but they do have specific requirements that can impact their yield. I’ve learned through trial and error that paying attention to these conditions can make all the difference.
Soil Requirements: pH, Texture, and Nutrients
The foundation of any successful bean crop starts with soil. Beans prefer well-draining soil that is rich in organic matter. The ideal pH level for beans is between 6.0 and 7.0. I usually test my soil before planting, as it helps me understand what amendments I may need to add. If your soil is too acidic or alkaline, it can hinder nutrient absorption, affecting your plants’ growth.
Texture is another important factor. Loamy soil is often the best choice, as it holds moisture but also drains excess water. I’ve found that adding compost or well-rotted manure helps improve soil structure and boosts nutrient content. Remember, healthy soil leads to healthy plants!
Climate Considerations: Temperature and Sunlight
Beans thrive in warm weather, with ideal temperatures ranging from 70°F to 90°F. If you live in a cooler climate, starting seeds indoors or waiting until the danger of frost has passed is essential. I often keep an eye on local frost dates to plan my planting schedule. Beans love sunlight, so choosing a location that receives full sun for at least 6-8 hours a day will help maximize your yield.
Watering Needs: Irrigation Strategies
Proper watering is crucial for growing beans successfully. They need consistent moisture, especially during germination and flowering. I typically water my beans deeply about once a week, ensuring the soil is wet but not soggy. It’s important to avoid overhead watering, as this can promote diseases. Instead, I prefer a drip irrigation system or watering at the base of the plants. This method helps keep the foliage dry and allows the roots to absorb water efficiently.
As the plants grow, I monitor them closely for any signs of drought stress, such as wilting or yellowing leaves. In hot spells, I may increase watering frequency, particularly if I notice the soil drying out too quickly. Finding that balance has been key in my bean-growing journey.
When to Plant Beans for Maximum Yield
Timing your planting is as crucial as the previous factors. Understanding when to plant beans can significantly impact your yield. Over the years, I’ve learned the importance of timing and how it can affect the success of my harvest.
Ideal Planting Seasons: Spring vs. Fall
Beans are typically planted in the spring after the last frost, but some varieties can also be grown in the fall in certain climates. I personally prefer spring planting because it aligns with warm weather and long days, which help the plants develop. I’ve tried fall planting, but I found that the shorter days and cooler temperatures can lead to a less abundant harvest.
When the soil temperature reaches at least 60°F, it’s usually safe to plant. I’ve made it a habit to check the soil temperature using a simple thermometer. A little patience goes a long way in ensuring the best start for your beans.
Frost Dates and Soil Temperature
Knowing the average frost dates in your area is key. Beans are sensitive to frost, and planting too early can lead to disaster. I always keep a gardening calendar handy to track these dates. If I ever feel unsure about planting, I wait another week or two until I’m confident that the danger has passed. This simple step has saved me from losing entire crops to unexpected cold snaps.
Soil temperature is another factor that I’ve learned to respect. Beans germinate best in warm soil, so waiting for the right conditions can lead to faster sprouting and healthier plants. I’ve seen firsthand how planting in cooler soil results in slower growth and weaker plants, which ultimately affects my yield.
Preparing Your Garden for Bean Planting
Now that we’ve gone through the essentials of growing beans, let’s focus on getting your garden ready for planting. Preparing your garden properly can set the stage for a successful growing season. I’ve learned that taking the time to prepare can make a world of difference in the outcome of my harvest.
Site Selection: Sunlight and Drainage
The first step in preparing your garden is selecting the right site. Beans thrive in full sunlight, so I always look for a spot that gets at least 6-8 hours of direct sun each day. I remember one year when I planted beans in a partially shaded area, and the yield was significantly lower than in my sunnier spots. It was a valuable lesson for me.
Another critical factor is drainage. Beans don’t like sitting in water, so I choose a location that drains well. If you notice water pooling after rain, it might be a sign that the spot isn’t suitable for beans. Raised beds are an excellent option if you have heavy clay soil, as they provide extra drainage and warmth.
Soil Preparation: Tilling and Amendments
Once I’ve selected the perfect site, I move on to soil preparation. This is where I roll up my sleeves and get to work! I start by tilling the soil to a depth of about 12 inches. This helps break up compacted soil and allows for better root growth. I find that a garden fork works well for smaller spaces, while a tiller is great for larger areas.
After tilling, I add organic matter to enrich the soil. Compost is my go-to; it’s like giving my plants a vitamin boost! I usually mix in some well-rotted manure or leaf mold, which improves soil structure and provides essential nutrients. I’ve noticed that the more I invest in soil health, the better my plants respond. It’s truly a rewarding process.
Using Row Covers and Mulching
As I prepare to plant, I often consider using row covers, especially if I’m planting early in the season. These lightweight fabrics help protect young plants from frost and pests. I remember covering my bean seedlings one year, and it made a significant difference in their growth and survival. It’s a simple yet effective way to give them a head start.
Once my beans are planted, I also like to use mulch around them. Mulching helps retain moisture, suppress weeds, and keep the soil temperature consistent. I typically use straw or shredded leaves, both of which I find beneficial for my garden. It’s like giving my plants a cozy blanket to snuggle under! Plus, as the mulch breaks down, it adds even more nutrients back into the soil.
Step-by-Step Guide to Planting Beans
Now that my garden is prepped and ready, it’s time to delve into the actual planting process. This is where I get really excited, as it’s the first step toward my anticipated harvest!
Seed Selection: Quality and Sourcing
Choosing the right seeds is crucial. I always look for high-quality seeds that are suited for my climate. Local garden centers often carry varieties that perform well in my area, but I also enjoy browsing online seed catalogs. I’ve found some unique bean varieties this way that have added fun and flavor to my garden. Always check the seed packet for information on germination rates and planting instructions; it’s helped me avoid disappointment in the past.
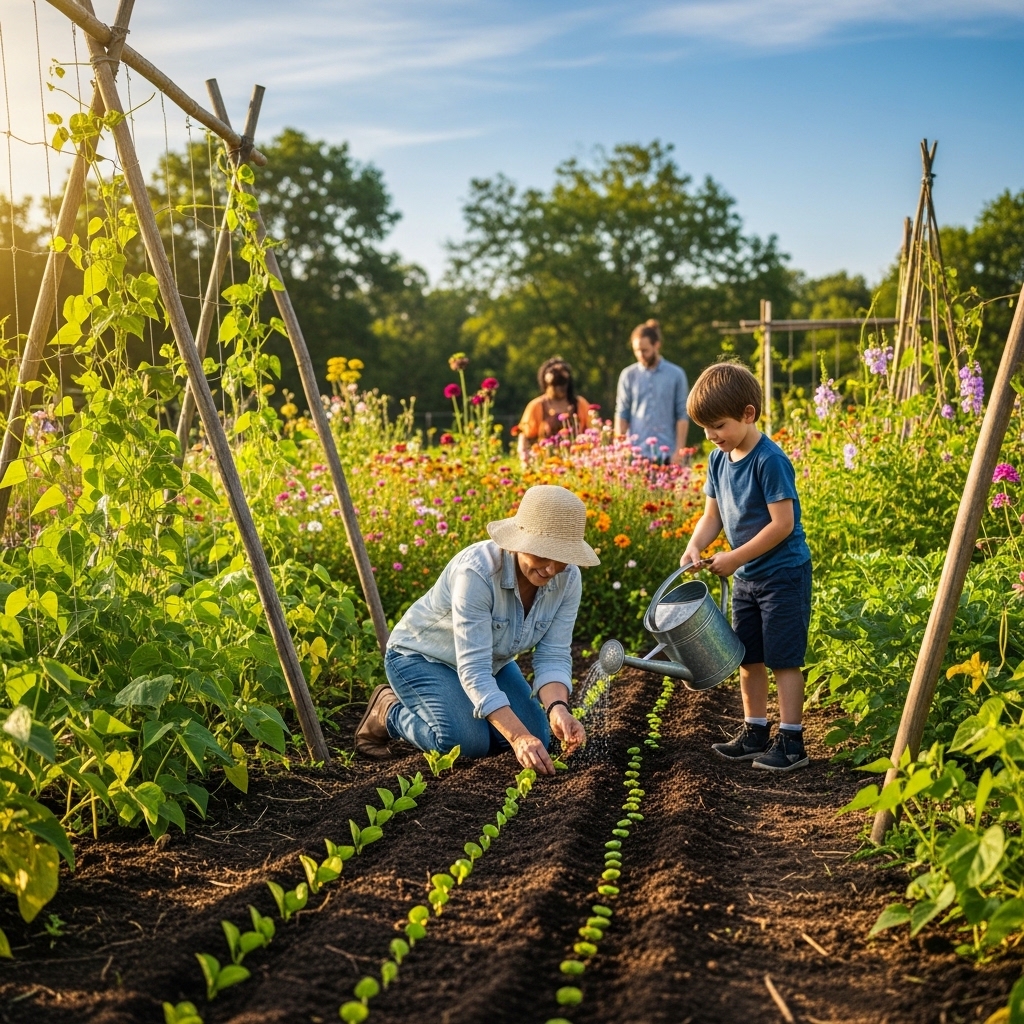
Planting Depth and Spacing Guidelines
When it comes to planting depth, I usually sow bean seeds about 1-1.5 inches deep. I’ve learned that planting too deep can delay germination, so I make sure to follow this guideline closely. As for spacing, I typically plant bush beans about 2-4 inches apart and pole beans 4-6 inches apart. This gives them enough room to grow without competing for nutrients.
Techniques: Direct Sowing vs. Transplanting
While I usually prefer direct sowing for beans, there are times when I’ve opted for transplanting, especially with varieties that need a head start indoors. Direct sowing is simple: I just make a small hole, drop in the seed, and cover it. But when I transplant, I always acclimate the seedlings to outdoor conditions first. Gradually introducing them to the elements has helped prevent shock and ensures they thrive once planted in the garden.
Every planting season is a new opportunity, and I cherish the moments spent in the garden. Watching those little seeds turn into thriving plants is one of my favorite parts of gardening. It’s not just about the yield; it’s about the journey and the joy that comes with nurturing life from the ground.
Care and Maintenance for Healthy Bean Plants
Once the beans are planted, the real adventure begins! Care and maintenance are essential to ensure that our plants grow strong and produce a good yield. Over the years, I’ve learned a few key practices that have helped me keep my bean plants healthy and thriving.
Watering Practices: Frequency and Amount
Watering beans properly is crucial for their growth. I’ve found that consistency is key. Beans need regular moisture, especially in the early stages when they are germinating and establishing their roots. I usually check the top inch of the soil; if it feels dry, it’s time to water. During peak growing conditions, I aim to water deeply about once a week. This helps the roots grow deep into the soil, which makes them more resilient.
In hot weather, I’ve learned to increase my watering frequency. Sometimes, if it gets particularly dry, I’ll water every few days to ensure they aren’t stressed. I often remind myself that it’s better to water deeply and less frequently than to give them shallow water daily. This approach has really helped my plants flourish.
Nutrient Management: Fertilizers and Organic Options
Nutrients play a pivotal role in how well our plants perform. Beans are unique because they can fix their own nitrogen, which means they don’t require as much fertilizer as other crops. However, I still like to give them a little boost. I usually start with a layer of compost mixed into the soil before planting, as it provides a good base of nutrients.
Once the plants start growing, I often apply a balanced organic fertilizer if I notice any signs of nutrient deficiency, such as yellowing leaves. One of my favorite organic options is fish emulsion, which I’ve found to be effective and easy to apply. I dilute it with water as per the instructions and apply it around the base of the plants. It’s always satisfying to see my plants perk up after a good feeding!
Pest and Disease Control: Common Threats and Solutions
Pests and diseases can pose serious threats to our bean crops, and I’ve learned the hard way that catching them early is essential. One common pest I often see is the aphid, which can suck the life out of my plants. I’ve found that a strong jet of water can knock them off, or I may introduce beneficial insects like ladybugs into the garden, as they love munching on aphids!
Another pest I keep an eye on is the Mexican bean beetle. I’ve noticed that handpicking them off the plants can help keep their numbers down. I like to check the undersides of the leaves, as that’s where they often hide. When it comes to diseases, I’ve found that ensuring good air circulation around my plants can help prevent issues like powdery mildew. I often space my plants adequately and avoid overhead watering, which has really paid off.
In my experience, practicing crop rotation is also beneficial for preventing diseases. I make a point to not plant beans in the same spot each year. This simple practice keeps my garden healthier and reduces the risk of soil-borne diseases that can linger.
Harvesting Beans for Maximum Yield
Harvesting is perhaps the most rewarding part of growing beans. After all the care and attention, it’s exciting to finally reap the benefits of our hard work! I’ve learned a few things over the years about when and how to harvest to ensure I get the best yield possible.
Signs of Ripeness for Different Bean Varieties
Knowing when to harvest can be a bit tricky, but I’ve found that paying attention to the signs on the plants is crucial. For green beans, I typically pick them when they are young and tender. I usually look for a bright color and a firm texture. If I wait too long, they can become tough and stringy, which isn’t ideal.
For shell beans like pinto or kidney beans, I wait until the pods are fully developed and dry. I watch for the pods to turn brown and start to rattle when shaken. At this point, I know they’re ready to be picked. I’ve made the mistake of waiting too long before, and it can lead to a decreased yield, so I try to stay vigilant.
Harvesting Techniques: Timing and Tools
When it’s time to harvest, I like to use a pair of garden scissors or shears. This helps me avoid damaging the plants while cutting the pods. I usually do my harvesting in the morning when the temperatures are cooler, which helps keep the beans fresh. Timing is essential; if I can, I try to harvest before a rainstorm, as wet beans can lead to mold.
After harvesting, I store the beans in a cool, dry place. For fresh beans, I pop them in the fridge to keep them crisp. For dried beans, I lay them out to dry completely before storing them in airtight containers. I’ve learned that proper handling after harvest makes a big difference in how long I can enjoy my beans.
Harvesting beans is not just about collecting; it’s about celebrating the fruits of our labor. Each time I harvest, it reminds me of the journey I’ve taken with those little seeds, and I can’t help but feel a sense of accomplishment. It’s a beautiful cycle of life that I cherish deeply.
Frequently Asked Questions
What are the two main types of beans?
The two main types of beans are bush beans and pole beans. Bush beans grow to a compact size of 1-2 feet tall, while pole beans can reach 6-10 feet and require support to climb.
What are some popular varieties of beans?
Popular varieties of beans include pinto beans, kidney beans, black beans, and green beans. Each variety has unique characteristics and uses in cooking.
What soil conditions are ideal for growing beans?
Beans prefer well-draining soil rich in organic matter, with an ideal pH level of 6.0 to 7.0. Loamy soil is often the best choice for holding moisture while draining excess water.
What temperature do beans thrive in?
Beans thrive in warm weather, with ideal temperatures ranging from 70°F to 90°F. They require full sun for at least 6-8 hours a day for optimal growth.
How should beans be watered?
Beans need consistent moisture, especially during germination and flowering. Deep watering about once a week is recommended, while avoiding overhead watering to prevent diseases.
When is the best time to plant beans?
Beans are typically planted in the spring after the last frost, when the soil temperature reaches at least 60°F. Some varieties can also be grown in the fall in certain climates. For more information, check out How to Plant Cocoa Beans in Minecraft (Quick Guide).
What is the importance of site selection for growing beans?
Site selection is crucial for growing beans as they thrive in full sunlight and well-draining locations. Poor drainage can hinder plant growth, so it’s important to choose a suitable spot.
What should be done to prepare the soil before planting beans?
Before planting beans, the soil should be tilled to a depth of about 12 inches and enriched with organic matter like compost or well-rotted manure to improve nutrient content.
How can pests and diseases be managed in bean crops?
Pests like aphids and Mexican bean beetles can be managed through methods such as handpicking, using water sprays, and introducing beneficial insects. Ensuring good air circulation and practicing crop rotation can also help prevent diseases.
When should beans be harvested?
Beans should be harvested when they show signs of ripeness. For green beans, look for young, tender pods, while shell beans like pinto or kidney should be picked when pods are fully developed and dry.