
The right way to plant hydrangeas involves choosing the right variety, understanding their needs, and ensuring proper soil preparation and care. From my experience, these beautiful blooms can thrive and bring joy to any garden if planted thoughtfully.
Understanding Hydrangeas: Types and Characteristics
Hydrangeas are one of the most beloved flowering shrubs, and it’s easy to see why. Their lush blooms add a pop of color to gardens and landscapes, and they come in various shapes, sizes, and colors. I remember the first time I saw a hydrangea bush in full bloom; it felt like a scene from a fairytale, with soft petals swaying gently in the breeze. Let’s explore the different types of hydrangeas and their unique characteristics to help you choose the right one for your garden.
Common Hydrangea Varieties
There are several common hydrangea varieties, each with its charm and personality. Here are a few that I’ve come to love:
- Hydrangea macrophylla (Bigleaf Hydrangea): This variety is known for its large, round flower clusters. The color can range from pink to blue, depending on soil acidity.
- Hydrangea paniculata (Panicle Hydrangea): With its conical flower clusters, this hardy variety is great for colder climates. I’ve seen them bloom into beautiful whites and pinks.
- Hydrangea arborescens (Smooth Hydrangea): Often seen in gardens, this variety is easy to grow and produces large blooms, usually in white or pale pink.
- Hydrangea quercifolia (Oakleaf Hydrangea): This one is unique due to its oak-shaped leaves and stunning fall color. The white flowers age to a lovely pinkish hue.
Each variety has its own growth habits and maintenance needs, so getting familiar with them is essential before making your choice.
Flower Color Changes and Their Causes
One of the fascinating things about hydrangeas is their ability to change color based on soil pH. I remember being surprised to learn that adding lime to the soil can turn blue hydrangeas pink. In acidic soils (pH below 6), you’ll find beautiful blue hues, whereas in alkaline soils (pH above 7), pink shades dominate. This phenomenon is primarily due to the presence of aluminum in the soil, which hydrangeas absorb. If you’re eager for a specific color, consider testing your soil’s pH and adjusting it accordingly.
Growth Habits and Size of Hydrangeas
Hydrangeas can vary widely in size and growth habits. Some are compact and perfect for smaller spaces, while others can grow quite large, making them ideal for borders or as standalone features in the garden. I’ve seen some panicle hydrangeas reach up to 8 feet tall, while others, like the little lime variety, stay under 3 feet. Understanding the mature size of the variety you choose will help with proper placement in your garden.
When to Plant Hydrangeas
Timing is everything when it comes to planting hydrangeas. I’ve learned that planting at the right time allows these beauties to establish roots before the heat of summer or the chill of winter sets in.
Ideal Planting Seasons
The best times to plant hydrangeas are in the spring and fall. When I first planted my hydrangeas, I chose spring since the weather was warming up, and I could watch them grow throughout the season. Spring planting gives the plants enough time to establish roots before the summer heat. Alternatively, fall is also a great time, as it allows the plants to settle in before going dormant for winter. You can find a more detailed overview in the article Best Time to Plant Hydrangeas: Your Seasonal Planting Guide.
Climate Considerations
Climate plays a significant role in when to plant hydrangeas. In warmer regions, I’ve noticed that spring planting often leads to quicker blooming, while in cooler areas, waiting until the last frost is essential. If you live in a particularly hot climate, consider planting in late afternoon or evening to avoid the harsh midday sun. Understanding your local climate and its impact on your hydrangeas is crucial for their success.
Signs of a Good Planting Time
When I’m deciding the right time to plant, I look for a few signs. One of the most telling is soil temperature—ideally, it should be consistently above 60°F. I also pay attention to the weather forecasts; a few days of mild weather, with no chance of frost, is perfect. Finally, healthy, green leaves on nursery plants signal that it’s a good time to bring them home and plant them in the garden. For more information on optimal timing, check out When to Plant Hydrangeas Outdoors: Optimal Timing for Planting Hydrangeas.
Choosing the Right Location
Finding the perfect spot for hydrangeas is one of the most rewarding parts of planting. I remember my excitement when I finally found a sunny corner of my yard that offered just the right balance of sun and shade.
Sunlight Requirements
Hydrangeas generally prefer partial shade, especially in hotter climates. I’ve noticed that too much direct sunlight can scorch their leaves, while too little can affect blooming. A spot that gets morning sun and afternoon shade often works best. When I first planted mine, I experimented with different locations until I found that sweet spot where they thrived without wilting.
Soil Type and Drainage
Another critical factor is the type of soil and its drainage. Hydrangeas like well-drained soil, and I learned this the hard way when I planted mine in a low spot that collected too much water. Over time, I noticed wilting and root rot. If you have heavy clay or sandy soil, amending it with organic matter can help improve drainage. I often mix in compost to enrich the soil, and it works wonders for my hydrangeas.
Proximity to Other Plants
When choosing a location, consider the proximity to other plants. Hydrangeas can grow quite large, so leaving enough space is essential. I’ve made the mistake of planting too close to other flowers, only to find that they overshadowed my beloved hydrangeas as they grew. I now give them plenty of room to breathe and flourish, ensuring they have enough space for their roots to spread.
Preparing the Soil for Planting
Preparing the soil for hydrangeas is one of the most crucial steps in ensuring their success. I can’t stress enough how much proper soil preparation has helped my plants thrive. When I first started gardening, I thought planting was just about digging a hole and putting the plant in. But I quickly learned that there’s so much more to it.
Testing Soil pH
The first step in preparing the soil is testing its pH level. I remember my first soil test like it was yesterday. It opened my eyes to the importance of understanding what I was working with. You can find simple pH test kits at garden centers or online. I recommend taking a sample from several spots in your garden to get an average reading. Hydrangeas prefer slightly acidic to neutral soil (around 6.0 to 7.0 pH). If you discover that your soil is too alkaline, you might want to consider adding some sulfur or peat moss to lower the pH. I tried this once, and it made a huge difference in the vibrancy of my blooms.
Amending Soil for Hydrangeas
Once I knew my soil’s pH, it was time to amend it. Hydrangeas thrive in rich, well-draining soil. I often mix in organic matter, such as compost or well-rotted manure, to enrich the soil. This not only improves nutrient content but also enhances the soil’s structure. I remember when I added compost for the first time; my hydrangeas responded with an explosion of blooms the following season. You can also mix in a bit of peat moss to help retain moisture without causing sogginess. Just be careful not to overdo it, as hydrangeas need good drainage to prevent root rot.
Importance of Good Drainage
Speaking of drainage, this is an area where I learned a lot through trial and error. Hydrangeas don’t like “wet feet,” so ensuring your soil drains well is key. I’ve made the mistake of planting in a spot where water pooled after heavy rains, and my hydrangeas paid the price. If your garden has heavy clay soil, consider building raised beds or planting in mounds to improve drainage. I found that elevating my plants helped them thrive, especially during wet seasons. Adding gravel or sand to the mix can also enhance drainage, which I learned while experimenting with different soil combinations.
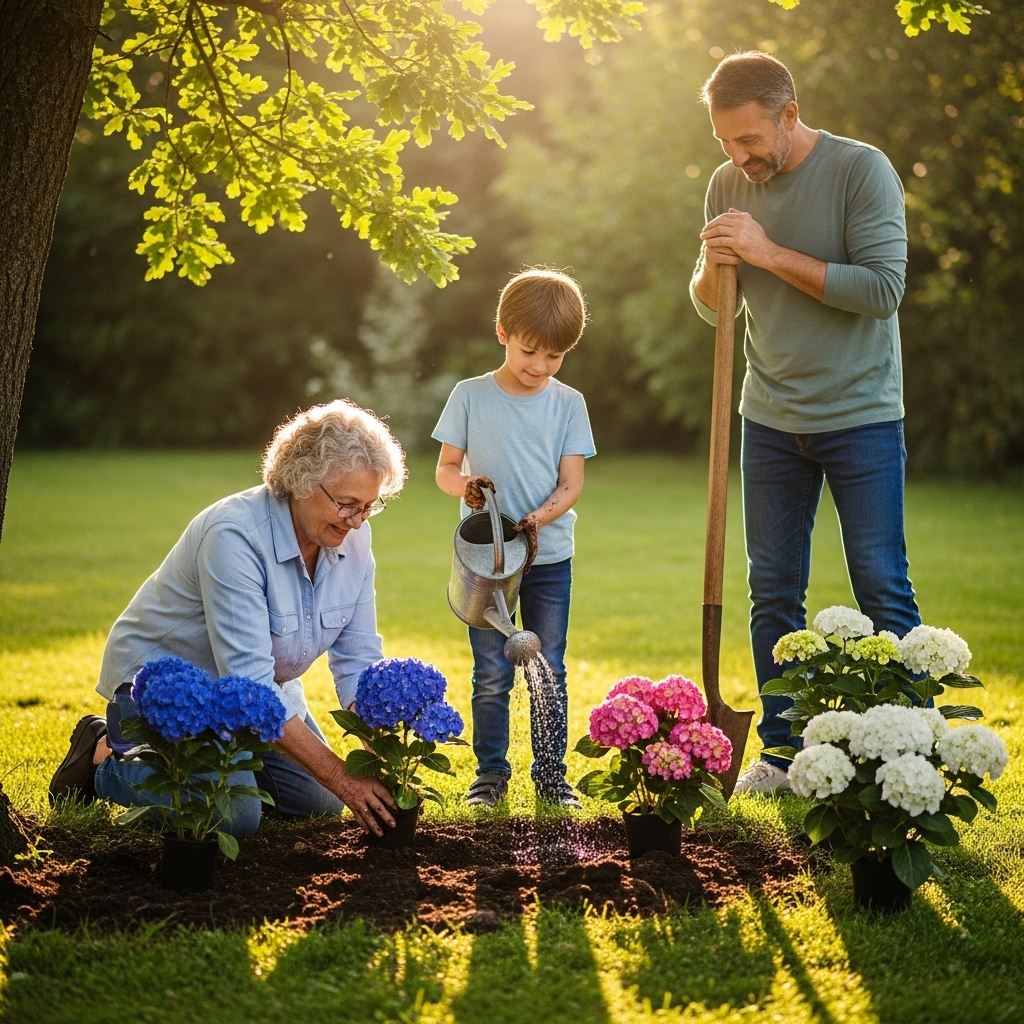
Steps to Plant Hydrangeas Correctly
Now that you’ve prepared your soil, it’s time to plant your hydrangeas! I still get excited every time I think about the planting process. There’s something magical about putting a plant into the ground and watching it grow. Here’s a step-by-step guide to ensure you plant them correctly.
Gathering Necessary Tools and Materials
Before you start digging, gather all the tools and materials you’ll need. I’ve found that having everything on hand makes the process smoother and more enjoyable. I typically use a spade or shovel, pruning shears, compost, and mulch. A watering can or hose is also essential for giving your newly planted hydrangeas a good drink. It might seem like a lot, but trust me, being prepared makes a world of difference.
Digging the Right Size Hole
When it comes to digging the hole for your hydrangeas, size matters. I’ve learned that the hole should be about twice as wide as the root ball and just deep enough so that the top of the root ball is level with the soil surface. I usually start by marking the area with a garden stake, and then I dig down, taking care to loosen the soil at the bottom. This helps the roots penetrate easily. Remember, I’ve made the mistake of planting too deep in the past, which stunted my plants’ growth.
Planting Depth and Spacing Guidelines
Once you have your hole ready, it’s time to place the hydrangea in. Carefully remove the plant from its container, loosening any tightly bound roots. I always try to tease them out gently. Place the plant in the hole, ensuring it sits at the right depth. As for spacing, I recommend giving them enough room to grow without crowding. Depending on the variety, I typically space them about 3 to 10 feet apart. This way, they have room to breathe and flourish without competing for nutrients.
Watering After Planting
After planting, I always give my hydrangeas a good drink of water. It’s crucial to help settle the soil around the roots and eliminate any air pockets. I usually soak the area thoroughly, ensuring the water reaches the root zone. In the days that follow, I keep a close eye on them, especially in the warmer months. Sometimes, I even create a small basin around the plant to hold water for a bit longer. This little trick has worked wonders for me in ensuring my hydrangeas get the hydration they need to establish themselves.
Care and Maintenance After Planting
Once you’ve planted your hydrangeas, the real journey begins! I’ve discovered that proper care and maintenance are vital for ensuring they flourish and bring vibrant blooms year after year. There’s something rewarding about nurturing these beautiful plants, and I love sharing what I’ve learned along the way.
Watering Guidelines
Watering is crucial, especially during the first few months after planting. I’ve noticed that newly planted hydrangeas need consistent moisture to establish their roots. I usually water them deeply at least once a week, but I adjust based on the weather. If it’s particularly hot or dry, I tend to check the soil more often. A good rule of thumb is to make sure the top inch of soil is dry before watering again. If it feels dry, it’s time for a drink!
Additionally, I often create a small basin around the base of the plant, which helps hold water longer and allows it to soak in rather than run off. This little trick has worked wonders for me, especially during those hot summer months when the sun is relentless.
Fertilizing Hydrangeas
Feeding my hydrangeas has been another learning experience. I’ve found that using a balanced fertilizer in early spring encourages healthy growth and vibrant blooms. When I first started, I was unsure how much to use, but I learned that following the instructions on the package is key. Too much fertilizer can harm the plants rather than help them.
In my garden, I tend to use a slow-release granular fertilizer that supports the plants throughout the growing season. I’ve also started to incorporate organic options like compost or well-rotted manure, which enrich the soil naturally and improve its structure. It’s amazing how much of a difference proper fertilization makes in promoting those stunning blooms!
Pruning Techniques for Healthy Growth
Pruning hydrangeas can feel a bit daunting, but I’ve come to enjoy it. I remember my first attempt at pruning; I was so nervous about cutting the wrong branches! However, I quickly learned it’s essential for maintaining the health and shape of the plant. The timing of pruning depends on the type of hydrangea you have. For example, I’ve found that I need to prune my bigleaf hydrangeas right after they bloom, while panicle varieties can be pruned in late winter or early spring.
When I prune, I focus on removing any dead or diseased wood and shaping the bush to encourage an open center for better air circulation. This helps prevent diseases and allows more sunlight to reach the inner branches. I usually step back after pruning to admire my handiwork—it’s incredibly satisfying to see the plants looking healthy and well-kept!
Managing Pests and Diseases
Like any garden plant, hydrangeas can face pests and diseases, but I’ve learned to stay vigilant and proactive. I’ve noticed aphids and spider mites can sometimes invade my hydrangeas, but I’ve had success using insecticidal soap or neem oil to control these pests. It’s essential to treat the plants early, as I found that a small problem can quickly escalate if left unchecked.
Additionally, I keep an eye out for signs of common diseases like powdery mildew or root rot. I’ve learned that good air circulation and proper watering techniques can help prevent many of these issues. If I see any yellowing leaves or unusual spots, I usually investigate right away to determine if it’s a pest or disease issue. I also make it a habit to clean up fallen leaves and debris around the base of my hydrangeas to minimize any potential disease risk.
Common Mistakes to Avoid
As I’ve dived deeper into the world of hydrangeas, I’ve made my share of mistakes along the way. Learning from these missteps has been a part of my gardening journey, and I want to share a few common pitfalls to help you avoid them.
Over or Underwatering
One of the biggest mistakes I made early on was not paying enough attention to my watering habits. I either overwatered or underwatered my hydrangeas, which led to wilting and poor growth. I’ve learned that consistency is key. Now, I make it a point to check the soil moisture regularly and adjust my watering schedule based on the weather and the plant’s needs.
Improper Pruning Timing
Pruning at the wrong time can seriously impact blooming. I once pruned my bigleaf hydrangeas too late in the season, resulting in fewer flowers the following year. Understanding the specific needs of the variety I’m working with has been invaluable. I always take a moment to check my plant type and adjust my pruning schedule accordingly.
Neglecting Soil Quality
Initially, I didn’t realize how crucial soil quality was for my hydrangeas. I thought I could skip testing and enriching the soil, but that led to disappointing blooms. Now, I make soil testing and amending a priority. I’ve found that investing time in improving soil quality pays off in the long run, as it creates a lush environment for my hydrangeas to thrive.
Frequently Asked Questions
What are the common types of hydrangeas?
The common types of hydrangeas include Hydrangea macrophylla (Bigleaf Hydrangea), Hydrangea paniculata (Panicle Hydrangea), Hydrangea arborescens (Smooth Hydrangea), and Hydrangea quercifolia (Oakleaf Hydrangea). Each has unique characteristics and growth habits.
How does soil pH affect hydrangea flower color?
Hydrangeas can change color based on soil pH. In acidic soils (pH below 6), they tend to produce blue flowers, while in alkaline soils (pH above 7), the flowers are more likely to be pink. This is due to the presence of aluminum in the soil, which hydrangeas absorb.
When is the best time to plant hydrangeas?
The best times to plant hydrangeas are in the spring and fall. Spring allows plants to establish roots before summer heat, while fall lets them settle in before going dormant for winter.
What sunlight conditions do hydrangeas prefer?
Hydrangeas generally prefer partial shade, especially in hotter climates. They thrive in spots that receive morning sun and afternoon shade to prevent leaf scorching.
What type of soil do hydrangeas need?
Hydrangeas prefer well-drained, rich soil that is slightly acidic to neutral (around 6.0 to 7.0 pH). Amending the soil with organic matter like compost can enhance its structure and nutrient content.
How should I water my newly planted hydrangeas?
Newly planted hydrangeas need consistent moisture to establish their roots. Water deeply at least once a week, ensuring the top inch of soil is dry before watering again. Creating a small basin around the plant can help retain moisture.
What is the importance of pruning hydrangeas?
Pruning hydrangeas is essential for maintaining their health and shape. It helps remove dead or diseased wood and promotes better air circulation, which can prevent diseases and improve blooming.
How can I manage pests and diseases in hydrangeas?
To manage pests like aphids and spider mites, early treatment with insecticidal soap or neem oil is effective. Additionally, ensuring good air circulation and proper watering can help prevent diseases such as powdery mildew and root rot.
What are common mistakes to avoid when caring for hydrangeas?
Common mistakes include over or underwatering, improper pruning timing, and neglecting soil quality. Consistency in watering, understanding pruning needs based on variety, and testing and enriching soil are key to successful hydrangea care.
How should I prepare the soil before planting hydrangeas?
Preparing the soil involves testing its pH, amending it with organic matter for richness and drainage, and ensuring it drains well to prevent root rot. This preparation is crucial for the health and success of the hydrangeas.