
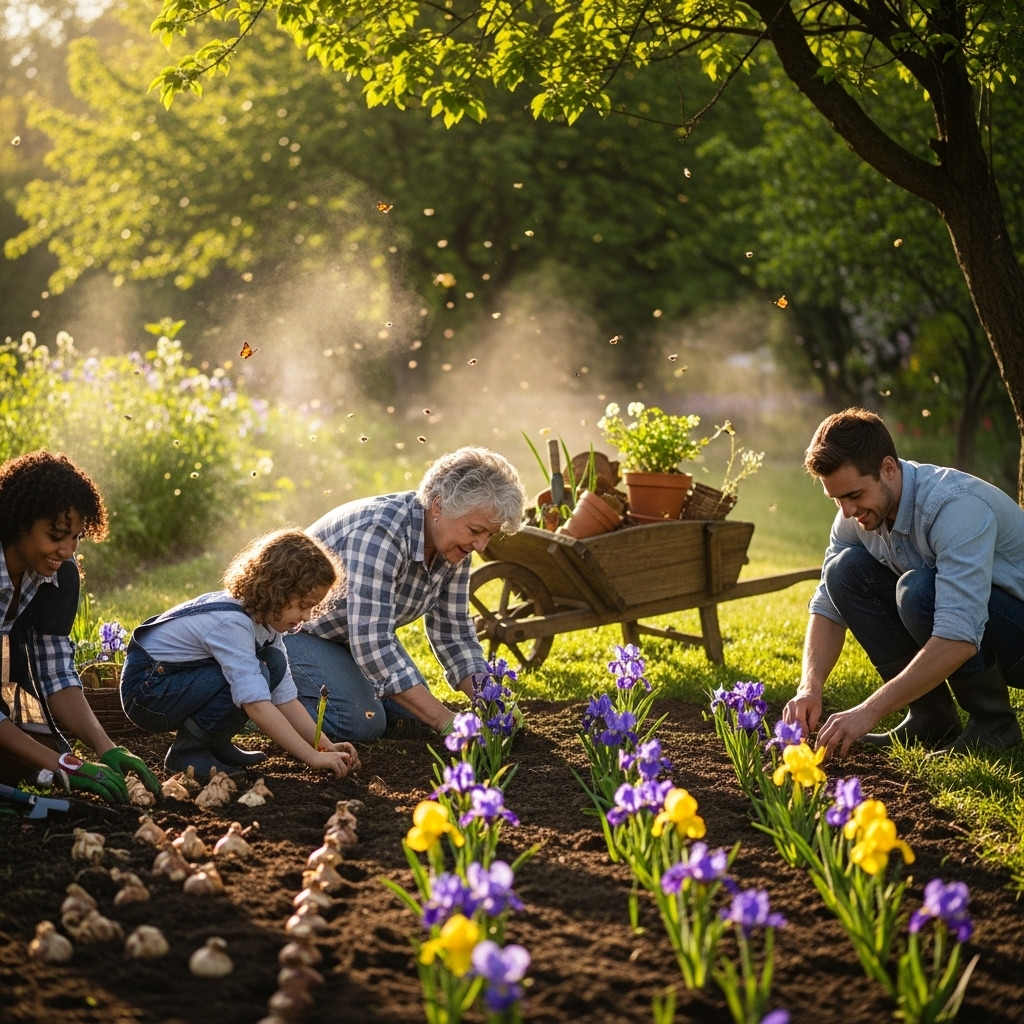
To plant iris bulbs for the best blooms, choose a sunny location with well-draining soil, and plant them at the correct depth in the fall or spring, depending on your climate. I’ve found that with the right care, these stunning flowers can transform any garden. Read Interesting article: When to Plant Iris Bulbs for Best Blooms
Understanding Iris Bulbs
What Are Iris Bulbs?
Iris bulbs are the underground storage organs of the iris plant, which store nutrients and energy to support growth and flowering. Unlike some other flowering plants that produce traditional bulbs, irises are typically categorized based on their rhizomes or tubers. The fascinating thing about iris bulbs is their ability to thrive in various conditions, making them popular among gardeners like myself. When properly planted and cared for, they can produce stunning blooms that bring joy and color to any garden.
Types of Iris Bulbs
There are many types of iris bulbs, each with unique characteristics and requirements. I’ve noticed that understanding these types helps when planning my garden. Here are a few common varieties:
Bearded Iris
Bearded irises are perhaps the most well-known type. They feature fuzzy “beards” on their petals and come in a rainbow of colors. I remember the first time I saw a garden filled with bearded irises; the vibrant colors and intricate patterns captivated me. They thrive in sunny spots and can grow up to 3 feet tall, making a bold statement in any landscape.
Beardless Iris
As the name suggests, beardless irises lack the characteristic fuzzy beard of their bearded cousins. These irises include varieties such as Siberian and Japanese irises. I find beardless irises to be equally stunning, with their elegant, straight petals. They often prefer moist soil and can add a lovely touch to garden beds or water features.
Louisiana Iris
Louisiana irises are native to wetlands and are known for their stunning blooms and vibrant colors. I’ve had great success with these in my garden, especially in areas with consistently moist soil. They grow taller than many other irises and can adapt well to varying light conditions. I appreciate how they bring a touch of the wild to my cultivated garden.
Planning Your Iris Garden
Choosing the Right Location
Location is key when it comes to planting iris bulbs. I’ve learned that choosing the right spot can make all the difference in their growth and blooming potential. Here are some factors to consider:
Sunlight Requirements
Iris plants thrive in full sun, so I always look for an area that gets at least six hours of sunlight each day. When I first planted irises in a shaded area, I noticed they didn’t bloom as beautifully as those in direct sunlight. If you’re planting bearded irises, they especially crave that sunny spot, while beardless and Louisiana irises can tolerate partial shade better.
Soil Type and Drainage
Good drainage is essential for iris bulbs because they don’t like soggy roots. I remember preparing my garden bed by ensuring that the soil was well-draining. If your soil is heavy clay, consider amending it with organic matter or sand to improve drainage. I’ve found that irises prefer slightly acidic to neutral soil, with a pH of about 6.0 to 7.0. Testing your soil before planting can help you understand what amendments might be necessary for the best results.
Designing Your Planting Layout
Once you’ve picked the perfect spot, it’s time to design the layout of your iris garden. This part of the process is almost as fun as planting!
Spacing Between Bulbs
Proper spacing is crucial for the growth of iris bulbs. I usually plant bearded irises about 12 to 24 inches apart to give them room to spread out. Beardless and Louisiana irises can be spaced a bit closer, around 12 inches apart, since they tend to grow in clumps. I’ve found that overcrowding can lead to poor air circulation, which may invite disease.
Color Combinations and Patterns
One of my favorite aspects of gardening is planning color combinations and patterns. I like to think of the layout as creating a living canvas. Mixing different colors and varieties can create a beautiful tapestry of blooms. For instance, pairing deep purple bearded irises with lighter yellows or whites can create a striking contrast. I often sketch my garden design on paper before planting to visualize how the colors will play off each other.
When to Plant Iris Bulbs
Best Planting Seasons
Timing is everything when it comes to planting iris bulbs. I’ve learned that the best seasons for planting can vary depending on where you live, and getting it right can set your flowers up for success.
Fall Planting
For many gardeners, fall is the ideal season to plant iris bulbs. I usually aim to plant in late summer to early fall, about six weeks before the first frost. This timing allows the bulbs to establish their roots before the ground freezes. I remember my first fall planting; I was so excited to see the bulbs settle into the earth, knowing that by spring, they would burst forth with life. When I plant in fall, I find that my irises tend to bloom earlier in the spring, which is always a welcome sight after winter.
Spring Planting
If you’re in a region with a milder climate, spring planting can also yield great results. I’ve tried this approach when I missed the fall window. Planting in early spring, once the soil is workable and the danger of frost has passed, allows for a vibrant summer bloom. I usually look for a period when temperatures are consistently above 50°F. However, I’ve found that spring-planted bulbs may not bloom as robustly as those planted in fall, as they don’t have as much time to settle in before the heat hits.
Regional Considerations
Understanding your local climate is crucial. Each region has its quirks, and I’ve discovered through experience that these can significantly impact my gardening success.
Climate Zones
In warmer regions, such as USDA Zones 9 and 10, I’ve noticed that irises can often thrive year-round with proper care. However, in colder zones, I’ve learned that winter protection is vital. Planting in fall is especially important for these zones, as it gives the bulbs time to strengthen their roots before the harsh winter. I like to check my local climate zone and adjust my planting schedule accordingly, ensuring that I’m giving my irises the best chance possible.
Frost Dates
Knowing the average last frost date in your area can help determine the best time for planting. I remember when I first started gardening; I was always anxiously watching the weather. In my case, I’ve found that planting too early can lead to disappointment if a late frost hits. I keep a calendar with frost dates marked, and I plan my planting around that. If you’re unsure about these dates, local gardening centers or agricultural extensions often provide helpful information tailored to your area.
Preparing for Planting
Soil Preparation
Once I’ve determined the ideal planting season, preparing the soil becomes my next focus. I can’t stress enough how important this step is. Healthy soil leads to healthy plants!
Testing Soil pH
I always start by testing the soil pH. Irises prefer a slightly acidic to neutral environment, typically between 6.0 and 7.0. When I first began my gardening journey, I often overlooked this aspect, but now I know how crucial it is. I’ve used simple soil test kits available at garden centers, which are easy to use and provide a clear picture of what my soil needs. Adjusting the pH can take time, so I make sure to do this well in advance of planting.
Adding Amendments
Once I’ve tested the soil, I consider what amendments might be needed. In my experience, adding organic matter like compost can work wonders. I remember one year, I mixed in well-rotted manure and saw a noticeable difference in growth. If my soil is too dense, I also incorporate sand or perlite to improve drainage. I always take the time to prepare my soil thoroughly, because it pays off when the irises burst into bloom! It’s like giving them a cozy, nutrient-rich bed to settle into. Read Interesting article: How to Plant on Sand Tile in RimWorld (Quick Fix Guide)
Bulb Preparation
Now that my soil is ready, it’s time to turn my attention to the bulbs themselves. Preparing them properly can make a big difference in how well they establish.
Inspecting Bulbs
I always inspect my iris bulbs before planting. I look for any signs of rot or damage. Healthy bulbs should feel firm to the touch and have no mushy spots. I’ve learned that investing a little extra time to weed out unhealthy bulbs can save me a lot of disappointment later. When I find a bulb that doesn’t meet my standards, I simply toss it aside without second thoughts.
Pre-Planting Treatments
Sometimes, I decide to soak my bulbs in a fungicide solution before planting. This step helps prevent disease and gives me peace of mind as I settle them into the ground. I usually let them soak for about 30 minutes, which, in my experience, is enough to give them a good head start. This extra effort has often led to healthier plants and more vibrant blooms.
How to Plant Iris Bulbs
Step-by-Step Planting Guide
After all that preparation, it’s finally time to plant our iris bulbs! There’s something incredibly satisfying about getting your hands in the soil and nurturing a beautiful bloom into existence. Here’s how I do it:
Digging the Hole
First, I grab my trusty garden spade and start digging. I usually make a hole that’s about 6 to 8 inches deep for most iris bulbs. It’s essential to ensure the hole is wide enough for the bulb to sit comfortably without being cramped. I remember one time, I didn’t dig deep enough, and the bulbs struggled to grow because they were too close to the surface. So, I make a point to double-check the depth, especially for varieties that can grow quite tall.
Placing the Bulb
Once the hole is ready, I carefully place the bulb in it, making sure the top of the bulb is level with the soil surface. I’ve found that planting them too deeply can hinder their growth, while leaving them exposed can lead to drying out. With bearded irises, I ensure the “shoulders” of the bulb are just at the soil line. It’s a bit like tucking them into bed—just right for a good night’s sleep! As I gently backfill the hole, I take care not to damage any roots that might start forming.
Covering and Watering
After covering the bulb with soil, I give the area a gentle pat to eliminate air pockets. Then comes the best part—watering! I make sure to give the newly planted bulbs a thorough drink, but I avoid oversaturating the area. From my experience, keeping the soil moist but not soggy is key. I usually monitor the moisture levels closely for the first few weeks until the bulbs establish themselves.
Common Planting Mistakes to Avoid
Even seasoned gardeners like myself can make mistakes, so it’s important to be aware of common pitfalls. Here are a couple of things to keep in mind as you plant your irises:
Overcrowding
One mistake I’ve made in the past is planting too many bulbs too close together. I thought I could create a lush, full display quickly, but it backfired. The overcrowded bulbs competed for nutrients and space, leading to smaller blooms and unhealthy plants. Now, I stick to the recommended spacing, and I’ve noticed a significant improvement in both growth and flowering.
Incorrect Depth
Another common error is planting at the wrong depth. If the bulbs are too deep, they may struggle to push through the soil. Conversely, if they’re too high, they can dry out. I’ve learned to be diligent about measuring and ensuring that the top of the bulb sits just above the soil. Trust me; it makes a world of difference!
Caring for Your Iris Plants
Watering Guidelines
Once our irises are planted, the care doesn’t stop there. I’ve found that watering is crucial, especially during the first few weeks. I typically check the soil moisture regularly, watering when the top inch feels dry. It’s a balancing act; I want to keep the soil moist, but I also want to avoid overwatering. I’ve seen what happens when the roots sit in water, and it’s not pretty—root rot can quickly set in!
Fertilization Tips
Feeding my irises is another vital part of their care. I like to give them a boost to promote healthy growth and blooms. Here’s what I’ve learned about fertilization:
Types of Fertilizers
I usually opt for a balanced fertilizer with an N-P-K ratio of around 10-10-10 or a fertilizer specifically formulated for bulbs. I remember trying a high-nitrogen fertilizer once, thinking it would give my irises a growth spurt, but it led to lush foliage with few flowers. Now, I stick with balanced options to support both growth and blooming.
When to Fertilize
Timing my fertilization is just as important as the type of fertilizer I choose. I typically start fertilizing in early spring, just as the shoots begin to emerge. I’ll apply another round after the first blooms fade, which helps encourage a second wave of flowers. I’ve learned that feeding them at the right times can lead to a more vibrant display in the garden. Read Interesting article: How to Plant a Peony for Stunning Blooms
Pest and Disease Management
Even with the best care, my irises can face challenges from pests and diseases. Being proactive is key to keeping them healthy.
Common Pests
I’ve encountered a few pests like iris borers and aphids over the years. To manage these nuisances, I regularly inspect my plants for any signs of trouble. If I spot any pests, I often hand-pick them off or use insecticidal soap as a gentle treatment. It’s amazing how quickly a little vigilance can pay off!
Preventing Diseases
To help prevent diseases, I ensure good air circulation by spacing my plants correctly and avoiding overcrowding. I also make a habit of cleaning up any dead leaves or debris around my iris plants, as this can harbor pests and diseases. Keeping my garden tidy has always helped me maintain healthy, vibrant plants.
Frequently Asked Questions
What are iris bulbs?
Iris bulbs are the underground storage organs of the iris plant, storing nutrients and energy to support growth and flowering. They are typically categorized based on their rhizomes or tubers.
What types of iris bulbs are there?
There are several types of iris bulbs, including Bearded Iris, Beardless Iris (such as Siberian and Japanese), and Louisiana Iris. Each type has unique characteristics and growing requirements.
What is the best location to plant iris bulbs?
Iris bulbs thrive in full sun and prefer well-draining soil. It’s best to choose a location that receives at least six hours of sunlight each day.
When is the best time to plant iris bulbs?
The best time to plant iris bulbs is in the fall or spring, depending on your climate. Fall planting is generally recommended about six weeks before the first frost, while spring planting can be done once the soil is workable and frost danger has passed.
How should I prepare the soil before planting iris bulbs?
Soil preparation involves testing the soil pH, adding organic matter or amendments to improve drainage, and ensuring the soil is well-draining. Irises prefer slightly acidic to neutral soil with a pH of about 6.0 to 7.0.
What is the recommended spacing for planting iris bulbs?
Bearded irises should be planted 12 to 24 inches apart, while beardless and Louisiana irises can be spaced around 12 inches apart, as they tend to grow in clumps.
What common mistakes should I avoid when planting iris bulbs?
Common mistakes include overcrowding the bulbs and planting at the incorrect depth. Overcrowding can lead to nutrient competition and smaller blooms, while incorrect depth can hinder growth.
How often should I water iris plants after planting?
Watering is crucial, especially during the first few weeks. The soil should be kept moist but not soggy, and you should water when the top inch of soil feels dry.
What type of fertilizer is best for iris plants?
A balanced fertilizer with an N-P-K ratio of around 10-10-10 or one specifically formulated for bulbs is recommended. It’s important to fertilize in early spring and again after the first blooms fade.
How can I manage pests and diseases in my iris garden?
Regularly inspecting your plants for pests like iris borers and aphids is key. Hand-picking pests or using insecticidal soap can help. To prevent diseases, ensure good air circulation, space plants correctly, and clean up debris around the plants.