
To plant lavender for big, healthy blooms, choose the right variety, ensure well-drained soil, provide plenty of sunlight, and follow proper watering and pruning techniques. I’ve learned that with the right care, lavender can flourish beautifully in our gardens. Read Interesting article: Planting a Spring Herb Garden: Guide for Herbal Teas
Understanding Lavender: Types and Varieties
Before diving into the planting process, it’s important to know that lavender comes in various types, each with its own unique characteristics and growing preferences. I remember feeling overwhelmed by the choices when I first started gardening, but understanding these types helped me make informed decisions. Here’s a closer look at the most popular varieties of lavender.
English Lavender (Lavandula angustifolia)
English lavender is arguably the most well-known and widely cultivated variety. I’ve found that it’s perfect for my garden, especially if you’re looking for a classic scent and beautiful purple blooms. This variety thrives in cooler climates and is particularly hardy. The flowers are often used in culinary dishes and for making essential oils, which adds to their appeal. Its compact nature makes it great for borders or in pots, allowing us to enjoy its beauty even in small spaces.
French Lavender (Lavandula dentata)
French lavender has a distinctive appearance with its frilly-edged leaves and unique flower spikes. I first encountered this variety on a trip to Provence, where its vibrant purple color caught my eye. It tends to grow taller than English lavender and prefers warmer climates. The aroma is delightful, though it’s often considered less potent than English lavender. If you live in a milder area, this variety could be a stunning addition to your garden.
Spanish Lavender (Lavandula stoechas)
Spanish lavender is known for its unique flower shape, resembling a butterfly with its tufted petals. I remember seeing this variety in a friend’s garden, and its unusual look made me fall in love with it instantly. This type is more drought-resistant and thrives in hot conditions, making it ideal for those living in warmer regions. It has a slightly different fragrance compared to the other varieties, but I find it equally enchanting. Spanish lavender is great for pollinators, so planting it can attract bees and butterflies, adding life to your garden.
Ideal Growing Conditions for Lavender
Now that we’ve explored the different types of lavender, let’s talk about the conditions they thrive in. I’ve learned through my gardening journey that understanding these requirements is key to growing vibrant plants. Lavender is a sun-loving plant that prefers specific soil and watering practices to really shine.
Soil Requirements
When it comes to soil, lavender prefers well-draining sandy or loamy soil. I remember my first attempt at planting lavender in heavy clay soil—it didn’t end well. The roots suffocated, and the plants struggled to grow. To achieve the best results, I recommend amending the soil with sand or gravel to improve drainage. A slightly alkaline pH (around 6.5 to 7.5) is also ideal, so testing your soil before planting can help you make the necessary adjustments. Read Interesting article: Gardening Nightmare? These Plants THRIVE in Poor Soil!
Sunlight and Temperature Needs
Lavender loves the sunlight! I’ve found that at least 6 to 8 hours of direct sunlight daily is crucial for healthy growth. In fact, the more sunlight, the more blooms we can expect. When selecting a planting location, I make sure to choose a spot that gets plenty of sun, even in the hot summer months. As for temperature, lavender does best in warm climates. While some varieties can tolerate light frost, they generally prefer temperatures ranging from 60°F to 75°F. I’ve seen my plants thrive when they’re kept warm but not overheated.
Watering Practices
Watering is another important factor that I learned about the hard way. Lavender is drought-tolerant, so it’s essential not to overwater. I typically let the soil dry out completely between waterings. A good rule of thumb is to water deeply but infrequently, especially during the establishment phase. After the plants are settled, I’ve found that they do remarkably well with minimal watering, depending on the climate. In fact, too much moisture can lead to root rot, which is something I always keep in mind.
When to Plant Lavender
Timing is everything when it comes to planting lavender. Over the years, I’ve learned that planting at the right time can set the stage for a healthy, thriving plant. Here’s what I’ve discovered about the best seasons and climate considerations for planting lavender.
Best Seasons for Planting
The best time to plant lavender is in the spring or fall. I prefer planting in the spring after the last frost, which usually gives the plants plenty of time to establish themselves before the heat of summer kicks in. Fall planting can work too, but it’s important to ensure that the plants have enough time to set roots before the winter chill arrives. I’ve found that spring planting leads to faster growth and more robust blooms.
Climate Considerations
Understanding your climate is crucial for successful lavender growing. If you live in a cooler area, I recommend selecting hardier varieties like English lavender. Meanwhile, those in hotter regions might find that French or Spanish lavender thrives better. I’ve also noticed that planting lavender in raised beds can improve drainage and warmth, making it an excellent choice for those in varied climates.
How to Prepare Your Planting Area
Preparing the right planting area for lavender can truly make a difference in how well your plants establish themselves. I’ve spent time learning the importance of this step, and I can say that a well-prepared area leads to healthier, more vibrant plants. Let’s break down the key aspects of prepping your space for lavender.
Choosing the Right Location
Finding the perfect spot for your lavender is essential. I’ve learned that lavender thrives in a location that gets plenty of sunlight, ideally at least 6 to 8 hours a day. I often look for a south-facing slope in my garden, as it tends to receive more direct sun and offers good drainage. If you have a choice, avoid low spots where water tends to pool, as this can lead to root rot. I remember planting my first lavender in a somewhat shaded area, and it just didn’t flourish as I had hoped. Taking the time to scout for the right spot is worth it!
Soil Preparation Techniques
Once I’ve chosen a location, I turn my attention to preparing the soil. This is the fun part for me—I love getting my hands dirty! First, I make sure to clear the area of weeds and debris. Weeds compete for nutrients and water, so starting with a clean slate is crucial. I then loosen the soil with a garden fork or tiller, which helps improve aeration and drainage. In my experience, mixing in some organic matter, like compost, can also boost the soil’s nutrient levels, setting the stage for healthy lavender plants.
Amending Soil for Optimal Growth
To create the ideal growing environment, I focus on amending my soil. Lavender prefers well-draining, sandy or loamy soil, so if your garden soil is heavy clay, you might want to add sand or fine gravel to lighten it up. I usually mix in about 30% sand to my existing soil. I also check the pH level; lavender thrives in slightly alkaline soil (around 6.5 to 7.5). If my soil tends to be too acidic, I’ve learned that adding a little lime can help balance it out. This step can feel tedious, but it’s essential for the health of the plants!
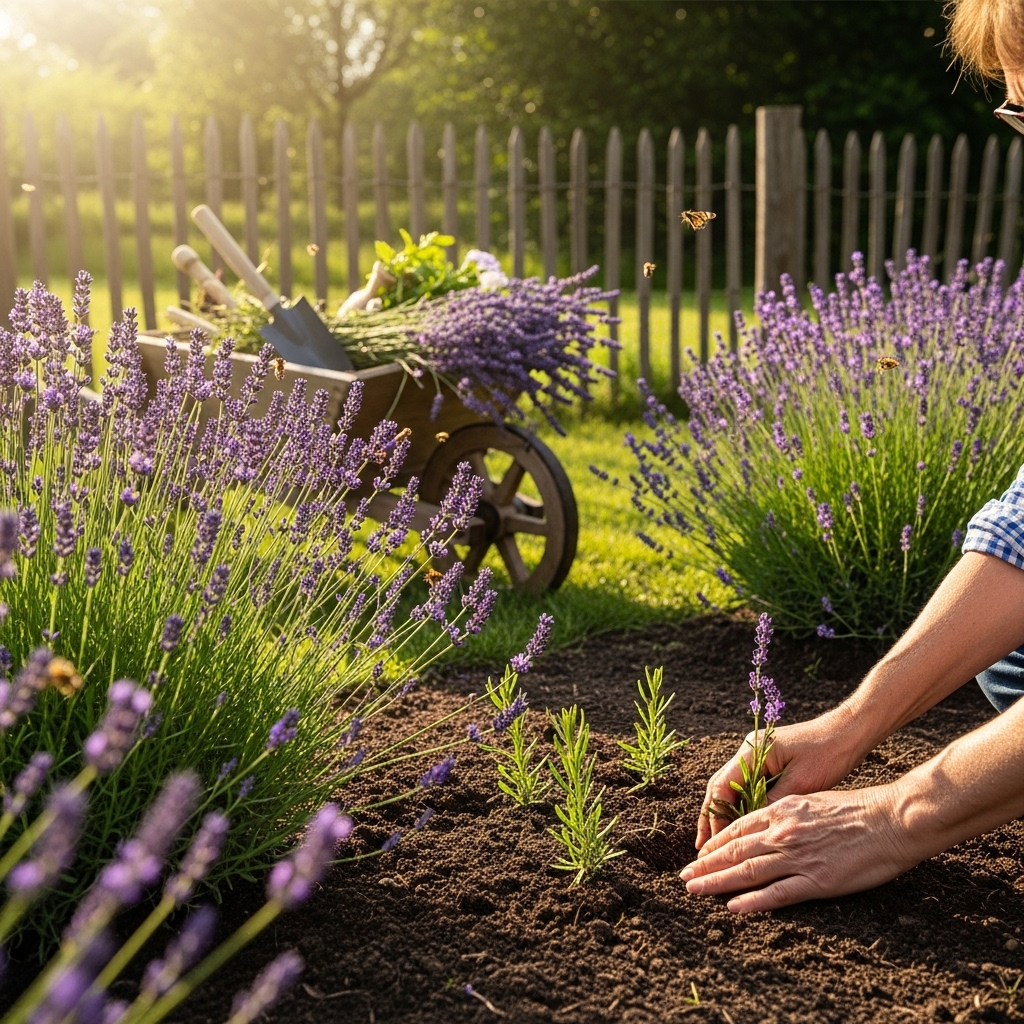
Step-by-Step Guide to Planting Lavender
Now that I have my planting area prepped, it’s time for the exciting part—planting! I’ve developed a simple process that ensures my lavender plants get off to a strong start.
Choosing Healthy Plants or Seeds
The first step in my planting process is selecting healthy plants or seeds. If I’m buying plants from a nursery, I always look for ones with vibrant green leaves and no signs of pests or disease. When I first started, I made the mistake of choosing plants that looked wilted, thinking I could revive them. Trust me, it’s better to invest in healthy specimens from the beginning! If I’m starting from seeds, I ensure they’re high-quality and suited for my climate.
Spacing and Planting Depth
Spacing is another critical factor. I’ve learned that giving my lavender enough room to grow is essential for airflow and preventing disease. Generally, I space my plants about 2 to 3 feet apart. When I plant them, I dig a hole that’s about twice the size of the root ball. I place the plant in the hole, ensuring that the crown of the plant is level with the soil surface. I used to plant too deep, thinking it would help anchor the plant, but this only led to poor growth.
Mulching Techniques
After planting, I like to apply a layer of mulch around the base of the plants. This helps retain moisture while also suppressing weeds. I often use a porous material like straw or decorative gravel, as it complements the look of lavender well. I learned the hard way that using heavy mulch can trap moisture and lead to root rot, so I stick to lighter options. Mulching not only keeps my garden looking neat, but it also creates a more stable environment for my lavender to thrive.
Post-Planting Care for Healthy Blooms
After planting, the care I give my lavender makes all the difference. I’ve discovered that maintaining the right conditions is key to achieving those big, beautiful blooms.
Watering Schedule
During the newly planted phase, I keep a close eye on my watering schedule. I usually water deeply but infrequently, allowing the soil to dry out between waterings. This helps establish strong roots. I remember overwatering my first batch and noticing how sluggish they became. Once the plants are established, I find they need very little additional water, which is perfect since I like to keep my garden low-maintenance!
Fertilizing Lavender
Fertilizing is something I approach with caution. Lavender doesn’t need a lot of extra nutrients, and I’ve read that too much fertilizer can lead to lush foliage but fewer flowers. I typically apply a balanced, slow-release fertilizer in the spring, focusing on low nitrogen content. It’s a simple step that has really helped me produce healthier blooms.
Pest and Disease Management
Finally, keeping an eye out for pests and diseases is part of my routine. Lavender is generally resistant to pests, but I’ve encountered aphids and spider mites in the past. To manage these, I’ve found that a gentle spray of water can often dislodge them. If the problem persists, I turn to organic insecticidal soap. I prefer this method because it aligns with my desire to keep my garden as natural as possible.
Pruning Lavender for Bigger Blooms
Pruning lavender is one of those tasks that might seem daunting at first, but I’ve learned that it’s an essential part of keeping the plants healthy and encouraging those magnificent blooms. I remember my initial hesitation about cutting back my plants, but over time, I’ve come to enjoy this process. Here’s what I’ve discovered about pruning lavender effectively.
When to Prune
The timing of pruning is crucial. I typically prune my lavender twice a year. The first round is in the early spring, just as new growth begins to show. This timing allows me to remove any dead or damaged stems and encourage new growth for the season. The second pruning happens after the blooming period, usually in late summer or early fall. I’ve found that this helps shape the plant and prepares it for winter. I like to keep an eye on the weather, ensuring I prune when there’s no risk of frost.
Techniques for Effective Pruning
When it comes to the actual pruning process, I’ve developed a few techniques that work well for me. I use sharp, clean pruning shears to make precise cuts, which helps prevent damage to the plant. For the spring pruning, I cut back about one-third of the plant, focusing on the woody stems while leaving the green growth intact. This encourages bushier growth and more blooms. I’ve learned to avoid cutting into the woody part of the stem, as this can hinder new growth. After harvesting the blooms in late summer, I prune again, shaping the plant to maintain its form and removing any spent flowers. This not only keeps the lavender looking tidy but also promotes new growth for the following year.
Harvesting Lavender for Maximum Bloom Quality
Harvesting lavender is one of the most rewarding parts of growing this beautiful plant. I find that the scent fills my garden and home, and it’s a delight to work with the flowers. Over the years, I’ve learned the ins and outs of harvesting to ensure I get the best quality blooms.
When to Harvest Lavender
The timing of the harvest can make a big difference in the quality of the lavender. I’ve discovered that the best time to harvest is when the buds are just beginning to open, but before they fully bloom. This is usually in mid to late summer. I take a close look at the plants, and when I see the color changing from green to purple, I know it’s time. I’ve made the mistake of waiting too long, which can lead to a more fragile flower that doesn’t dry well. Harvesting in the morning, after the dew has dried, is also ideal, as this is when the essential oils are most concentrated.
Best Practices for Harvesting
When I harvest, I use sharp shears to cut the stems, taking about 6 to 12 inches from the top, depending on the variety. I like to gather the stems into small bundles, which makes it easier for drying later. I find that keeping the bundles small ensures that they dry evenly and prevents mold from developing. After cutting, I immediately tie them together with twine or string, creating a lovely bouquet that I can hang upside down in a cool, dark place to dry. I’ve learned that good airflow is essential during the drying process, so I avoid hanging them in cramped spaces.
Storing and Using Harvested Lavender
Once the lavender is fully dried, I store it in a cool, dark place, usually in airtight containers to preserve its fragrance. I often fill small glass jars or cloth sachets, which not only look charming but also keep the lavender fresh. I love using my harvested lavender in various ways, like making lavender sachets, adding it to bath salts, or even incorporating it into culinary dishes. The versatility of lavender makes it one of my favorite herbs to grow and enjoy. Read Interesting article: Add Drama to Your Garden: Incredible Purple Leaf Plants Revealed!
Common Mistakes to Avoid When Planting Lavender
Even with all the knowledge I’ve gained over the years, I’ve still made mistakes along the way. I think it’s important to share these experiences so that others can avoid the same pitfalls. Here are some common mistakes to watch out for when planting lavender.
Overwatering Issues
Overwatering is perhaps the most common mistake I see, and I’ve certainly fallen into this trap myself. Lavender is a drought-tolerant plant, and I’ve learned that it thrives best when the soil is allowed to dry out between waterings. I remember how my first plants struggled in overly wet conditions, leading to root rot. Now, I always check the soil moisture before watering to ensure I’m not giving my plants too much water.
Choosing the Wrong Location
Choosing the right location is another critical factor. I’ve made the mistake of planting lavender in areas that didn’t receive enough sunlight. This resulted in leggy, weak plants with fewer blooms. I’ve come to realize that lavender needs full sun, so I make sure to pick spots that offer at least 6 to 8 hours of sunlight every day. Finding the right location is worth the effort!
Neglecting Pruning
Lastly, neglecting to prune lavender can lead to sparse growth and reduced blooms. I used to think that pruning was optional, but I quickly learned that regular pruning encourages bushier plants and more vibrant flowers. Keeping up with this simple task has made a big difference in the overall health of my lavender. Now, I look forward to my pruning sessions as a way to care for my plants and prepare them for the next blooming season.
Frequently Asked Questions
What are the ideal growing conditions for lavender?
Lavender thrives in well-drained sandy or loamy soil, requires at least 6 to 8 hours of direct sunlight daily, and prefers warm temperatures ranging from 60°F to 75°F.
When is the best time to plant lavender?
The best time to plant lavender is in the spring after the last frost or in the fall, ensuring the plants have enough time to establish roots before winter.
What are the different types of lavender?
The most popular types of lavender include English lavender (Lavandula angustifolia), French lavender (Lavandula dentata), and Spanish lavender (Lavandula stoechas), each with unique characteristics and growing preferences.
How should I prepare the soil for planting lavender?
Preparing the soil involves clearing the area of weeds, loosening the soil for better aeration, and amending it with sand or gravel to improve drainage. A slightly alkaline pH of around 6.5 to 7.5 is ideal.
What watering practices should I follow for lavender?
Lavender is drought-tolerant, so it’s essential to water deeply but infrequently, allowing the soil to dry out completely between waterings to prevent root rot.
How often should lavender be pruned?
Lavender should typically be pruned twice a year; the first pruning occurs in early spring to encourage new growth, and the second occurs after the blooming period in late summer or early fall.
What are some common mistakes to avoid when planting lavender?
Common mistakes include overwatering, choosing a location with insufficient sunlight, and neglecting to prune the plants, which can lead to sparse growth and reduced blooms.
How do I know when to harvest lavender?
The best time to harvest lavender is when the buds are just beginning to open, usually in mid to late summer, and after the dew has dried for maximum essential oil concentration.
What should I do after harvesting lavender?
After harvesting, the lavender should be tied into small bundles and hung upside down in a cool, dark place to dry. Once dried, it can be stored in airtight containers to preserve its fragrance.
Can lavender be used in culinary dishes?
Yes, English lavender is often used in culinary dishes, in addition to being used for making essential oils and creating lavender sachets or bath salts.