
To plant pipino successfully, start by choosing the right variety, prepare your garden properly, and ensure you provide adequate care throughout its growth cycle. I’ve found that with a little attention and the right approach, anyone can grow this refreshing fruit. Read Interesting article: Kauri Trees: The Ancient Wonders You Can Grow at Home
Understanding Pipino: The Basics
What is Pipino?
Pipino, also known as pepino dulce or sweet cucumber, is a delicious, juicy fruit native to South America. It resembles a melon and has a sweet, mild flavor, often compared to a mix of cucumber and pear. I’ve come to love its unique taste and refreshing quality, making it a delightful addition to salads, desserts, or simply enjoyed on its own. It’s a great choice for beginners like us because it’s relatively easy to grow and maintain.
Origin and History of Pipino
Pipino is believed to have originated in the Andean regions of Peru and Colombia. Historically, it was cultivated by indigenous people who recognized its value as a nutritious food source. Over time, it spread to other parts of South America and eventually made its way to other continents. I remember reading about its journey, and it’s fascinating how a fruit can travel so far and become popular in gardens around the world. Today, pipino is cultivated in various countries, and it thrives in warm climates.
Health Benefits of Pipino
This fruit isn’t just tasty; it’s also packed with health benefits. Pipino is low in calories and high in water content, making it an excellent choice for hydration. It’s rich in vitamins A and C, which are great for skin health and boosting our immune system. I’ve found that incorporating pipino into my diet has helped me feel more energetic, especially during the hot summer months. Plus, it contains antioxidants that can aid in fighting free radicals in our bodies. So, not only is it delicious, but it also contributes to our overall well-being.
Choosing the Right Variety of Pipino
Common Varieties of Pipino
When it comes to pipino, several varieties are available, each with unique characteristics. Some popular ones include the “Golden” pipino, which is sweet and has a yellow skin, and the “Green” pipino, which tends to be slightly less sweet but still very enjoyable. I remember my experience trying different varieties, and I found that the Golden pipino quickly became my favorite due to its rich flavor and vibrant appearance. Choosing the right variety can enhance your gardening experience and your taste buds!
Factors to Consider When Selecting a Variety
When selecting a variety of pipino to grow, consider factors such as your climate, available space, and personal taste preferences. Some varieties may perform better in specific climates, so it’s helpful to research what works best in your area. For instance, if you live in a cooler region, you might want to look for varieties that are more tolerant of lower temperatures. I also think about how much space I have; if you’re gardening in a small area, choosing a compact variety can make a big difference in your success. Read Interesting article: Pruning Cherry Trees for Better Sunlight Exposure
When to Plant Pipino
Best Seasons for Planting Pipino
The timing of your pipino planting is crucial for a successful harvest. I’ve learned that the best seasons for planting pipino are late spring to early summer when the risk of frost has passed, and the soil has warmed up. This is typically around May to June in many regions. Observing the weather in my area has helped me determine the perfect time to start planting. If you’re unsure, consulting a local gardening calendar can be a great help.
Understanding Climate Requirements
Pipino thrives in warm, sunny environments. Ideally, temperatures should be between 70°F and 85°F for optimal growth. I’ve noticed that when the weather is too cold or too hot, the plants struggle. If you live in a region with extreme temperatures, consider starting seeds indoors or using cloches to protect young plants from sudden changes in weather. It’s all about creating the right environment for these delicate fruits to flourish.
Preparing Your Garden for Pipino
Soil Requirements and Preparation
Proper soil preparation is essential for growing healthy pipino plants. They prefer well-draining soil rich in organic matter. I usually mix compost or well-rotted manure into my soil to enhance its fertility. A pH level between 6.0 and 7.0 is ideal, so using a soil test kit can help you determine if adjustments are necessary. Having healthy soil has made a significant difference in my gardening success, and I always take a moment to ensure it’s just right before planting.
Choosing the Right Location
Location plays a key role in the growth of pipino. They love sunlight, so selecting a spot that receives at least six hours of direct sunlight daily is crucial. I’ve found that placing them near a sunny wall or fence can give them the extra warmth they need. Additionally, ensure the area has good air circulation to prevent disease, which can be a concern in more humid environments.
Using Raised Beds vs. Ground Planting
When it comes to planting pipino, you might wonder whether to use raised beds or plant them directly in the ground. From my experience, raised beds can offer better drainage and soil control, which is beneficial for pipino. They also tend to warm up faster in the spring, giving your plants a head start. However, if you have decent soil and space in your garden, planting directly in the ground can work just as well. Just be sure to prepare the soil adequately, whether in raised beds or in-ground.
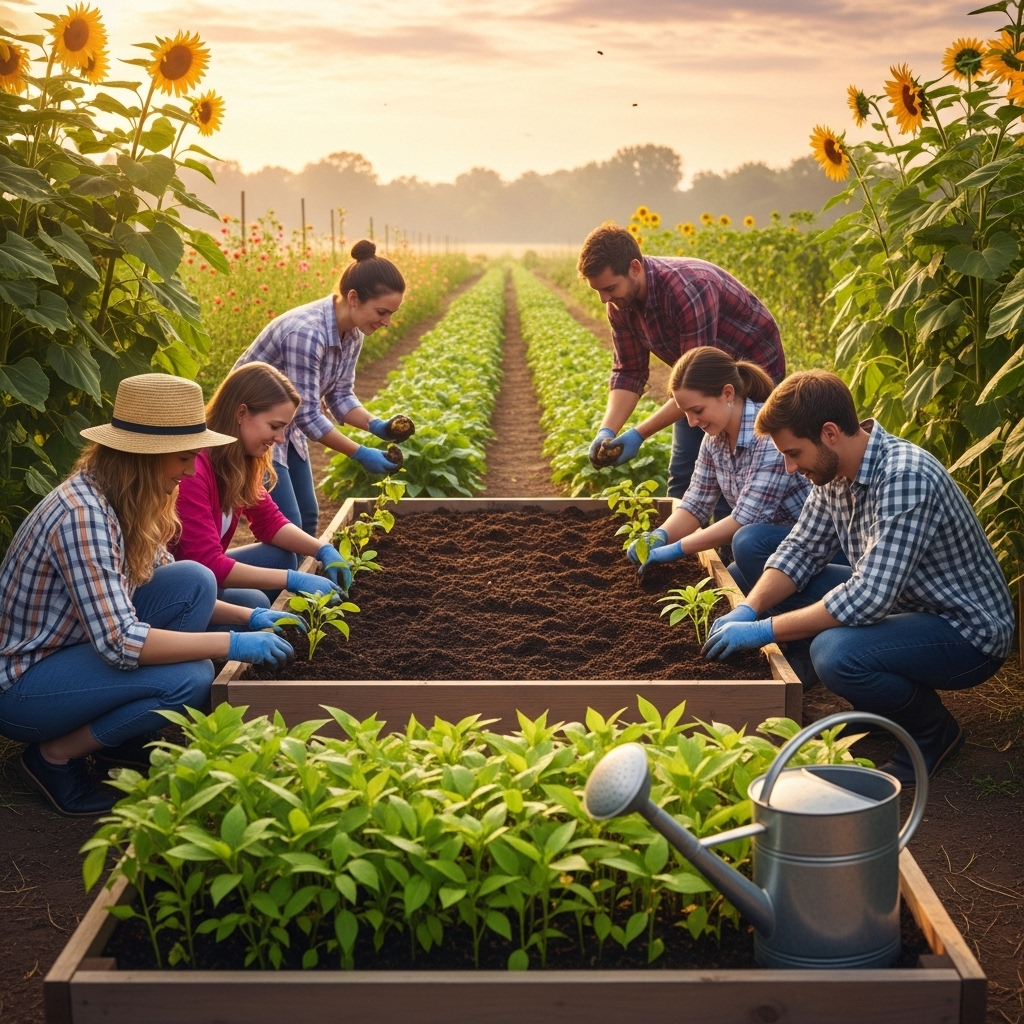
Planting Pipino: Step-by-Step Guide
Gathering Necessary Tools and Materials
Before diving into planting pipino, it’s essential to gather all the tools and materials you’ll need. I’ve learned that being prepared makes the process smoother and more enjoyable. Here’s a quick list of what you might need:
- Seeds or seedlings of your chosen pipino variety
- Garden trowel or spade
- Watering can or hose
- Compost or well-rotted manure
- Mulch (like straw or wood chips)
- Fertilizer (optional, depending on your soil quality)
- Labels and markers for identifying different varieties
Once I have everything at hand, I feel more confident tackling the planting process. Remember, it’s always better to double-check your supplies before you get started. I’ve had moments where I had to pause because I forgot a critical item!
How to Plant Pipino Seeds
Planting pipino seeds is a straightforward process that I enjoy, as it’s the first step toward growing something delicious! Here’s how I usually do it:
- Prepare the Soil: Ensure your soil is loose and well-draining. I usually mix in plenty of compost to give the seeds the best start.
- Make Holes: Create small holes in the soil about 1 inch deep. I like to space them around 2 feet apart since pipinos can spread out as they grow.
- Plant the Seeds: Drop 2 to 3 seeds in each hole. I’ve found that this increases the chances of a successful germination rate.
- Cover and Water: Gently cover the seeds with soil and water them lightly. I always make sure not to drown them, as too much water can cause seeds to rot.
After planting, I keep an eye on the moisture levels in the soil. It’s exciting to think about what’s to come as you wait for those little sprouts to appear!
Transplanting Seedlings: Timing and Techniques
If you started your pipino from seeds indoors, you’ll eventually need to transplant the seedlings outside. I remember when I first did this; I was both excited and nervous. Here are the steps I follow for a successful transplant:
- Timing is Key: Wait until your seedlings are about 3 to 4 inches tall and have developed a few leaves. I usually do this a couple of weeks after the last frost to ensure they will thrive.
- Harden Off the Seedlings: Gradually acclimate your seedlings to outdoor conditions by placing them outside for a few hours each day, increasing the time over a week. This helps prevent shock.
- Prepare the Planting Area: As previously mentioned, make sure your soil is well-prepared. When I transplant, I often dig holes that are slightly larger than the root ball of the seedling.
- Transplant Carefully: Gently remove the seedlings from their pots, being careful not to damage the roots. I place them in the holes and cover them with soil.
After transplanting, I give them a good watering and try to keep them out of direct sunlight for a day to help them adjust. I’ve found that being gentle and patient during this process ensures that my plants thrive.
Watering and Nutrient Requirements
How Much Water Do Pipinos Need?
Watering is one of the most crucial aspects of growing pipino. From my experience, these plants prefer consistent moisture but don’t like to be waterlogged. I usually aim to water them deeply once a week, ensuring the soil is moist but not soggy. If the weather is particularly hot or dry, I check the soil more frequently. I’ve learned that letting the top inch of soil dry out between waterings encourages strong root development. It’s a balancing act, but once you find that rhythm, your plants will be happy!
Best Fertilizers for Healthy Growth
Feeding your pipino plants can make a significant difference in their growth and fruit production. I often use a balanced, slow-release fertilizer when planting, which gives the plants nutrients gradually. Midway through the growing season, I like to apply a liquid fertilizer to give them a boost. I’ve noticed that this helps the plants stay healthy and productive. Just be cautious not to over-fertilize, as that can lead to excessive foliage growth at the expense of fruit production, which I learned from a less-than-stellar harvest one year!
Signs of Overwatering or Underwatering
Recognizing the signs of overwatering or underwatering is essential for keeping your pipino plants healthy. From my experience, overwatered plants often show yellowing leaves, wilting, or even root rot. If you notice these signs, it’s time to adjust your watering habits. On the flip side, underwatered plants will have droopy leaves and may even drop flowers. I’ve been there, and it’s heartbreaking to watch your hard work wilt away! Keeping a close eye on your plants and adjusting as needed has helped me achieve great results.
Pipino Care and Maintenance
Pest and Disease Management
One of the things I’ve learned while growing pipino is that keeping an eye out for pests and diseases is essential. These plants can attract various pests, including aphids, spider mites, and whiteflies. I remember my first encounter with aphids; they seemed to appear out of nowhere and quickly multiplied. To combat these pesky insects, I often use insecticidal soap or neem oil, which has worked wonders for me. I spray it on the affected areas, and it usually helps minimize the damage.
Additionally, it’s crucial to be aware of diseases like powdery mildew and root rot. I’ve found that ensuring good air circulation around the plants and avoiding overhead watering can help prevent these issues. If I notice any yellowing leaves or unusual spots, I act quickly to remove the affected parts. This proactive approach has saved many of my plants from serious harm.
Pruning and Supporting Pipino Plants
As my pipino plants grow, I’ve discovered that pruning plays a vital role in their health and productivity. I usually prune them to encourage better airflow and sunlight penetration, which is essential for fruit development. I aim to remove any dead or yellowing leaves and cut back any excessive growth that might hinder the plant’s overall energy. It’s amazing how a little pruning can result in healthier, more robust plants! Read Interesting article: How Long Does It Take for Sunflowers to Grow and Bloom?
Supporting my pipino plants has also been a game-changer. Since they can grow quite large, using stakes or trellises has helped keep them upright and off the ground. I remember the first time I didn’t provide enough support; my plants ended up sprawling everywhere, making it hard to care for them. Now, I make it a point to set up supports early on, which allows the vines to climb and flourish without getting tangled.
Mulching: Benefits and Techniques
Mulching has become a beloved practice in my garden, especially for my pipino plants. I use a layer of straw or wood chips around the base of the plants, which has multiple benefits. It helps retain soil moisture, keeps the roots cool during hot days, and suppresses weeds that can compete for nutrients. I’ve noticed that my watering routine becomes easier when I use mulch; it really helps reduce evaporation.
Another benefit of mulching is that it adds organic matter to the soil as it breaks down over time. I’ve found that using mulch also cuts down on the time I spend weeding, which is a huge plus for me! I recommend applying a 2- to 3-inch layer around the base of the plants, being careful not to pile it directly against the stems, as this can lead to rot. It’s a simple step that has made a big difference in my gardening experience.
Harvesting Pipino
When to Harvest Pipino
Harvesting pipino is one of the most rewarding parts of the gardening journey. I’ve learned that the timing of the harvest is crucial for enjoying the best flavor. Typically, pipinos are ready to harvest when they turn a golden-yellow color, and the skin is slightly soft to the touch. I remember the first time I picked one too early; it lacked the sweetness I expected! Now, I carefully monitor the fruits, checking them regularly as they approach maturity.
I’ve also found that picking pipinos just before they reach full ripeness allows for a longer shelf life, which is great if you want to store them for a while. If you’re unsure, I recommend taking a taste test—there’s nothing quite like the satisfaction of sampling a fruit straight from the garden!
How to Harvest Without Damaging the Plant
When it comes to harvesting, I’ve learned that gentle handling is key. I use a pair of garden scissors or pruning shears to cut the fruit from the vine, which helps prevent damage to the plant. If I try to pull them off by hand, I risk breaking the stems and harming the plant. I always aim to leave a small bit of stem attached to the fruit, as this helps prolong its freshness.
After harvesting, I carefully place the pipinos in a basket lined with a soft cloth to prevent bruising. I’ve had my share of unfortunate drops, and it’s heartbreaking to see a perfectly good fruit get damaged after all the hard work! Taking these extra steps has helped me enjoy my harvest longer and keeps my plants thriving for future crops.
Post-Harvest Storage Tips
Once I’ve harvested my pipinos, I want to ensure they stay fresh for as long as possible. I store them in a cool, dry place away from direct sunlight. Ideally, a refrigerator can help maintain their crispness and flavor. I’ve found that they can last up to two weeks if stored correctly, though they are best enjoyed fresh. Sometimes, I slice them up and toss them in salads or smoothies right away to savor that fresh taste.
Another tip I’ve picked up is that if I have an abundance of pipinos, I can also consider preserving them. I’ve tried making pipino salsa, and it’s been a hit at gatherings! It’s such a delightful way to share the bounty of my garden with friends and family.
Frequently Asked Questions
What is pipino?
Pipino, also known as pepino dulce or sweet cucumber, is a delicious, juicy fruit native to South America. It has a sweet, mild flavor and resembles a melon. It is easy to grow and maintain, making it a great choice for beginners.
What are the health benefits of pipino?
Pipino is low in calories and high in water content, making it excellent for hydration. It is rich in vitamins A and C, which support skin health and boost the immune system. It also contains antioxidants that help fight free radicals in the body.
When is the best time to plant pipino?
The best seasons for planting pipino are late spring to early summer, typically from May to June, after the risk of frost has passed and the soil has warmed up. Pipino thrives in warm, sunny environments with ideal temperatures between 70°F and 85°F.
What type of soil is best for growing pipino?
Pipino prefers well-draining soil rich in organic matter, with a pH level between 6.0 and 7.0. Mixing compost or well-rotted manure into the soil enhances its fertility and supports healthy growth.
How much water do pipinos need?
Pipinos prefer consistent moisture but do not like to be waterlogged. It is recommended to water them deeply once a week, ensuring the soil is moist but not soggy. The top inch of soil should dry out between waterings to encourage strong root development.
What are common pests and diseases that affect pipino plants?
Pipino plants can attract pests such as aphids, spider mites, and whiteflies. Common diseases include powdery mildew and root rot. Good air circulation and avoiding overhead watering can help prevent these issues.
How should I harvest pipino?
Pipinos are ready to harvest when they turn a golden-yellow color and the skin is slightly soft to the touch. It is recommended to use garden scissors or pruning shears to cut the fruit from the vine to avoid damaging the plant.
What should I do to store pipinos after harvesting?
After harvesting, pipinos should be stored in a cool, dry place away from direct sunlight. They can last up to two weeks in the refrigerator, though they are best enjoyed fresh. Preserving them by making salsa is also an option if there is an abundance.
What are some common varieties of pipino?
Common varieties of pipino include the “Golden” pipino, which is sweet with yellow skin, and the “Green” pipino, which is slightly less sweet. Choosing the right variety depends on factors like climate and personal taste preferences.
How can I support my pipino plants as they grow?
Supporting pipino plants can be done using stakes or trellises to keep them upright and off the ground. This helps prevent tangling and makes care easier. Pruning can also encourage better airflow and sunlight penetration for healthier plants.