
To plant potatoes for bigger harvests, choose the right seed potatoes, prepare nutrient-rich soil, and use effective planting techniques like hilling. I’ve learned these strategies through my gardening experiences, and they can lead to a bountiful potato crop.
Understanding Potatoes: Types and Varieties
When I first started my potato gardening journey, I was overwhelmed by the different types and varieties. Each type of potato has its unique characteristics, and understanding them can significantly affect your harvest. Potatoes are categorized mainly into two groups: waxy and starchy. Waxy potatoes are great for boiling and salads, while starchy potatoes are perfect for baking and frying. Knowing the difference can help you choose the right potato for your meals.
Common Potato Varieties
Some of the most common potato varieties include:
- Russet Potatoes: These are the classic baking potatoes, known for their fluffy texture.
- Yukon Gold: A favorite for its buttery flavor and versatility in cooking.
- Red Potatoes: Great for salads and roasting, they hold their shape well.
- Fingerling Potatoes: Their unique shape and rich flavor make them a gourmet choice.
- New Potatoes: These are young potatoes that are harvested early for a delicate taste and tender skin.
Each variety has its strengths, so I recommend experimenting with a few to see which ones you enjoy the most. I remember trying Yukon Gold for the first time, and I was blown away by the taste!
Best Potatoes for High Yields
For a bigger harvest, some potato varieties stand out. I’ve had excellent results with Russet Burbank and Yukon Gold for their high yield potential. These varieties not only grow well in various conditions, but they also produce large, healthy tubers. If you’re in a cooler climate, Caribe or Norland can also offer good yields. When selecting a variety, think about your climate and the cooking methods you prefer.
Choosing Seed Potatoes
Choosing the right seed potatoes is crucial for a successful harvest. I often recommend looking for certified seed potatoes rather than using store-bought ones. Certified seed potatoes are disease-free and specifically grown for planting. When you pick your seed potatoes, look for those that are firm and free from blemishes. I also suggest cutting larger potatoes into chunks, ensuring each piece has at least one eye, which will sprout into a new plant. This method has worked wonders for me!
Preparing for Planting Potatoes
Before planting, preparation is key. I’ve learned that taking the time to prepare the soil and choose the right location can make a significant difference in the health and yield of my potato plants.
Soil Requirements
Potatoes thrive in well-drained, loose soil that’s rich in organic matter. I always make sure to amend my soil with compost or well-rotted manure before planting. This not only helps provide essential nutrients but also improves soil structure. Aim for a soil pH of around 5.8 to 6.5 for optimal growth. I remember the first year I neglected to check my soil, and my potatoes didn’t grow as well as I hoped. Lesson learned!
Choosing the Right Location
Finding the perfect spot for your potatoes is essential. Potatoes need full sun, so I always look for a location that gets at least 6-8 hours of sunlight each day. I’ve found that raised beds work well because they drain better and warm up faster in the spring. They also help keep my potatoes away from pests that can lurk in the soil.
Testing Soil pH and Nutrients
Before planting, I recommend testing the soil to determine its pH and nutrient levels. Local garden centers often sell testing kits, or you can send samples to a lab for a more thorough analysis. In my experience, knowing my soil’s nutrient content helps me decide which amendments to add. A balanced soil is vital for strong potato plants.
Preparing the Soil: Tilling and Amending
Tilling the soil is another important step. I use a garden fork or tiller to break up the soil to a depth of about 12 inches. This helps with aeration and allows the roots to grow freely. After tilling, I mix in compost or organic fertilizers to improve the nutrient content. I’ve seen a noticeable difference in growth when I take this step seriously, and it really sets my potatoes up for success!
When to Plant Potatoes
Timing is everything when it comes to planting potatoes. I’ve found that getting the planting date right can make a world of difference in the yield and health of my crop. Over the years, I’ve learned to pay close attention to the weather and soil conditions to ensure a successful start.
Optimal Planting Dates
In general, potatoes are best planted in early spring, after the last frost date in your area. I usually plant my seed potatoes about 2-4 weeks before the last expected frost. This timing allows the plants to establish themselves before the heat of summer kicks in. I remember my first year trying to rush the planting, and I learned the hard way when a late frost wiped out my young plants. Now, I always keep an eye on local frost calendars and use that as my guide.
Understanding Frost Dates
Frost dates can vary quite a bit depending on where you live. I’ve found that checking the USDA Plant Hardiness Zone Map for my area helps me understand when I can expect the last frost. In my experience, if you’re unsure, it’s better to err on the side of caution and wait a little longer than to plant too early and risk frost damage. Plus, potatoes can tolerate light frosts once they’re established, but tender young shoots are much more vulnerable.
Signs That It’s Time to Plant
Aside from frost dates, I also look for other signs that it’s time to plant. One of my favorite indicators is the soil temperature. I try to wait until the soil has warmed to around 45-50°F (7-10°C), which is usually just right for potatoes. I often check the soil with a simple thermometer, or I dig down a few inches to feel if it’s warm enough. When I notice that the soil is dry enough to till and has warmed up, I know it’s time to get my hands dirty.
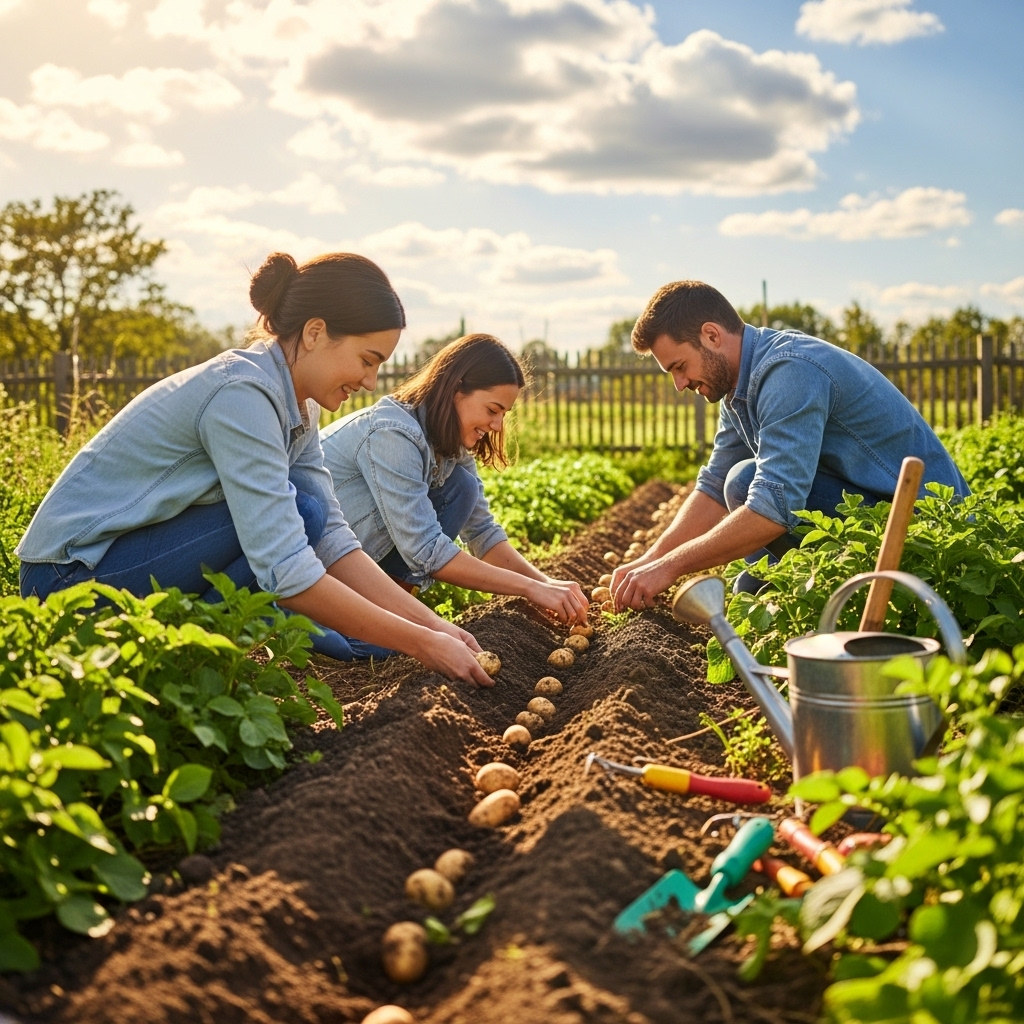
Planting Techniques for Bigger Harvests
Once I’ve determined the right time to plant, I turn my attention to the methods I’ll use for planting. I’ve experimented with various techniques, and each has its strengths. I’ve found that how I plant can directly affect the size and yield of my potatoes.
How to Cut Seed Potatoes
Cutting seed potatoes is an essential step in maximizing my harvest. I usually choose larger potatoes and cut them into chunks, making sure each piece has at least one eye. This is crucial because each eye has the potential to produce a new plant. I like to let the cut pieces sit for a day or two before planting to allow the cut surfaces to callous over. This helps prevent rot and disease. I remember one year when I skipped this step, and it didn’t end well for my crop!
Planting Depth and Spacing
Getting the depth and spacing right is also key. I typically plant my seed potato pieces about 4 inches deep and space them around 12 inches apart in rows that are about 2-3 feet apart. This gives each plant enough room to grow while allowing me to hill them later. I’ve learned that if I crowd my potatoes, I can end up with smaller yields. For more information on the optimal planting depth, check out How Deep Do You Plant Potatoes? Correct Depth Guide!
Using Hilling Techniques
Hilling is a technique I swear by for encouraging bigger harvests. After my potato plants grow to about 6 inches tall, I mound soil around the base of each plant. This process not only supports the plant but also encourages more tuber development. I’ve noticed that hilling helps prevent the tubers from turning green and becoming toxic due to sunlight exposure. I find it quite satisfying to see my plants grow taller as I hill them up!
Choosing the Right Planting Method: Trench vs. Mound
When it comes to planting methods, I’ve tried both trenching and mounding with different results. Trenching involves digging a ditch where I place the seed potatoes and then cover them with soil. This method can be easier for planting, but I’ve found that mounding tends to produce better yields for me. Mounding allows for better drainage and soil warmth, which I think are essential for healthy growth. Each method has its advantages, but I’ve definitely leaned towards mounding as my go-to.
Ultimately, I believe that experimenting with these techniques can help us find what works best for our specific conditions. Each year brings new challenges, and I’ve learned to adapt my methods based on my experiences and what I observe in the garden. Happy planting!
Watering and Fertilization Strategies
After planting, I’ve learned that one of the most crucial aspects of growing potatoes is understanding their watering and fertilization needs. Proper moisture and nutrients can significantly impact the size and quality of my harvest. Over the years, I’ve developed a routine that helps me keep my potato plants thriving.
Understanding Potato Water Needs
Potatoes require consistent moisture, especially during their growing season. I usually water my plants deeply to encourage deep root growth, which helps them access moisture from the soil. I’ve found that about 1-2 inches of water per week is ideal, depending on the weather conditions. I remember a particularly dry summer when I had to be extra diligent about monitoring the moisture level in my garden. I used a simple method—just sticking my finger a couple of inches into the soil to see if it felt dry. When I noticed the top inch of soil was dry, I knew it was time to give them a good drink!
Best Fertilizers for Potatoes
Fertilizing my potato plants has made a significant difference in my yields. I typically choose fertilizers that are high in potassium and phosphorus, as these nutrients are essential for tuber development. I often use a balanced fertilizer with an N-P-K ratio of about 5-10-10. When I apply fertilizer, I make sure to do it during the growing season—usually a few weeks after planting and again when the plants are flowering. I’ve found that side-dressing with some organic fertilizer, like fish emulsion or a compost tea, really gives my potatoes the boost they need.
Organic vs. Chemical Fertilizers
In my garden, I’ve tried both organic and chemical fertilizers, and I’ve noticed some differences. Organic options, like compost and well-rotted manure, enrich the soil and improve its structure over time. They also promote beneficial microbes that help with nutrient uptake. On the other hand, chemical fertilizers can provide a quick nutrient boost, which can be useful if my plants seem to be lacking. I’ve come to prefer organic methods for the long-term health of my soil, but I keep chemical options on hand for emergencies. It’s all about finding that balance that works for me and my garden.
Timing Your Watering Schedule
Timing my watering is just as important as the amount. I’ve learned that watering early in the morning is best because it allows the plants to absorb moisture throughout the day without the risk of evaporation. I’ve also found that watering right before a rainstorm can be counterproductive; plants can end up sitting in too much water, which can lead to rot. During the hottest parts of summer, I’ve noticed that my potatoes tend to need a little extra attention, so I might increase the frequency of my watering. Keeping an eye on weather forecasts has helped me adjust my schedule as needed.
Pest and Disease Management
Pest and disease management is another area where I’ve had to learn through trial and error. Potatoes can be susceptible to a variety of pests and diseases, so being proactive is vital for a successful harvest.
Common Potato Pests
One of the pests I often encounter is the Colorado potato beetle. These little guys can wreak havoc on my plants if I don’t catch them early. I’ve found that hand-picking them off the plants is effective, though it can be a bit tedious. Other pests, like aphids and wireworms, can also be problematic. I’ve started using companion planting to help deter pests. For instance, planting marigolds nearby has helped reduce the number of aphids in my garden.
Identifying Potato Diseases
Potato diseases can be sneaky, and I’ve had my share of disappointments with blight and scab. I’ve learned to look for early signs, such as yellowing leaves or dark spots, which can indicate disease. Prevention is key, so I try to rotate my crops each year to avoid soil-borne diseases. This strategy has helped keep my plants healthier and more productive.
Preventative Measures and Treatments
To further safeguard my potato plants, I focus on preventative measures. I make sure to practice good sanitation by cleaning up any plant debris at the end of the season. I’ve also started using disease-resistant varieties, which have made a noticeable difference in my garden. When I do spot disease, I often turn to organic treatments like neem oil or diatomaceous earth, which can be effective and less harmful to beneficial insects.
Natural Pest Control Options
In my quest for a healthy garden, I’ve explored various natural pest control options. Beneficial insects, like ladybugs and lacewings, are great allies in keeping pest populations in check. I’ve planted flowers that attract these helpful bugs, creating a more balanced ecosystem. I’ve also experimented with homemade sprays, like garlic or hot pepper solutions, which can deter certain pests without harming my plants. It’s been rewarding to see how these natural methods can work alongside my crops.
Harvesting Your Potatoes
Once I’ve navigated the challenges of watering, fertilizing, and pest management, the time finally comes to harvest my potatoes. This is one of my favorite parts of the gardening process. The anticipation builds as I watch my plants grow and flourish!
Frequently Asked Questions
What are the two main categories of potatoes?
Potatoes are categorized mainly into two groups: waxy and starchy. Waxy potatoes are great for boiling and salads, while starchy potatoes are perfect for baking and frying.
Which potato varieties are recommended for high yields?
For a bigger harvest, Russet Burbank and Yukon Gold are recommended for their high yield potential. Caribe and Norland are also good options for cooler climates.
What should I look for when choosing seed potatoes?
When choosing seed potatoes, look for certified seed potatoes that are disease-free. They should also be firm and free from blemishes. Cutting larger potatoes into chunks with at least one eye per piece can also promote better growth.
What soil conditions are best for growing potatoes?
Potatoes thrive in well-drained, loose soil rich in organic matter with a pH level of around 5.8 to 6.5. Amending the soil with compost or well-rotted manure is beneficial for nutrient content and soil structure.
When is the best time to plant potatoes?
Potatoes are best planted in early spring, about 2-4 weeks before the last expected frost. It’s important to check local frost calendars to determine the right planting date.
How deep should I plant seed potatoes?
Seed potatoes should be planted about 4 inches deep, with spacing of around 12 inches apart in rows that are about 2-3 feet apart to allow for proper growth and hilling later on. For additional insights, refer to How Deep to Plant Potatoes for Best Growth.
What is hilling, and why is it important?
Hilling is a technique involving mounding soil around the base of potato plants as they grow. This supports the plants, encourages more tuber development, and helps prevent tubers from turning green due to sunlight exposure. You can get more tips on planting methods in How to Plant Sweet Potatoes (Easy Step-by-Step).
What watering needs do potato plants have?
Potatoes require consistent moisture, needing about 1-2 inches of water per week. Deep watering encourages deep root growth, which is essential for accessing moisture from the soil.
What are some common pests that affect potato plants?
Common potato pests include the Colorado potato beetle, aphids, and wireworms. Hand-picking pests and using companion planting can help deter these issues.
What should I do if I notice signs of disease in my potato plants?
If you notice signs of disease, such as yellowing leaves or dark spots, it’s important to rotate crops to avoid soil-borne diseases. Using disease-resistant varieties and organic treatments like neem oil can also help manage the problem.