
To plant potatoes the right way, start with high-quality seed potatoes and prepare your soil by ensuring it’s well-drained and nutrient-rich. Following the correct planting technique and care will lead to a bountiful harvest.
Understanding Potatoes: Types and Varieties
When I first decided to grow potatoes, I found myself overwhelmed by the variety of options available. Potatoes come in different shapes, sizes, and colors, each with its own unique taste and texture. Understanding the types of potatoes is crucial to ensuring your satisfaction with the harvest.
Common Potato Varieties
There are several types of potatoes that are common in home gardens. Some of my favorites include:
- Russet Potatoes: These are starchy and perfect for baking and frying. Their rough skin and fluffy interior make them a popular choice.
- Yukon Gold: A waxy variety with a buttery flavor that works well for boiling and roasting. I love using these for mashed potatoes.
- Red Potatoes: Their smooth skin and firm texture make them great for salads and roasting. They hold up well during cooking.
- Fingerling Potatoes: These are small, elongated potatoes that come in various colors. They’re excellent for roasting and add a visual appeal to dishes.
Each variety has its own growing requirements and taste, so I recommend experimenting with a few different types to see which ones you enjoy the most.
Choosing the Right Type for Your Climate
Climate plays a significant role in the success of your potato crop. I remember the first time I planted potatoes; I didn’t consider how the local weather would affect my garden. Potatoes thrive in cooler climates, typically between 60°F and 70°F. If you live in a warmer area, you might need to plant earlier in the season to avoid the heat of summer.
Additionally, certain varieties may perform better in specific regions. For example, if you’re in a humid area, consider growing varieties that are resistant to diseases common in moist conditions. I realized that researching local growing conditions and talking to fellow gardeners helped me make the best choices.
Preparing to Plant Potatoes
Once I understood the types of potatoes, I moved on to preparing for planting. This part is essential because proper preparation can lead to a successful crop.
When to Plant Potatoes
The timing of planting is crucial. I learned the hard way that planting too early can lead to frost damage. Generally, potatoes should be planted about two to four weeks before the last expected frost date in your area. I found that checking local frost dates online or through gardening apps was incredibly helpful. In my case, I aimed for mid-April, which worked perfectly.
Choosing the Right Location
Selecting the right location in your garden can make a significant difference. Potatoes thrive in full sun, so I always look for a spot that gets at least six hours of sunlight daily. I remember clearing out an area that used to be shaded by trees, and once those were trimmed back, my potatoes flourished. Good air circulation is also essential; overcrowded plants can lead to disease.
Soil Requirements for Potatoes
Potatoes prefer well-drained soil with plenty of organic matter. When I first started, I didn’t pay much attention to soil quality, which led to disappointing yields. I discovered that loose, loamy soil allows potatoes to grow without restrictions. Aim for a soil pH of around 6.0 to 6.8 for optimal growth. Testing your soil with a simple kit can provide valuable insights.
Preparing the Soil
Preparing your soil is a task that I look forward to every season. I start by tilling the soil to break it up and improve aeration. Adding compost or well-rotted manure enriches the soil and boosts fertility. I like to mix in some organic matter a few weeks before planting to allow it to integrate into the soil. This not only helps in providing nutrients but also improves drainage, which is crucial for potato growth.
After mixing in the compost, I usually level the soil and remove any large rocks or debris. This step is essential, as I’ve learned that potatoes need room to grow without any obstructions. I often take a moment to admire the freshly prepared soil – it’s like a blank canvas waiting for the artwork to begin.
Tools and Supplies Needed
As I dove deeper into potato gardening, I quickly realized that having the right tools and supplies made all the difference. At first, I thought I could get by with just a spade and some seeds, but I soon learned that a well-equipped gardener is a happy gardener.
Essential Gardening Tools
When I began my journey, I gathered a set of essential tools that I still rely on today. Here’s what I consider must-haves for any potato gardener:
- Garden Fork: I use this for loosening soil and mixing in compost. It’s great for breaking up compacted earth, which is so important for healthy potato growth.
- Hand Trowel: This small tool is perfect for digging individual planting holes and removing weeds that try to invade my potato patch.
- Rake: I find a rake useful for leveling the soil and clearing away debris. It helps create a smooth surface for planting.
- Watering Can or Hose: Adequate watering is crucial, so having a reliable watering source is non-negotiable for me.
- Garden Gloves: Protecting my hands is important. Good gloves keep them clean and safe from thorns or splinters while I work.
These tools have become my trusty companions in the garden, making tasks easier and more enjoyable. I can’t imagine working without them!
Seed Potatoes vs. Grocery Store Potatoes
One of the decisions I faced early on was whether to use seed potatoes or just grab some from the grocery store. I remember feeling tempted to use the standard potatoes I found in the produce aisle, thinking they would work just as well. However, I soon learned that seed potatoes are specifically bred for planting and yield much better results.
Seed potatoes are certified disease-free and come in a variety of types tailored for growing. Grocery store potatoes can carry diseases or be treated with chemicals that inhibit sprouting. I decided to invest in high-quality seed potatoes from a local nursery, and I’ve never looked back. The difference in my harvest was noticeable, and it was worth every penny.
Fertilizers and Amendments
As I prepared my soil, I also learned about the importance of fertilizers and soil amendments. In my early gardening days, I didn’t really understand how nutrients affected plant growth. I was surprised to find out that potatoes need specific nutrients, particularly nitrogen, phosphorus, and potassium.
I recommend using an all-purpose fertilizer that’s balanced, like a 10-10-10 mix. I usually mix this into the soil about a week before planting. Additionally, I often incorporate organic matter like compost to enhance soil structure and fertility. The first time I added compost, I could almost feel the soil come alive, and my potatoes thrived like never before.
Sometimes, I also sprinkle some bone meal or fish emulsion at planting time, as they provide a good source of phosphorus for strong root development. It’s amazing how a little extra care can make such a big difference in my garden.
Step-by-Step Guide to Planting Potatoes
Now that I had everything ready, the excitement of planting potatoes was palpable. I remember counting down the days until I could finally get my hands in the soil. Here’s the step-by-step process I follow to plant my potatoes effectively.
Step 1: Chitting Seed Potatoes
Before planting, I always chit my seed potatoes. This means I allow them to sprout before putting them in the ground. I lay them out in a cool, light area for a couple of weeks, which encourages sprouting. I find that this helps them get a head start and leads to a more robust harvest. The first time I tried it, I was amazed at how quickly the eyes developed into little sprouts.
Step 2: Cutting Seed Potatoes
If my seed potatoes are large, I cut them into pieces, ensuring that each piece has at least one or two eyes. I’ve found that cutting them a day or two before planting allows the cut surfaces to heal, which helps prevent rot. It’s a bit nerve-wracking for me to cut them, but I’ve learned that it encourages better growth. My first batch of cut seed potatoes surprised me with their vigor!
Step 3: Digging Trenches
Once the seed potatoes are ready, I dig trenches about 4-6 inches deep and 2-3 feet apart. This is an exciting part! I take my time to ensure that the trenches are straight and evenly spaced. I love the feel of the soil as I dig — it’s like creating little homes for my future potatoes. I usually make a few trenches and step back to admire my work before planting.
Step 4: Planting Seed Potatoes
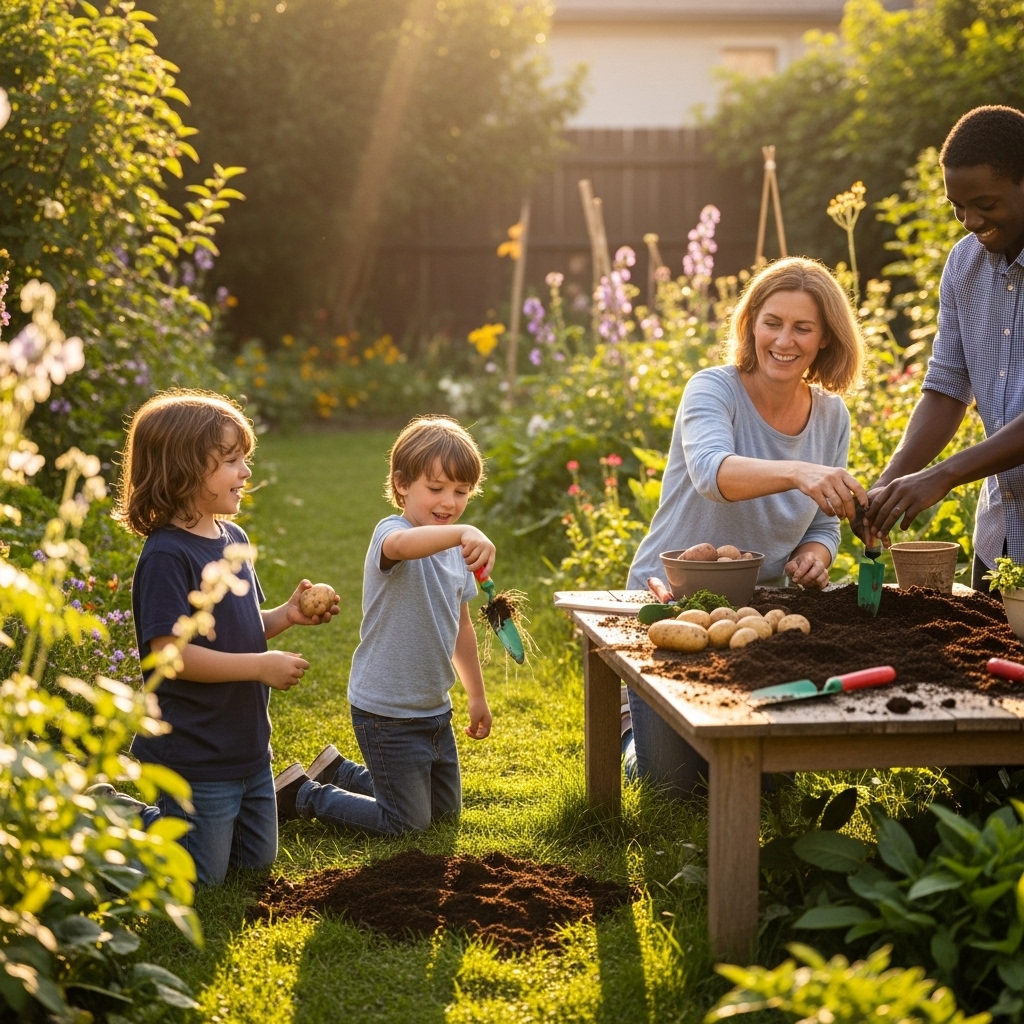
Now comes the fun part: planting! I drop the seed potato pieces into the trenches, spacing them about 12 inches apart. I try to keep the sprouts facing up, as I believe this gives them the best chance to thrive. As I cover them with soil, I can’t help but feel a sense of hope and excitement for the season ahead.
Step 5: Covering and Watering
After covering the potatoes with soil, I give the area a gentle watering. I remember the first time I planted, I was so eager that I watered too much, leading to puddles. Now, I water just enough to moisten the soil without over-saturating it. This is crucial for giving the potatoes a solid start while preventing rot. I often find myself checking the moisture levels every few days, eager to see how my little plants are doing.
Care and Maintenance After Planting
After all the excitement of planting, I realized that the journey doesn’t end there. Taking care of my potato plants as they grow is crucial for a successful harvest. I’ve learned that proper care can make a world of difference. Here’s how I maintain my potato plants.
Watering Guidelines
I can’t stress enough how important watering is for potato plants. Initially, I was unsure about how much water they really needed. Potatoes need consistent moisture, especially during the early stages of growth. I try to keep the soil evenly moist but not soggy. To do this, I water my plants about once a week, depending on the weather. I remember a particularly hot week when I noticed the leaves starting to droop; that was a wake-up call! Now, I keep a close eye on the soil moisture and adjust my watering schedule based on the temperature and rainfall.
When it comes to watering, I prefer to use a soaker hose. This way, the water seeps into the soil slowly and deeply, which encourages the roots to grow deeper. I love watching my potato plants flourish when they have just the right amount of water.
Fertilizing During Growth
As my potato plants grow, I know that they require additional nutrients to support their development. I learned that applying fertilizer during the growing season can boost my harvest. About four weeks after planting, I usually apply a second dose of that balanced 10-10-10 fertilizer I mixed in before planting. I sprinkle it around the base of the plants, being careful not to let it touch the stems directly.
In addition to the balanced fertilizer, I also like to use some organic options, such as compost tea or fish emulsion, every few weeks. I find that these organic fertilizers give my plants an extra boost and help maintain a healthy soil ecosystem. The first time I used compost tea, I was amazed at how vibrant my plants looked afterward!
Weed Control Strategies
Weeds can be a gardener’s worst nightmare, and I quickly learned that they compete with my potatoes for nutrients and water. In my early gardening days, I didn’t pay much attention to weed control, and it ended up costing me. Now, I make it a priority to keep my potato patch weed-free. I usually hand-pull weeds as soon as I see them, especially when they’re small. This has become somewhat meditative for me, and I enjoy spending quiet moments in the garden just pulling weeds.
Another tip I discovered is to use mulch around my potato plants. Applying a layer of straw, grass clippings, or wood chips not only keeps weeds at bay but also helps retain moisture in the soil. Whenever I see my freshly mulched garden bed, I feel a sense of accomplishment. It looks tidy and is helping my potatoes thrive!
Pest and Disease Management
As my potato plants grow, I always stay on the lookout for pests and diseases. I remember my first year when aphids invaded my plants, and I felt overwhelmed. I quickly learned the importance of being proactive. Now, I regularly inspect the leaves for any signs of trouble. If I spot any pests, I use insecticidal soap or neem oil to treat them. I find that these organic options are effective and safe for my garden.
Diseases can be tricky, but I’ve had good luck with crop rotation. I avoid planting potatoes in the same spot year after year, which helps reduce the risk of soil-borne diseases. Another preventive measure is to ensure my plants have good air circulation. I always take the time to thin them if they start to crowd each other, as this helps reduce humidity and the risk of disease. It’s a small effort, but it makes a big difference!
Harvesting Potatoes
After weeks of care and maintenance, the moment I’ve been waiting for finally arrives: harvesting my potatoes! It feels like unwrapping a present.
Signs That Potatoes Are Ready to Harvest
Knowing when to harvest can be tricky, but I’ve learned to look for specific signs. Typically, I wait until the plants flower and the foliage starts to yellow and die back. At this point, I can almost feel the excitement bubbling inside me! I’ve discovered that for early potatoes, I can start harvesting when the plants are still green, which is such a treat. The first time I tried it, the little new potatoes tasted amazing.
For main crop potatoes, I usually wait until the tops have completely died back. I remember the first time I pulled potatoes up from the ground; it was like digging for treasure! The anticipation as I unearthed each tuber was indescribable. I can still picture the satisfaction on my face when I saw those plump, healthy potatoes emerge from the soil.
How to Harvest Potatoes Properly
Harvesting can be a bit of a delicate process. I usually use a garden fork to gently lift the potatoes from the soil. It’s important for me to be careful not to stab or bruise them. I’ve learned that starting from the edges of the planting area and working my way in is the best approach. After I’ve unearthed a few, I like to give them a quick rinse to remove any dirt before bringing them inside.
Once I’ve gathered my harvest, I spread the potatoes out in a cool, dark place to cure for a few days. This step helps them develop better flavor and prevents spoilage. I can hardly wait to cook with them! The feeling of digging up my hard work and seeing those beautiful potatoes is one of the most rewarding experiences I’ve had as a gardener.
Frequently Asked Questions
“`html
What are the best types of potatoes to grow in a home garden?
Some common potato varieties for home gardens include Russet Potatoes, Yukon Gold, Red Potatoes, and Fingerling Potatoes. Each variety has unique growing requirements and taste.
What is the ideal climate for growing potatoes?
Potatoes thrive in cooler climates, typically between 60°F and 70°F. In warmer areas, it’s advisable to plant earlier in the season to avoid the heat of summer.
When is the best time to plant potatoes?
Potatoes should generally be planted about two to four weeks before the last expected frost date in your area. Checking local frost dates can help determine the right timing.
What type of soil is best for growing potatoes?
Potatoes prefer well-drained, nutrient-rich soil with a pH of around 6.0 to 6.8. Loose, loamy soil with plenty of organic matter is ideal for healthy growth.
What essential tools do I need for potato gardening?
Essential tools for potato gardening include a garden fork, hand trowel, rake, watering can or hose, and garden gloves. These tools help with soil preparation, planting, and maintenance.
Why should I use seed potatoes instead of grocery store potatoes?
Seed potatoes are specifically bred for planting and are certified disease-free, yielding better results than grocery store potatoes, which can carry diseases or be treated with chemicals that inhibit sprouting.
How often should I water potato plants?
Potato plants need consistent moisture, especially during early growth stages. It’s recommended to water them about once a week, adjusting based on weather conditions.
What should I do to control weeds around my potato plants?
Weed control can be achieved by hand-pulling weeds and applying mulch, such as straw or grass clippings, around the potato plants to suppress weeds and retain soil moisture.
How can I tell when my potatoes are ready to be harvested?
Potatoes are typically ready to harvest when the plants flower and the foliage starts to yellow and die back. Early potatoes can be harvested while the plants are still green.
What is the proper way to harvest potatoes?
To harvest potatoes, use a garden fork to gently lift them from the soil, starting from the edges of the planting area. After harvesting, rinse them to remove dirt and cure them in a cool, dark place.
“`