
The best way to plant pumpkin seeds for excellent results is to choose the right time, prepare your soil well, and provide proper care throughout the growing season. I’ve learned that paying attention to these details can lead to a bountiful pumpkin harvest. Read Interesting article: When to Plant Pumpkins for a Big Harvest
Understanding Pumpkin Seeds
Types of Pumpkin Seeds
When I first started gardening, I was surprised to learn about the different types of pumpkin seeds available. You can find a range of varieties, each with unique shapes, sizes, and colors. Common types include the classic orange pumpkins, like ‘Howden’, which are great for Halloween carving, and ‘Sugar Pie’, perfect for making delicious pies. There are also heirloom varieties, like ‘Connecticut Field’, known for their rich flavor and history. If you’re interested in growing pumpkins for their seeds, you might explore varieties like ‘Kakai’ or ‘Styrian’, which produce hull-less seeds that are delightful to snack on. Read Interesting article: How to Plant Pumpkins for a Bigger Harvest
Benefits of Planting Your Own Pumpkins
Growing your own pumpkins has so many benefits. For one, there’s the undeniable joy of watching those small seeds transform into beautiful, vibrant orange fruits. I remember the excitement of seeing my first pumpkin develop, day by day. Beyond the beauty, homegrown pumpkins tend to taste better than store-bought ones, and you have the freedom to experiment with different varieties. Plus, it’s a fun family activity, involving everyone from planting to carving. And let’s not forget the satisfaction of growing something from scratch; it can be incredibly rewarding!
When to Plant Pumpkin Seeds
Best Time of Year for Planting
Timing is everything when it comes to planting pumpkin seeds. In my experience, the best time to plant is in late spring, typically between mid-May and early June, after the danger of frost has passed. Pumpkins thrive in warm weather, and planting too early can expose them to chilly nights that stunt their growth. I remember waiting anxiously for the right moment, checking the weather forecast daily to ensure conditions were just right.
Optimal Soil Temperature
One crucial aspect I learned about is soil temperature. Pumpkins prefer a warm environment, with an ideal soil temperature of around 70°F to 95°F. I’ve found that using a soil thermometer can be a game changer. You want to feel confident that the soil is warm enough for those seeds to germinate. If the ground is still chilly, I’ve had better luck waiting a few more days rather than risking a poor germination rate.
Frost Dates and Their Importance
Understanding frost dates is another key factor in successful pumpkin planting. I’ve learned to check my local frost dates before planting, as this helps avoid those pesky late spring frosts that can damage young plants. Most gardeners have a general idea of the last frost date in their area, but I recommend looking it up specifically for your region. Mark that date on your calendar, and just to be safe, I always give myself a cushion of a week or two after the last expected frost before sowing my seeds.
Choosing the Right Location
Sunlight Requirements
Choosing the right spot for your pumpkin patch is vital for growth. Pumpkins love sunlight, so I always look for an area that gets at least six to eight hours of direct sunlight each day. I remember one year I planted some pumpkins in a partially shaded area, thinking they would still do okay. Boy, was I wrong! The plants were weak and spindly, and I didn’t get a great crop. Sunlight is essential for photosynthesis, which helps pumpkins grow strong and healthy.
Soil Drainage and Quality
The quality of the soil is also something I pay close attention to. Pumpkins thrive in well-drained soil rich in organic matter. I usually mix in compost or well-rotted manure to boost the soil’s nutrient content. Good drainage is critical; I’ve seen too many gardeners struggle with soggy roots that lead to rot. If you notice standing water in your garden after heavy rain, consider building raised beds to improve drainage.
Space Considerations for Pumpkin Growth
Space is a significant factor to consider when planting pumpkins. These plants can spread quite a bit, often requiring about 20 to 25 square feet per plant. I’ve made the mistake of cramming too many plants into a small space, which led to competition for nutrients and sunlight. Now, I plan my layout carefully, ensuring each pumpkin plant has enough room to spread out and grow. Keeping adequate spacing also improves airflow, reducing the risk of diseases.
Preparing the Soil
Soil Testing and Amendments
Before planting, I always recommend testing your soil. This will tell you its pH and nutrient levels. I’ve found that pumpkins prefer slightly acidic to neutral soil, with a pH between 6.0 and 7.0. If the test shows imbalances, you can amend the soil with lime to raise pH or sulfur to lower it. This step can make a noticeable difference in how well your pumpkins grow.
Best Soil Type for Pumpkins
In my experience, sandy loam is the ideal soil type for pumpkins. It drains well while still retaining enough moisture and nutrients. If your garden soil is heavy clay, consider amending it with organic matter to improve its texture. I’ve seen great results by mixing in compost, which not only improves soil structure but also adds essential nutrients.
How to Prepare Your Garden Bed
Preparing the garden bed is a task I always look forward to. I start by clearing the area of any weeds and debris. Then, I till the soil to a depth of about 12 inches to ensure it’s loose and aerated. If you haven’t added compost or other amendments yet, this is the perfect time. Once everything is mixed in, I like to level the soil to create a smooth surface. This preparation lays the foundation for healthy pumpkin growth.
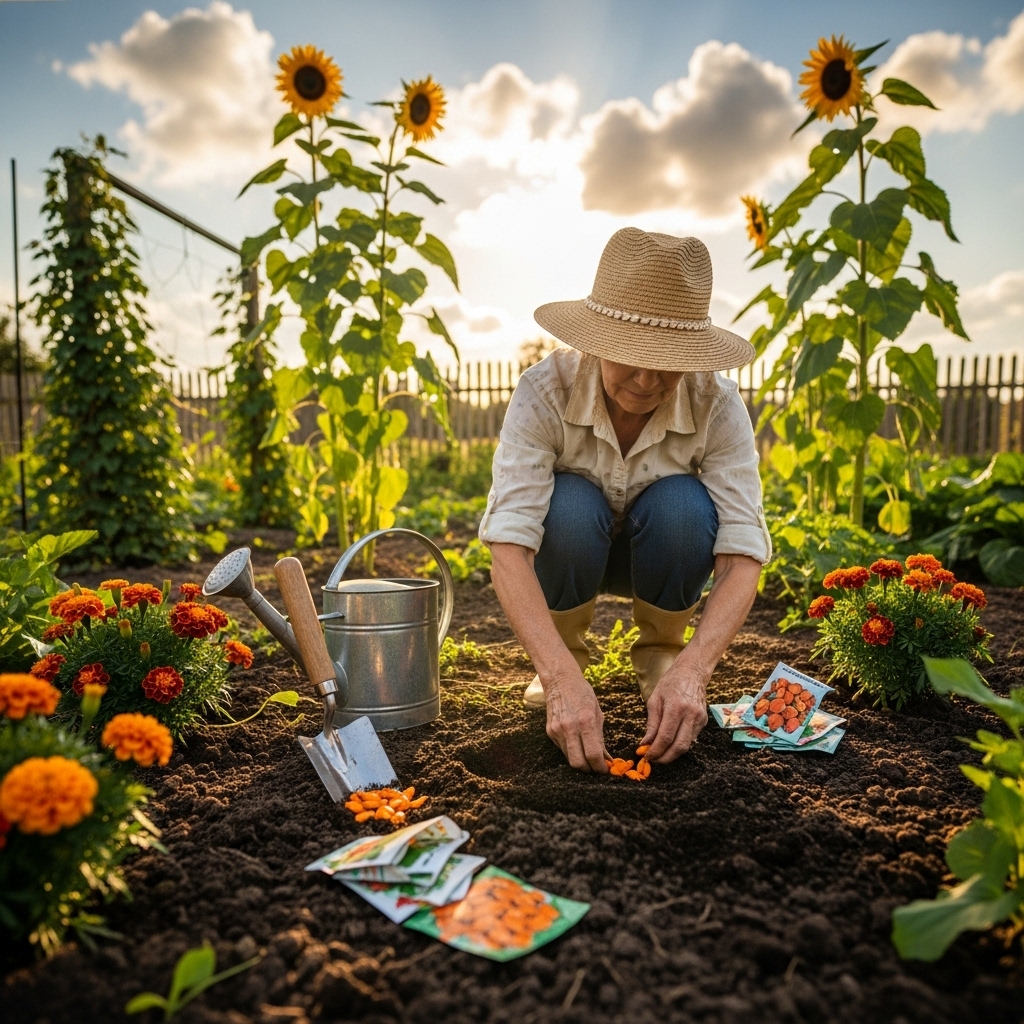
Planting Pumpkin Seeds
How to Plant Seeds: Depth and Spacing
When it comes to planting pumpkin seeds, I’ve learned that the right depth and spacing can make a world of difference. Typically, I plant the seeds about one inch deep in the soil. This depth helps them stay warm and moist, which is crucial for germination. I’ve found that spacing them about 4 to 6 feet apart allows each plant enough room to spread out and grow without competing too much for nutrients and light. I remember my first year, I was so eager to see those pumpkins grow that I planted them too close together. It ended up being a lesson in patience, as I watched them struggle to thrive. So, I always make sure to give each seed plenty of space now.
Using Seedlings vs. Direct Sowing
Another choice I’ve faced is whether to start with seedlings or to directly sow the seeds in my garden. Both methods have their pros and cons. I’ve tried direct sowing and found it to be quite rewarding. There’s something magical about putting those seeds right into the ground and watching them sprout. However, starting seedlings indoors can give you a head start, especially in shorter growing seasons. I remember starting some seeds indoors last year and transplanting them once the weather was warm enough. They grew robustly and gave me a nice jump on the season. It really depends on your local climate and your personal preference. If you choose to start seedlings indoors, just be sure to harden them off before planting them outside to avoid shocking them.
Companion Planting for Pumpkins
Companion planting is another aspect I’ve found fascinating when growing pumpkins. Certain plants can actually help pumpkins thrive. I like to plant corn alongside my pumpkins; the corn serves as a natural support for the pumpkins to climb on, which saves space. Another great companion is beans, which can add nitrogen back into the soil. I’ve seen how these plants work together in a way that benefits each other, and the results are often healthier plants and better yields. I recommend experimenting with different combinations in your garden. It’s a fun way to discover what works best for your specific growing conditions.
Watering and Care After Planting
Watering Schedule for Pumpkins
Once my pumpkin seeds are in the ground, I pay close attention to the watering schedule. Pumpkins demand a lot of water, especially when they’re developing. I usually aim for about an inch of water per week, either from rainfall or supplemental watering. I remember one season when I didn’t keep a close enough eye on the moisture levels, and my pumpkins ended up stressed during a dry spell. I’ve learned that it’s best to water deeply but less frequently, encouraging the roots to grow deeper into the soil. I also try to water in the early morning to minimize evaporation and to allow the foliage to dry out during the day, which helps reduce the risk of fungal diseases.
Fertilizing Techniques for Optimal Growth
Fertilizing is another essential part of pumpkin care that I’ve come to appreciate. I like to use a balanced fertilizer when planting, but I also give them an extra boost when the plants start to flower. I’ve found that a fertilizer high in phosphorus and potassium can really encourage fruit development. I also consider using organic options, like fish emulsion or compost tea, which I find to be effective and beneficial for the soil. I remember the first time I tried compost tea — it felt like I was giving my plants a delicious drink, and they responded with vibrant growth. Just be mindful not to over-fertilize, as this can lead to excessive leaf growth at the expense of fruit production.
Pest and Disease Management
Pest and disease management is something I take seriously in my garden. I’ve encountered aphids and squash bugs before, and let me tell you, they can wreak havoc on pumpkin plants. I’ve found that regular checks on my plants can help catch problems early. I like to use row covers to protect my young plants from pests, and I often introduce beneficial insects like ladybugs to help keep pest populations in check. I also make it a point to practice crop rotation to prevent soil-borne diseases from taking hold. This has been vital for maintaining healthy plants year after year. Additionally, I’ve learned to recognize the signs of common diseases, like powdery mildew, and take action quickly to mitigate any damage.
Harvesting Your Pumpkins
Signs That Pumpkins Are Ready to Harvest
After all the care and attention I’ve poured into my pumpkins, the harvesting stage is always the most exciting. I’ve learned to look for specific signs to determine when they’re ready. The skin should feel hard, and the color should be vibrant and consistent. I usually check the tendril closest to the pumpkin; when it turns brown and dries up, that’s often a good indicator that it’s time to harvest. The waiting can be a challenge, especially when I can see those beautiful pumpkins sitting in my garden, but patience pays off.
How to Properly Harvest and Store Pumpkins
When it’s finally time to harvest, I make sure to use a sharp knife or pruners to cut the stem, leaving a few inches attached to the pumpkin. This helps prevent rot during storage. I remember one year, I didn’t leave enough stem on some of my pumpkins, and they didn’t last as long as I’d hoped. After harvesting, I wash them gently to remove any dirt and let them dry before storing. I like to store my pumpkins in a cool, dry place, away from direct sunlight. Proper storage can extend their life, and I’ve managed to enjoy my homegrown pumpkins well into the winter months this way!
Common Mistakes to Avoid When Planting Pumpkin Seeds
Overwatering and Underwatering
One of the biggest lessons I’ve learned while growing pumpkins is the importance of striking the right balance with watering. It’s so easy to go overboard, especially when you see those little seedlings popping up. I remember the first time I got a bit too enthusiastic with my watering can. I wanted to make sure my pumpkins had plenty of moisture, but I ended up overwatering them. The soil became waterlogged, and I noticed some of my plants started wilting. It was a tough lesson learned. Now, I always check the soil moisture before watering. I stick my finger in the soil; if it feels dry about an inch down, then it’s time to water. On the flip side, I’ve also had my share of underwatering mishaps. During a particularly dry spell, I neglected to keep up with the watering schedule, and my pumpkins showed signs of stress. It’s a balancing act, but once you find that sweet spot, your pumpkins will thrive!
Planting Too Early or Late
Timing really is everything when it comes to planting pumpkins. I’ve made the mistake of planting too early, thinking I could get a jump start on the season, only to have to deal with a late frost that wiped out my precious seedlings. I’ve learned that waiting for the right conditions is crucial. Now, I keep a close eye on the weather forecast and the soil temperature before planting. I also make sure to plant my pumpkins after the last frost date for my area, giving them the best chance to flourish. On the other hand, I’ve also waited too long to plant, missing out on the optimal growing season. It’s essential to find that balance and plan accordingly to ensure my pumpkins have enough time to grow and mature before the fall harvest.
Neglecting Pest Control
Pest management is an area where I learned to be proactive rather than reactive. I used to think that I could just let nature take its course, but I quickly discovered that ignoring pests can lead to significant problems. Squash bugs, aphids, and even slugs can be relentless. I remember one year, my pumpkin plants were thriving, but I didn’t notice the aphids until they had taken over. My once-healthy plants started to wither, and it was heartbreaking. Now, I regularly inspect my plants for any signs of pests and take action right away. I’ve found that introducing beneficial insects like ladybugs can help keep the pest population in check. Plus, using organic pest control methods has been a game changer for me. I prefer to take a preventative approach by planting companion plants that repel pests and creating a healthy ecosystem in my garden.
Additional Tips for Successful Pumpkin Growing
Proper Mulching Techniques
Mulching is a technique I’ve come to appreciate immensely. It’s amazing how much of a difference a good layer of mulch can make in the garden. I usually apply straw or wood chips around my pumpkin plants. This helps retain moisture in the soil and regulates temperature, which is especially beneficial during hot summer days. Plus, it suppresses weeds, which means less competition for my pumpkins. I remember one year when I neglected to mulch, and the weeds took over. It was a constant battle, pulling them out by hand. Since then, I’ve made it a point to mulch every year, and it has saved me so much time and effort!
Rotate Your Crops Annually
Crop rotation is another practice I’ve adopted for a healthier garden. I learned that planting pumpkins in the same spot year after year can deplete the soil of nutrients and increase the likelihood of disease. So, I make it a point to change up my planting areas. I keep a garden journal to track where I plant each crop every year, which has helped me create a rotation plan. For example, I follow my pumpkins with legumes, which fix nitrogen in the soil, and then plant a different group of crops the following year to keep everything balanced. This method has not only improved my pumpkin yield but also made my garden healthier overall.
Getting to Know Your Pumpkin Varieties
Finally, understanding the specific needs of the pumpkin varieties I’m planting has made a huge difference. Some pumpkins require more space or different care than others. For instance, I’ve noticed that larger varieties, like ‘Giant Pumpkin’ types, need more room to grow and more nutrients. On the other hand, smaller varieties can be more forgiving. I’ve found that researching the specific types I want to grow and knowing their unique requirements helps me tailor my care for each one. It’s like getting to know my plants; the more I understand them, the better I can help them thrive.
Frequently Asked Questions
What is the best time of year to plant pumpkin seeds?
The best time to plant pumpkin seeds is in late spring, typically between mid-May and early June, after the danger of frost has passed.
What type of soil is ideal for growing pumpkins?
Pumpkins thrive in well-drained soil rich in organic matter, with sandy loam being the ideal soil type as it drains well while retaining moisture and nutrients.
How deep should pumpkin seeds be planted?
Pumpkin seeds should be planted about one inch deep in the soil to help them stay warm and moist, which is crucial for germination.
How much sunlight do pumpkins require?
Pumpkins require at least six to eight hours of direct sunlight each day for optimal growth.
What is an effective watering schedule for pumpkins?
Pumpkins typically need about an inch of water per week, whether from rainfall or supplemental watering. It’s best to water deeply but less frequently to encourage deep root growth.
What are common pests that affect pumpkin plants?
Common pests that affect pumpkin plants include aphids, squash bugs, and slugs. Regular inspections and proactive pest management are essential to keep these pests in check.
How can I tell when my pumpkins are ready to harvest?
Pumpkins are ready to harvest when the skin feels hard, the color is vibrant and consistent, and the tendril closest to the pumpkin turns brown and dries up.
What should I do to prepare my garden bed for planting pumpkins?
To prepare your garden bed, clear the area of weeds and debris, till the soil to a depth of about 12 inches, mix in compost or other amendments, and level the soil to create a smooth surface.
What are the benefits of planting pumpkins at home?
Growing your own pumpkins allows for better taste compared to store-bought ones, provides the joy of watching them grow, and can be a fun family activity from planting to carving.
Why is crop rotation important for pumpkin growing?
Crop rotation is important because planting pumpkins in the same spot year after year can deplete the soil of nutrients and increase the likelihood of disease, so changing the planting areas helps maintain soil health and improves yield.