
The key to planting pumpkins for a bigger harvest lies in selecting the right variety, preparing your soil, and providing proper care throughout the growing season. I’ve found that with the right approach, anyone can grow a successful pumpkin crop.
Understanding Pumpkin Varieties
Common Types of Pumpkins for Harvest
When I first decided to plant pumpkins, I was amazed at the variety available. There are many types of pumpkins, each with its own characteristics. Some popular varieties include:
- Jack-O’-Lantern: Perfect for carving, these pumpkins are medium-sized with a classic orange color and a sturdy stem.
- Pie Pumpkins: Smaller and sweeter, these are ideal for baking. Varieties like Sugar Pie and Cinderella are favorites for delicious pumpkin pies.
- Giant Pumpkins: If you’re looking to grow a massive pumpkin, try the Atlantic Giant. They can weigh hundreds of pounds and are often seen in competitions.
- White Pumpkins: Varieties like Casper are unique and popular for decorating, offering a fresh twist on the traditional orange pumpkin.
Each type serves a different purpose, so think about what you want from your pumpkin patch. Do you want to carve them, bake with them, or simply have beautiful decorations? This decision will help guide your variety selection.
Choosing the Right Variety for Your Climate
I’ve learned that not every pumpkin variety is suitable for every climate. Some pumpkins thrive in warmer areas, while others prefer cooler temperatures. For instance, if you live in a region with a shorter growing season, you might want to opt for early-maturing varieties like the Small Sugar or New England Pie. In contrast, if you have a longer growing season, you can experiment with larger varieties like the Big Max or the aforementioned Atlantic Giant.
It’s also crucial to check the seed packet or plant label for specific climate recommendations. I remember making the mistake of choosing a variety that needed a longer season than my area could provide, leading to a disappointing yield. Take your local climate into account to set yourself up for success. Read Interesting article: When to Plant Pumpkins for a Big Harvest
Preparing the Soil for Pumpkin Planting
Soil Testing and Amendments
Before I plant anything, I always make sure to test my soil. This step is key for ensuring that my pumpkins have the nutrients they need to thrive. A simple soil test kit can tell you the pH level and nutrient content of your soil. I’ve found that pumpkins prefer well-draining soil rich in organic matter. If my test results show deficiencies, I’m quick to amend the soil with compost, aged manure, or specific fertilizers.
When I first started gardening, I overlooked this step, and it cost me dearly. My pumpkins were stunted and didn’t produce well. Now, I prioritize soil health, and it has made a huge difference in my harvest.
Optimal Soil pH Levels
Speaking of soil health, I’ve learned that the pH level of the soil is incredibly important for pumpkin growth. Pumpkins thrive in soil with a pH between 6.0 and 6.8. If your soil is too acidic or too alkaline, it can hinder nutrient absorption. After testing my soil, I adjust the pH if necessary by adding lime to raise it or sulfur to lower it. This way, I create the ideal environment for my pumpkin plants to flourish.
Composting and Nutrient Requirements
Composting is another practice that has significantly improved my pumpkin yields. I make a habit of adding compost to my garden beds before planting. Compost enriches the soil with nutrients, improves drainage, and encourages microbial activity. I mix in about 2 to 4 inches of compost into the top layer of soil, and I’ve noticed that my pumpkins grow stronger and healthier as a result.
Another beneficial practice is to add slow-release fertilizers during planting. I usually choose one that is high in potassium and phosphorus, as these nutrients help with root development and flowering. A little research on the right amendments can go a long way in boosting your pumpkin harvest.
When to Plant Pumpkins
Understanding Frost Dates
Timing is everything when it comes to planting pumpkins. One of the first things I check is the last frost date for my area. Pumpkins are tender plants and cannot handle frost. I usually wait until after the last frost has passed, which can be anywhere from late April to late May depending on where I live. If I’m unsure, I always err on the side of caution and plant a bit later.
Best Planting Seasons in Different Regions
In my experience, planting times vary widely depending on your region. For example, in the northern states, I’ve found that late May to early June is the best window. Meanwhile, in the southern states, I’ve seen people plant as early as March. Knowing your local climate and seasonal patterns can help you decide the best time to plant.
Timing for Direct Seeding vs. Transplanting
I have experimented with both direct seeding and transplanting seedlings, and I’ve learned that each has its advantages. Direct seeding means I plant the seeds right in the ground, which tends to work well for larger pumpkin varieties. However, if I choose to transplant seedlings, I benefit from having a head start, especially in shorter growing seasons. I usually start my seeds indoors about 3-4 weeks before the last frost date if I decide on this method. This way, I can ensure that my pumpkins get a good jump on the growing season.
Where to Plant Pumpkins
Choosing the Right Location in Your Garden
When I think about where to plant my pumpkins, I realize that location is just as crucial as the variety and soil preparation. Pumpkins need plenty of space to grow, and I’ve learned that a site with good drainage and a bit of shelter from strong winds is ideal. I often choose a spot that’s slightly elevated, as this helps prevent water from pooling around the roots.
One year, I planted my pumpkins in a low-lying area, and I faced significant issues with rot due to excess moisture. Since then, I’ve made it a point to select a location that’s dry and sunny. It’s also helpful to consider the layout of my garden. I like to plant pumpkins near the edges where they can spread out and not take over my entire plot!
Sunlight Requirements for Healthy Growth
I can’t stress enough how important sunlight is for pumpkin plants. They thrive on full sun, needing at least 6 to 8 hours of direct sunlight each day. I usually take note of how much sunlight a particular area receives before planting. If I’m unsure, I’ll spend a day observing the patches of my garden to see which areas get the most sun.
I’ve found that when my pumpkins don’t get enough light, they tend to become leggy and produce fewer fruits. It’s disappointing after all the effort I put into growing them. So, I make sure to plant my pumpkins in spots where they can soak up all that glorious sunshine, which helps them grow robust and bountiful!
Spacing Considerations for Maximum Yield
Spacing is another factor I’ve learned is vital for a successful pumpkin harvest. I remember the first time I planted pumpkins; I crammed them too close together, thinking more plants would mean more pumpkins. I quickly learned that overcrowding can stunt their growth and make them more susceptible to diseases.
Now, I follow a guideline of about 3 to 5 feet between each plant, depending on the variety. This allows the vines to spread out without competing for nutrients and water. I’ve found that when I give them room to breathe, my pumpkins grow larger and healthier. It’s amazing how a little space can lead to a much bigger yield!
How to Plant Pumpkins
Step-by-Step Planting Process
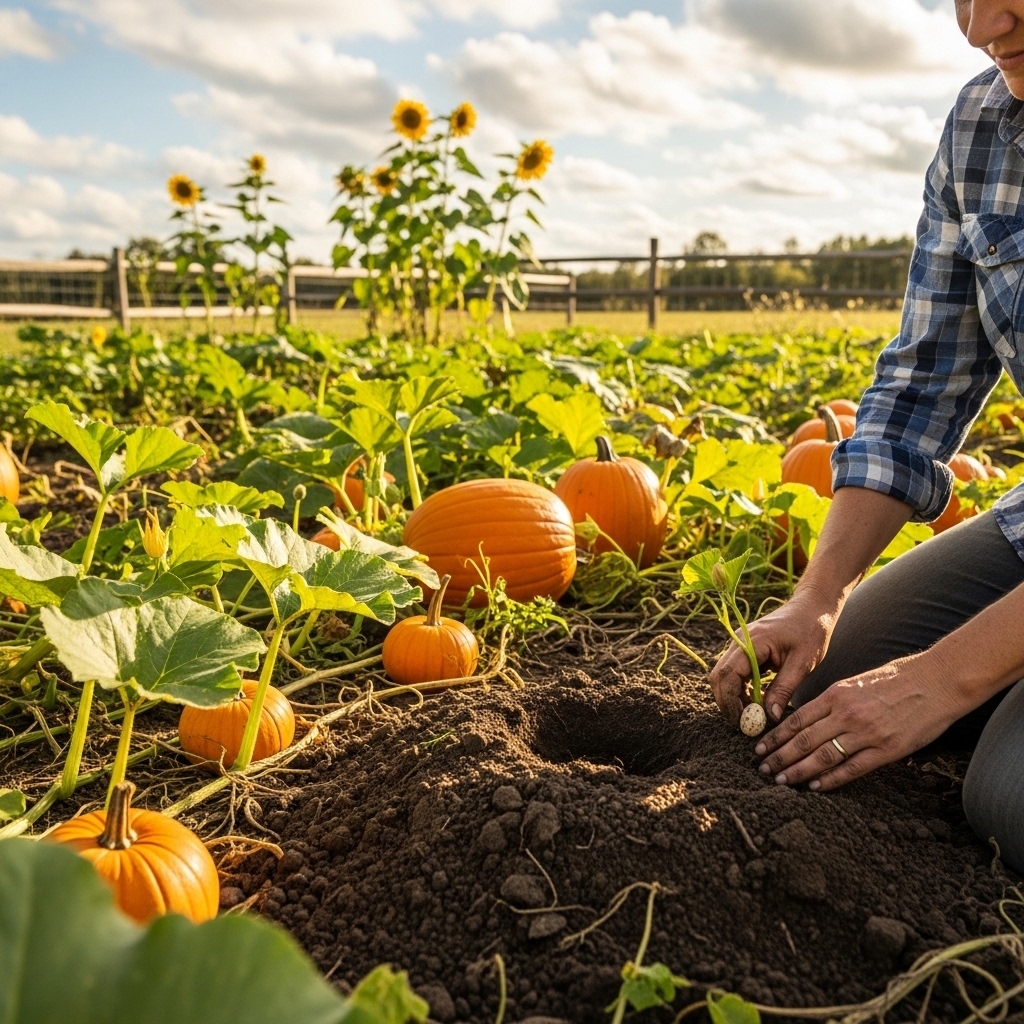
Planting pumpkins is one of my favorite gardening activities, and I’ve developed a step-by-step process that works well for me. First, I prepare the planting site by loosening the soil and mixing in compost and fertilizers. I usually create small hills or mounds about 3 feet apart, which helps with drainage and heating the soil.
Once I’ve set up the mounds, I plant 2 to 3 seeds per hill, about an inch deep. I remember my excitement the first time I saw those tiny sprouts pushing through the soil. After planting, I water the area well, ensuring the seeds have enough moisture to germinate.
After a week or so, I check for sprouting. If all seeds have germinated, I’ll thin them out to the strongest one or two plants per hill. This way, I can focus the plant’s energy on producing the best possible pumpkins!
Direct Seeding vs. Transplanting Seedlings
Choosing between direct seeding and transplanting is something I’ve had to consider each growing season. Direct seeding has been my go-to because it’s straightforward and I love watching the seeds grow in their natural environment. However, I’ve also tried transplanting seedlings for varieties that require a longer growing season.
Transplanting can give me a head start, especially if I start seeds indoors about 3-4 weeks before the last frost. I’ve found that seedlings establish well when they are hardened off properly before being moved outdoors. This way, I can avoid shocking them and ensure a smoother transition into the garden.
Watering Techniques During Planting
Watering is another critical part of the planting process. After I plant my seeds, I make sure to keep the soil consistently moist but not soggy. I usually water the area deeply at the beginning, ensuring the seeds get the hydration they need to germinate. After that, I check the soil moisture regularly, especially during hot spells.
One technique I’ve found helpful is using a soaker hose or drip irrigation system. This allows me to water the pumpkins directly at their roots without wetting the leaves too much, which can lead to diseases. I’ve learned that consistent and proper watering can help my pumpkins thrive and produce an abundant harvest!
Essential Care for Pumpkin Plants
Watering Frequency and Techniques
As my pumpkin plants grow, I pay close attention to their watering needs. Typically, I water deeply about once a week, but I adjust based on the weather. If it’s particularly hot or dry, I increase the frequency to keep them hydrated. I’ve found that pumpkins need about an inch of water per week, especially during their flowering and fruiting stages.
Another trick I’ve learned is to mulch around the plants. This not only helps retain moisture but also suppresses weeds that can compete for nutrients. I often use straw or grass clippings as mulch, and I’ve noticed my pumpkins respond well to it.
Fertilization Schedule and Types of Fertilizers
Fertilization is essential for a robust pumpkin harvest. I typically use a balanced fertilizer during the early growth stages to provide essential nutrients. Once the plants begin to flower, I switch to a fertilizer higher in potassium and phosphorus to support fruit development. I remember one year when I neglected to fertilize properly, and my pumpkins ended up being smaller than I expected. Since then, I’ve made it a routine to feed them regularly.
In addition to granulated fertilizers, I occasionally apply liquid fertilizers during the growing season. This gives my plants an extra boost of nutrients when they need it most. Finding the right balance has really aided in maximizing my pumpkin production!
Pest and Disease Management
Pests and diseases are challenges I’ve encountered throughout my pumpkin-growing journey. I’ve learned to keep a close watch on my plants for signs of trouble. Squash bugs and aphids are among the common pests I’ve had to deal with, and I’ve found that hand-picking them or using insecticidal soap can be effective in controlling their populations.
Additionally, I practice crop rotation each year to minimize the risk of soil-borne diseases. This strategy has helped me maintain healthier plants over time. I’ve found that being proactive in pest and disease management can make all the difference in ensuring a successful pumpkin harvest.
Frequently Asked Questions
What are some common types of pumpkins for harvest?
Some popular pumpkin varieties include Jack-O’-Lantern for carving, Pie Pumpkins like Sugar Pie for baking, Giant Pumpkins such as the Atlantic Giant for competitions, and White Pumpkins like Casper for decoration.
How do I choose the right pumpkin variety for my climate?
Consider your local climate and growing season. For shorter growing seasons, opt for early-maturing varieties like Small Sugar or New England Pie. For longer growing seasons, you can try larger varieties like Big Max or Atlantic Giant.
What is the optimal soil pH for growing pumpkins?
Pumpkins thrive in soil with a pH between 6.0 and 6.8. If your soil’s pH level is outside this range, you may need to adjust it by adding lime to raise it or sulfur to lower it.
When is the best time to plant pumpkins?
The best time to plant pumpkins depends on your region. Generally, in northern states, late May to early June is ideal, while in southern states, planting can start as early as March.
What are the spacing requirements for planting pumpkins?
When planting pumpkins, it’s recommended to space them about 3 to 5 feet apart to avoid overcrowding, which can stunt their growth and increase susceptibility to diseases.
What is the step-by-step process for planting pumpkins?
First, prepare the site by loosening the soil and mixing in compost and fertilizers. Create small mounds about 3 feet apart, plant 2 to 3 seeds per hill about an inch deep, and water well. After a week, thin to the strongest one or two plants per hill.
How often should I water my pumpkin plants?
Typically, pumpkins need about an inch of water per week. Adjust the frequency based on weather conditions, and consider using mulch to retain moisture and suppress weeds.
What type of fertilizer should I use for pumpkin plants?
Start with a balanced fertilizer during early growth stages. Once the plants flower, switch to a fertilizer higher in potassium and phosphorus to promote fruit development.
How can I manage pests and diseases in my pumpkin garden?
Keep an eye out for pests like squash bugs and aphids, which can be controlled by hand-picking or using insecticidal soap. Practicing crop rotation each year also helps minimize the risk of soil-borne diseases.
What are the sunlight requirements for growing pumpkins?
Pumpkins need full sun, requiring at least 6 to 8 hours of direct sunlight each day for healthy growth. Choose a location that receives adequate sunlight to prevent leggy growth and low fruit production.
Read Interesting article: 15 Bucket Gardening Ideas for Sustainable Home Living
Read Interesting article: 14 Low Cost Bucket Gardening Ideas for Beginners