
Planting rice involves selecting the right variety, preparing the soil, and understanding the planting process, which can lead to a rewarding harvest. With a little patience and the right techniques, anyone can cultivate this staple grain in their backyard.
Understanding Rice: Varieties and Types
Rice is more than just a common staple; it’s a world of flavors, textures, and cultural significance. When I first decided to grow rice, I was surprised to learn about the different varieties and types available. Each one has unique growing requirements and culinary uses, so understanding these differences is key to a successful planting experience. Read Interesting article: Are Snake Plants Toxic to Dogs? Symptoms + Treatment
Common Rice Varieties
There are two main species of rice that are commonly cultivated: Oryza sativa (Asian rice) and Oryza glaberrima (African rice). Within these species, you’ll find a variety of types that cater to different climates and culinary preferences. For example, short-grain rice is known for its sticky texture, making it perfect for sushi, while long-grain rice is fluffy and ideal for pilafs and stir-fries.
Some of the most popular varieties include:
- Jasmine Rice: A fragrant long-grain rice from Thailand, it has a soft, sticky texture when cooked.
- Basmati Rice: Known for its aromatic flavor, this long-grain rice is a staple in Indian cuisine.
- Arborio Rice: This short-grain rice is used primarily for making risotto due to its creamy texture.
- Brown Rice: A whole grain variety that retains its bran and germ, offering more nutrients and fiber.
When I started my rice-growing journey, I chose a local variety that thrived in my region’s climate, and it made all the difference.
Differences Between White, Brown, and Wild Rice
It’s essential to understand that not all rice is created equal. White rice, brown rice, and wild rice have distinct differences in terms of nutritional content and culinary uses. White rice is milled and polished, removing the bran and germ, which gives it a longer shelf life but less nutritional value. Brown rice, on the other hand, is a whole grain that maintains its bran and germ, making it richer in fiber and nutrients.
Wild rice is actually not rice at all but rather an aquatic grass. It has a nutty flavor and chewy texture, often used in salads and gourmet dishes. When I first tried wild rice, I was amazed by its unique taste and decided to plant some alongside my traditional rice varieties, which added diversity to my harvest.
Preparing to Plant Rice
Now that we understand the different types of rice, it’s time to focus on preparing for planting. This phase is crucial to ensure a fruitful harvest. I found that taking the time to prepare properly made a significant difference in my results.
Choosing the Right Location
Selecting the right location for your rice field is essential. Rice grows best in warm, sunny areas with ample water. I remember scouting various spots in my yard, ensuring there was enough sunlight and access to water. Ideally, rice should receive at least six to eight hours of direct sunlight each day. It thrives in a flat area where water can easily accumulate, which is why many rice farmers use paddies.
Soil Requirements for Rice Growth
Rice loves wet soil, but not all soils are created equal. Clay soils are often the best choice because they retain water well. However, it’s still crucial to ensure proper drainage to avoid waterlogging. I learned that testing the soil is a great first step. You can find kits at gardening stores that help determine pH and nutrient levels. Ideally, rice prefers a slightly acidic to neutral pH (around 6.0 to 7.0). Read Interesting article: Plant Cell vs Animal Cell: Main Differences Explained
Before planting, I enriched my soil with organic compost to improve its fertility. This not only boosts nutrient levels but also enhances the soil structure, making it more conducive for healthy root growth.
Essential Tools and Supplies
Having the right tools can make planting rice much easier. Here’s a quick list of what you’ll need:
- Garden Spade: For digging and preparing the plot.
- Rake: To level the soil and remove debris.
- Seed Sower: Useful for evenly distributing seeds.
- Watering Can or Hose: To keep the soil moist.
- Mulch: Straw or other organic materials to help retain moisture.
Once I gathered my tools, I felt ready to tackle the next steps of planting rice!
When to Plant Rice
Timing is everything when it comes to planting rice. I learned this the hard way when I decided to jump in without considering the optimal planting schedule. Understanding when to plant can significantly impact your yield and the health of your plants.
Optimal Planting Seasons
Rice is typically planted in the spring or early summer, depending on the climate. I remember checking the local weather patterns and consulting with seasoned farmers in my area to determine the best time to start. In most regions, the soil temperature should be warm enough, ideally around 70°F to 90°F (21°C to 32°C), for the rice to germinate successfully. I found that planting too early could expose the seedlings to frost, while waiting too late could result in a shortened growing season.
In my case, I decided to plant my rice when the last frost had passed, which meant waiting until late April. I marked my calendar with reminders, and it was so rewarding to watch the seedlings thrive in their prime growing season.
Climate Considerations for Rice Cultivation
Rice thrives in warm, humid conditions, so understanding your local climate is crucial. I discovered that different varieties of rice also have varying tolerances to heat and humidity. For example, some tropical types of rice can handle higher temperatures and more rainfall, while others prefer milder conditions. I found this out after trying to grow a variety that wasn’t suited for my cooler climate, which led to stunted growth.
A key factor to consider is the length of the growing season. In warmer climates, rice can be grown twice a year, while in cooler areas, we might only have a single season. I took note of my region’s average rainfall, humidity levels, and temperature fluctuations to choose a variety that would thrive in my conditions.
How to Plant Rice: Step-by-Step Guide
Once I had my timing and location sorted out, it was time to get my hands dirty. Planting rice can be a rewarding experience if done correctly. I followed a series of steps that made the process smoother and more efficient.
Preparing the Soil
Soil preparation is pivotal. I began by tilling the soil to break up any clumps and enhance aeration. This was also the time to add organic matter, which I learned helps retain moisture and provides essential nutrients. After tilling, I leveled the soil to create a uniform surface, which would help with water retention. I found that this made a huge difference in how my rice plants established themselves.
Before planting, I also created small furrows or rows in the soil. This step is optional, but I found it helped keep the seeds organized and made planting easier. I was excited to see how all this preparation would pay off in the end!
Seed Selection and Preparation
Choosing the right seeds is just as important as soil preparation. I remember spending time researching various rice seeds, and I opted for a variety that was not only well-suited for my climate but also had a good yield potential. I soaked the seeds in water for about 24 hours before planting, which I read helps with germination. This was an interesting process, and I loved watching the seeds absorb water and swell up, ready to take root.
Methods of Planting Rice
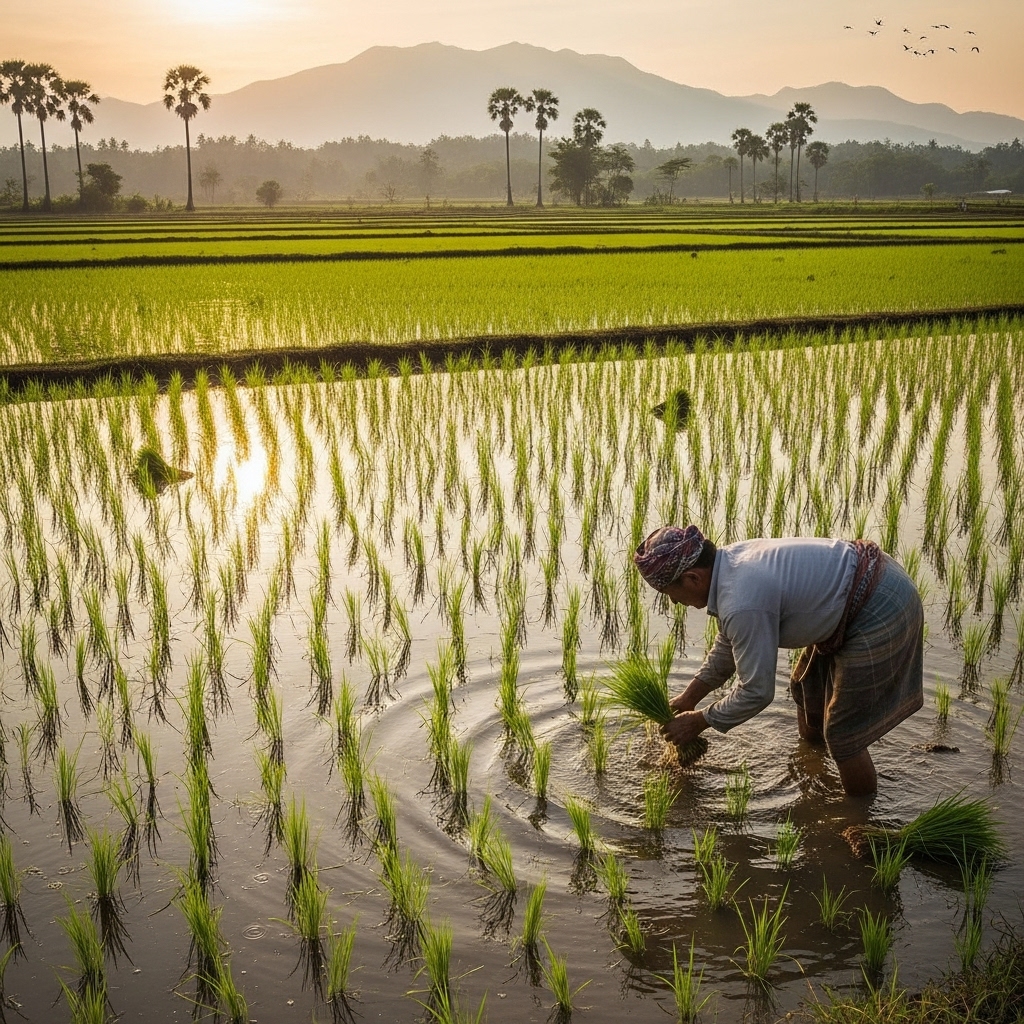
There are a few different methods to plant rice, and I was torn between direct seeding and transplanting. I chose to transplant because I was curious about the process and wanted to see if it would lead to better growth. I started seedlings in trays filled with nutrient-rich soil about four weeks before transplanting them into the paddies. When the seedlings reached about 6 inches tall, I gently uprooted them and carefully placed them into pre-prepared puddles in the paddies. Each time I planted a seedling, I felt a sense of connection to the land and its history.
For those who prefer direct seeding, I learned that broadcasting seeds evenly over the prepared soil and then lightly covering them with soil can also be effective. Whatever method you choose, I recommend ensuring that the seeds have enough water to help them germinate quickly.
Water Management for Rice Plants
Once I had my rice seeds in the ground, I quickly realized that water management is crucial in rice cultivation. This is not just about watering; it’s about creating the right environment for the rice plants to thrive. I found that understanding how to manage water levels could significantly affect the growth and yield of my rice.
Importance of Flooding in Rice Cultivation
Rice is often grown in flooded conditions, which might seem odd to some, but it is actually beneficial for the plants. I learned that flooding helps suppress weeds and pests that could otherwise harm the young rice plants. By maintaining a layer of water over the fields, I provided a protective barrier against many potential threats.
When I first flooded my paddies, I was a bit nervous about how it would affect the plants. However, I noticed that the rice thrived in these conditions, developing strong roots and healthy shoots. The water also helps maintain a stable temperature, which can be crucial during periods of fluctuating weather. I made it a point to keep the water level consistent, as rice plants generally prefer about 4 to 6 inches of water during their growth stages.
Watering Techniques and Schedules
Managing water effectively is more than just flooding the fields. I discovered that different growth stages of rice require different watering techniques. In the early stages, keeping the soil consistently wet is vital for germination and seedling establishment. As the plants grow, I learned that I could gradually reduce the water depth, allowing the soil to dry slightly before flooding again. This technique encourages root development and strengthens the plants.
I found that it was helpful to monitor the water levels regularly. I used a simple stick to gauge the water depth and made adjustments as necessary. Plus, I paid attention to the weather forecasts. Rainy days were a blessing because they helped maintain the water levels, but during dry spells, I was ready to add water manually to ensure my rice stayed healthy. Keeping a water management log helped me track what worked best for my plants.
Care and Maintenance of Rice Plants
Caring for rice plants doesn’t stop with planting and watering. I learned that ongoing maintenance is crucial for achieving a bountiful harvest. From fertilization to pest control, each aspect plays a role in the health of the plants.
Fertilization Practices
Fertilization was a key part of my rice-growing experience. I remember feeling overwhelmed at first, wondering how much and what type of fertilizer I should use. After some research and consultation with local experts, I decided to go with organic fertilizers like fish emulsion and well-rotted manure. These options provided essential nutrients without the harsh chemicals that could harm the environment.
As I applied the fertilizer, I made sure to follow a schedule. I typically fertilized my rice plants a few weeks after planting, then again during the early tillering stage. I found that watching my plants respond to the nutrients was incredibly satisfying. The lush green growth I witnessed was proof that my efforts were paying off!
Pest and Disease Management
Pests and diseases can be real threats to rice cultivation. I experienced this first-hand when I noticed some leaf discoloration, which made me suspect an issue. I learned that regular monitoring is crucial. I walked through my fields often, checking for any signs of trouble. When I did encounter pests, I used a combination of natural remedies, such as neem oil and insecticidal soap, to manage the situation without harming beneficial insects.
Additionally, I found that promoting biodiversity in and around my rice paddies helped create a natural balance. Planting companion crops around the edges attracted beneficial insects, which helped control pest populations. This approach not only kept my rice healthy but also created a more vibrant ecosystem in my yard.
Weeding Techniques
Weeds can compete with rice for nutrients and water, so I knew I had to stay on top of weeding. I remember feeling overwhelmed when I saw how quickly weeds could pop up, but I learned that hand-weeding was my best option, especially in the early stages. I dedicated some time each week to pull weeds by hand, which allowed me to keep the rice paddies tidy while also getting some light exercise.
As the rice plants grew taller, the dense canopy they created actually helped suppress weeds. I found that mulching around the base of the rice plants was another effective strategy. This not only smothered the weeds but also helped retain moisture in the soil. Balancing weeding with these other techniques turned out to be a key factor in my rice care routine.
Frequently Asked Questions
What are the two main species of rice commonly cultivated?
The two main species of rice commonly cultivated are Oryza sativa (Asian rice) and Oryza glaberrima (African rice).
What is the difference between white rice and brown rice?
White rice is milled and polished, removing the bran and germ, which gives it a longer shelf life but less nutritional value. Brown rice, on the other hand, is a whole grain that retains its bran and germ, making it richer in fiber and nutrients.
What soil type is best for growing rice?
Clay soils are often the best choice for growing rice because they retain water well. However, it’s crucial to ensure proper drainage to avoid waterlogging.
When is the optimal time to plant rice?
Rice is typically planted in the spring or early summer, depending on the climate, when the soil temperature is ideally around 70°F to 90°F (21°C to 32°C).
What are some essential tools needed for planting rice?
Essential tools for planting rice include a garden spade, rake, seed sower, watering can or hose, and mulch.
How should water management be handled in rice cultivation?
Water management in rice cultivation involves flooding the fields, which helps suppress weeds and pests, while also maintaining a consistent water level of about 4 to 6 inches during growth stages.
What type of fertilizers are recommended for rice plants?
Organic fertilizers like fish emulsion and well-rotted manure are recommended for rice plants as they provide essential nutrients without harsh chemicals.
How can pests and diseases be managed during rice cultivation?
Pests and diseases can be managed through regular monitoring, using natural remedies like neem oil and insecticidal soap, and promoting biodiversity by planting companion crops to attract beneficial insects.
What weeding techniques are effective for rice cultivation?
Effective weeding techniques include hand-weeding in the early stages and using mulch around the base of rice plants to smother weeds and retain moisture.
Why is flooding beneficial for rice plants?
Flooding is beneficial for rice plants as it suppresses weeds and pests, helps maintain a stable temperature, and provides a protective barrier for young rice plants.