
The right way to plant rice involves understanding your rice variety, preparing soil and water conditions, and following specific planting techniques. I’ve discovered that mastering these basics makes all the difference in achieving a bountiful harvest. Read Interesting article: How to Plant Rice Successfully (Beginner Guide)
Understanding Rice Planting Basics
When I first decided to grow rice, I was surprised by how much I needed to learn about the entire process. It’s not just about throwing seeds into the ground and hoping for the best. Instead, we must consider various factors that influence the growth of rice. Let’s dive into some of the core elements of rice planting.
Types of Rice Varieties
There are several types of rice varieties, each suited for different climates and purposes. In my experience, I found that understanding these varieties is crucial for successful planting. The two main categories of rice are:
- Indica Rice: This variety is typically long-grain and is known for its non-sticky texture. It’s mostly grown in tropical regions and is perfect for dishes like fried rice.
- Japonica Rice: Short-grain and sticky when cooked, Japonica is commonly grown in cooler climates. It’s great for sushi and other Asian cuisines.
Choosing the right variety can depend on your local climate and what you want to use the rice for. I remember my first attempt included a mix of both types, which made for an interesting cooking experience!
Rice Growing Conditions
Rice thrives in warm, wet conditions, so it’s essential to understand the environment in which you’re planting. Ideally, rice requires:
- Temperature: A temperature range of 70°F to 90°F is perfect for rice growth. I found that planting too early in cooler weather can stunt growth.
- Water: Rice is often grown in flooded fields, which helps control weeds and pests. Ensuring a consistent water supply is vital.
During my initial planting, I noticed how crucial it was to monitor the temperature and adjust my planting schedule accordingly. Too much rain can also wash away seeds, so I recommend checking the local weather forecast before planting. Read Interesting article: How to Plant Rice (Easy Growing Guide)
Importance of Soil Quality
The quality of your soil plays a significant role in rice cultivation. I learned the hard way that not all soils are created equal. Here are some points to consider:
- Soil Type: Clay soils are ideal for rice as they retain water better than sandy soils. In one of my trials, I used loamy soil, and it didn’t hold water well, leading to poor growth.
- Nutrient Content: Testing for nutrients is key. Rice needs nitrogen, phosphorus, and potassium. I’ve used compost and organic matter to enrich my soil.
One of the first things I did was conduct a soil test. It helped me understand what nutrients were lacking and what amendments I needed to add. Investing time in soil preparation can yield a much better harvest, trust me!
Preparing for Rice Planting
Once you grasp the basics of rice planting, it’s time to prepare for the actual planting process. Proper preparation can set you up for success down the line. Here’s how I went about it.
Choosing the Right Location
Selecting the right location for your rice field is crucial. You want to find a flat area with good drainage that can hold water when needed. I learned that areas with natural water sources, like ponds or streams, can simplify irrigation. Observing how the water flows in your chosen spot can help you plan your field layout.
Soil Preparation Techniques
Soil preparation is a big step before planting. I remember tilling my soil about a month before planting, which allowed me to break it up and mix in organic matter. Here are some techniques I’ve found helpful:
- Tilling: Breaking up the soil helps aerate it and makes it easier for roots to grow.
- Leveling: Ensuring your field is level prevents water pooling in one area, which can lead to uneven growth.
- Fertilization: Adding compost or organic fertilizers before planting can boost soil health.
On my journey, I discovered that taking the time to properly prepare the soil led to healthier plants and a more abundant harvest. It’s worth the effort!
Water Management for Rice Fields
Water management is crucial in rice farming. I learned that rice needs consistent flooding for optimal growth. Here are some key points to consider:
- Flooding: Maintain a water depth of about 4-8 inches in the field. This keeps weeds down and provides the right environment for rice.
- Drainage: After the tillering stage, you may need to drain the field to allow the soil to dry slightly before harvest.
- Irrigation Systems: Investing in a good irrigation system can make managing water levels much easier.
I found that my rice plants thrived with proper water management, and it also helped prevent pests. Remember, consistency is key!
Steps to Plant Rice
When to Plant Rice
Timing is everything when it comes to planting rice. I remember the excitement of my first planting season, but I quickly learned that choosing the right time can make or break your crop. In general, rice is best planted in the late spring to early summer when temperatures are warm enough for germination. In my experience, I found that planting too early can expose the young plants to cold weather, which stunted their growth.
One tip I picked up along the way is to pay attention to the local climate patterns and historical data. For instance, I started planting when the average daily temperatures consistently reached about 70°F. It was also beneficial to observe the last frost date in my area. I realized that waiting a week or two after the last frost provided a much better chance for healthy growth.
Seed Selection and Treatment
Choosing the right seeds for your variety is vital. I remember browsing through catalogs and local stores, overwhelmed by the options. In my case, I decided to go with certified seeds that had good disease resistance. After selecting the seeds, I learned that pre-treatment can be extremely beneficial. Soaking the seeds for about 24 hours before planting not only helps in germination but also promotes stronger seedlings.
During my first attempt, I neglected this step and faced uneven germination. The seeds that I soaked sprouted quickly, while others took much longer, causing inconsistency in my field. I recommend trying to soak seeds in a solution of water mixed with a bit of fertilizer to give them that extra boost. This small step can make a significant difference in how your plants establish themselves.
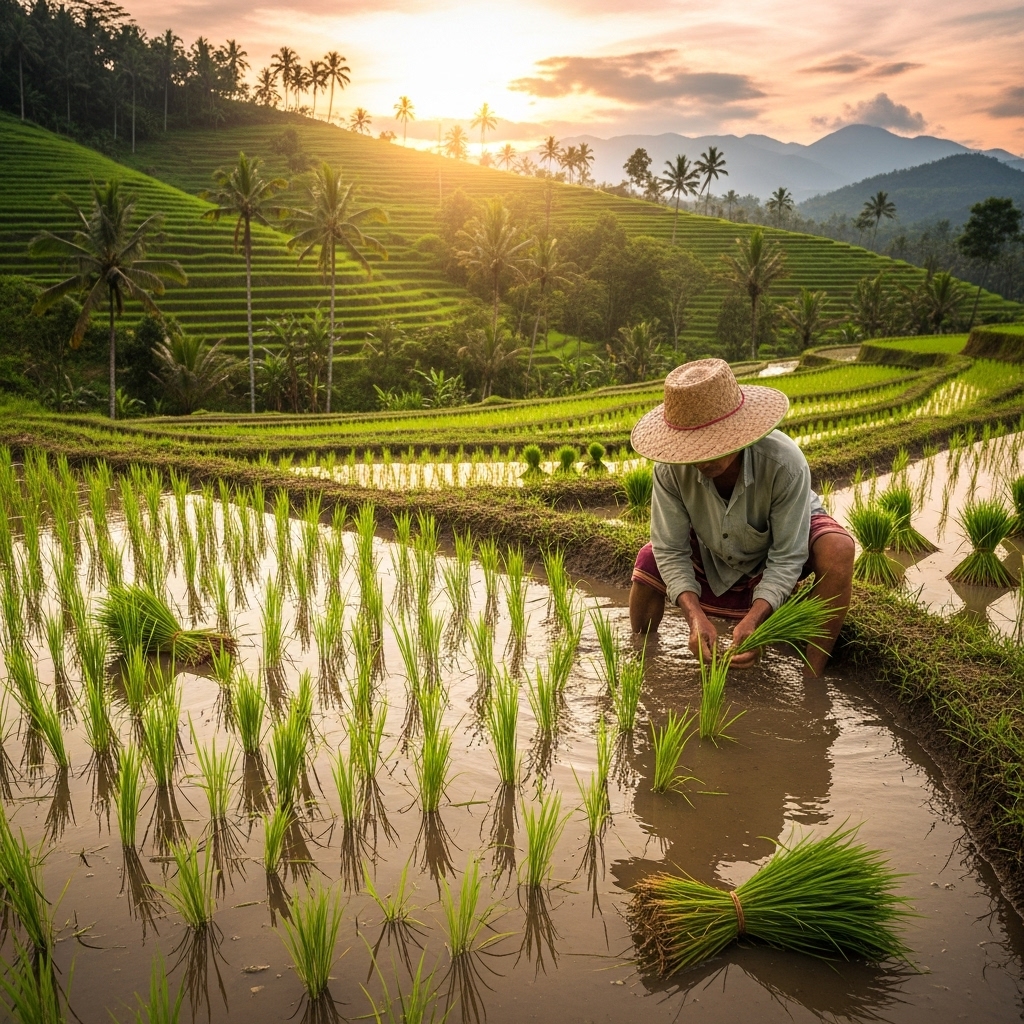
Seedling Preparation and Transplanting
If you choose to transplant your rice seedlings instead of direct seeding, you’ll need to start preparing them a few weeks before the main planting. I remember building a small seedbed where I could grow my seedlings. This involved tilling a small area of soil, enriching it with compost, and then broadcasting the seeds. Keeping the seedbed moist was critical. I learned that maintaining a water depth of about 2 inches helped create the right environment for my seedlings.
After about 20-30 days, when the seedlings were around 6-8 inches tall, I was ready to transplant them into the main field. It was a labor-intensive process, but I found joy in carefully uprooting each seedling and gently placing it into the prepared field. I learned that spacing the seedlings about 6-12 inches apart allowed them to grow without competing too much for nutrients and water.
Direct Seeding vs. Transplanting
Now, I want to touch on the difference between direct seeding and transplanting. Both methods have their pros and cons, and I’ve tried both approaches to see which suited my style better. Direct seeding felt simpler; I could sow the seeds directly into flooded fields. However, I noticed that it sometimes led to uneven plant growth, especially if the soil conditions weren’t ideal.
Transplanting, while more labor-intensive, has its benefits. I found that transplanting resulted in stronger plants that were better able to withstand pests and diseases. It also allowed me to control the planting density more effectively. In my experience, I’ve favored transplanting, particularly for varieties that need more care. It’s a personal choice, and I encourage you to consider your circumstances, such as time, resources, and the specific rice variety you’re planting.
Care and Maintenance of Rice Fields
Irrigation Techniques
Once your rice is planted, ongoing care is key to a successful harvest. Effective irrigation techniques have been a game-changer for me. I quickly learned that rice requires consistent water levels, especially during the initial growth stages. I set up a simple irrigation system using gravity to ensure that water flowed evenly across my field. It was a satisfying project that made a real difference!
During dry spells, I found that checking the water levels regularly was essential. I learned to look for signs of stress in the plants, such as drooping leaves. If I noticed that, I’d immediately increase the water supply. Additionally, I discovered the importance of draining the field during certain growth stages, which allowed the soil to dry slightly and helped prepare the plants for maturation.
Fertilization Practices
Proper fertilization was another lesson I learned through trial and error. I initially underestimated how much nutrients my rice plants required. After conducting soil tests, I realized the importance of balancing nitrogen, phosphorus, and potassium in my fertilization regimen. I started applying organic fertilizers a few weeks after planting, which helped boost plant growth.
One practice that worked well for me was side-dressing with compost or organic pellets during the growing season. It helped sustain the nutrient levels in the soil without overwhelming the plants. I always made sure to follow up with water after fertilization to help the nutrients penetrate the soil.
Pest and Weed Management
Managing pests and weeds was another critical part of my rice farming experience. I quickly realized that rice fields can attract pests like rice water weevils and stem borers. I adopted an integrated pest management approach, which included monitoring pest levels and introducing beneficial insects. I also tried to use traps and organic pesticides when necessary, and I found that this helped keep pest populations in check.
Weed control was equally important. I learned that keeping the fields flooded could help suppress weed growth, but I still had to remain vigilant. Hand weeding became a regular task for me, along with mulching, which worked wonders in reducing weed competition. I remember the satisfaction of seeing clean rows of rice plants without the distraction of weeds.
Harvesting Rice
Signs of Maturity
After all the hard work of planting and maintaining the rice fields, the excitement of harvesting is just around the corner! I remember the anticipation as the season approached, and I wanted to ensure I harvested at the right time. Recognizing the signs of maturity in rice plants was crucial. Typically, rice is ready to harvest when the grains are firm and the plants turn a golden color. I found that checking the grains for moisture content is a good practice as well; ideally, the moisture should be around 20-25% for optimal harvesting.
During my first harvest, I was amazed at how the plants transformed. The once-green fields shifted to beautiful golden waves, signaling that it was time to act. I also learned to test several plants from different areas of the field. This helped me gauge the overall maturity, as not all plants ripen at the same time. When I noticed that most grains were hard and the leaves began to yellow, I knew it was time to prepare for the big day!
Harvesting Techniques
Harvesting rice can be quite an experience! I started with a simple hand-harvesting method using a sickle, which allowed me to feel connected to the process. It was labor-intensive, but there’s something rewarding about cutting each stalk with care. I made sure to cut the stalks just above the ground, leaving some roots intact to help with soil stability.
If you have a larger field, investing in a combine harvester might be more efficient. I’ve seen how these machines can cut down on harvesting time significantly. However, I also appreciate the traditional methods for the connection they provide to the land and the crop. No matter the method, I recommend harvesting in the morning when the dew is still on the plants; this helps reduce dust and keeps the grains from shattering.
It’s essential to handle the harvested rice carefully to avoid damage. I learned that stacking the rice in small bundles and keeping it protected from direct sunlight helps preserve its quality. After harvesting, I also checked the weather to ensure there would be no rain, which could ruin the freshly cut grain.
Post-Harvest Processing
Post-harvest processing is a step I initially overlooked, thinking it was less important than growing. However, I quickly realized that it’s just as vital. After harvesting, the rice must be dried to prevent spoilage. I usually spread my rice out in a thin layer on large tarps or trays in a shaded area with good airflow. This drying process can take several days, and I learned to check for moisture regularly to ensure the rice was drying evenly.
Once the rice reached the ideal moisture level, I would then thresh it to separate the grains from the stalks. In my case, I used a simple manual method by beating the bundles against a hard surface. It was a bit of a workout, but I found it satisfying to see the grains fall free. For larger operations, mechanical threshers can be beneficial to speed up this process.
After threshing, I would clean the rice to remove any debris or leftover husks. I remember the first time I did this; it felt like uncovering a treasure! Cleaning can be done by hand or with a small air blower, and it makes a noticeable difference in the quality of the final product.
Finally, I would store the processed rice in cool, dry conditions, ideally in airtight containers to protect it from pests. I learned that proper storage can extend the shelf life of my rice significantly, ensuring that I could enjoy my harvest for months to come.
Frequently Asked Questions
What are the two main types of rice varieties?
The two main categories of rice are Indica Rice, which is long-grain and non-sticky, typically grown in tropical regions, and Japonica Rice, which is short-grain and sticky when cooked, commonly grown in cooler climates.
What are the ideal temperature and water conditions for growing rice?
Rice thrives in temperatures ranging from 70°F to 90°F and often requires flooded fields to maintain a consistent water supply, ideally with a water depth of about 4-8 inches.
How important is soil quality in rice cultivation?
Soil quality is crucial for rice cultivation. Clay soils are ideal as they retain water better than sandy soils, and nutrient content, including nitrogen, phosphorus, and potassium, must be tested and enriched for optimal growth.
What is the best timing for planting rice?
Rice is best planted in late spring to early summer when temperatures are warm enough for germination, ideally waiting until the average daily temperatures consistently reach about 70°F and after the last frost date.
What is the benefit of soaking rice seeds before planting?
Soaking rice seeds for about 24 hours before planting helps in germination and promotes stronger seedlings, leading to more consistent growth in the field.
What are the differences between direct seeding and transplanting rice?
Direct seeding is simpler but may lead to uneven plant growth, while transplanting is more labor-intensive but can result in stronger plants that withstand pests and diseases better.
What irrigation techniques are recommended for rice fields?
Consistent water levels are essential, especially during initial growth stages. Setting up an irrigation system and regularly checking water levels can help manage stress in plants during dry spells.
How can pests and weeds be managed in rice farming?
Pests and weeds can be managed through an integrated pest management approach, which includes monitoring pest levels, using beneficial insects, traps, organic pesticides, and maintaining flooded fields to suppress weed growth.
What are the signs that rice is ready for harvesting?
Rice is ready to harvest when the grains are firm, the plants turn a golden color, and the moisture content is ideally around 20-25%.
What steps should be taken for post-harvest processing of rice?
Post-harvest processing involves drying the rice to prevent spoilage, threshing to separate grains from stalks, cleaning the rice to remove debris, and storing it in cool, dry conditions in airtight containers.