
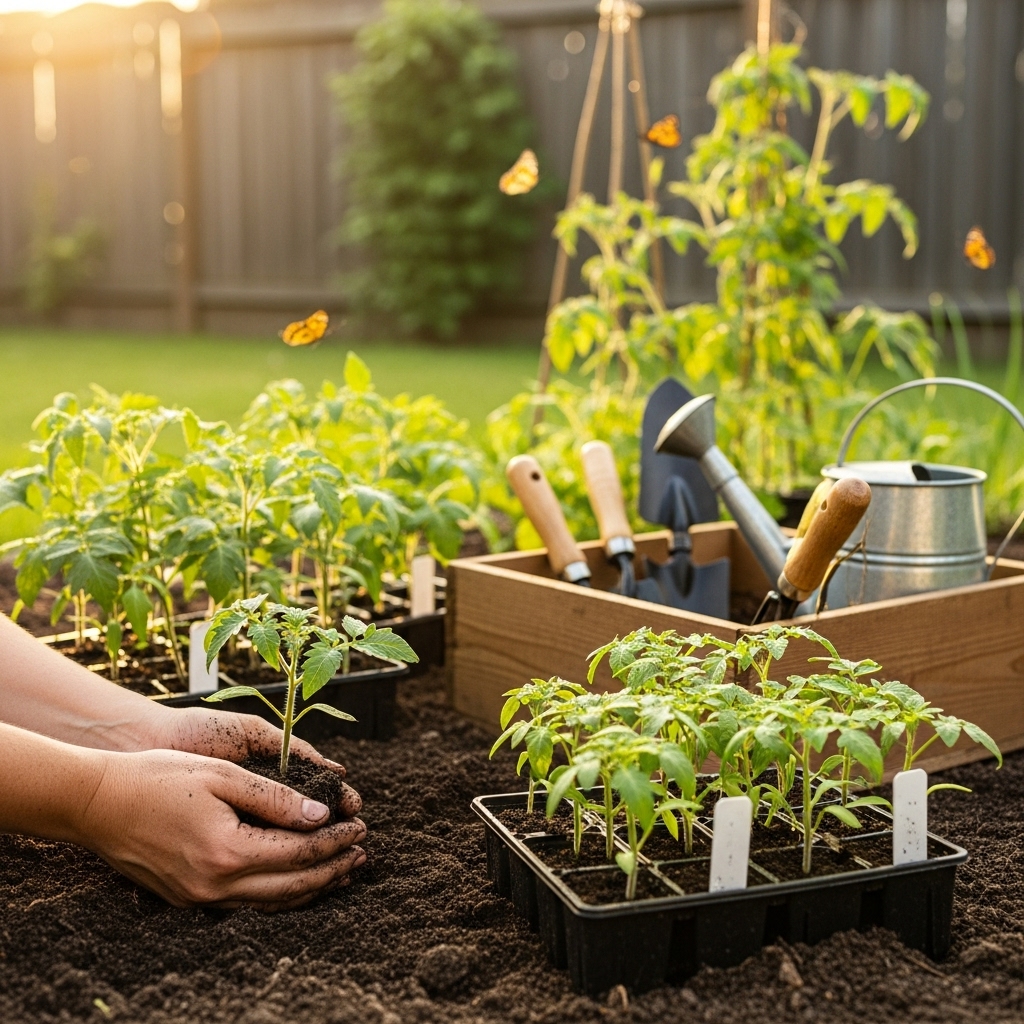
The right way to plant tomatoes from seedlings involves selecting the right variety, preparing the soil, and following proper planting techniques. I’ve learned that the key to a successful tomato garden lies in careful planning and execution.
Understanding Tomato Seedlings
What Are Tomato Seedlings?
Tomato seedlings are young tomato plants that have been started from seeds and are ready to be transplanted into the garden or containers. They usually have a few sets of true leaves and are typically around 6-8 weeks old when they’re ready for this transition. For me, watching those little seedlings grow from tiny seeds is one of the most rewarding parts of gardening. It’s fascinating to see how tiny, fragile plants can eventually produce juicy, delicious tomatoes.
Types of Tomato Seedlings
There are countless varieties of tomato seedlings, each with its own unique flavor, color, and growth habit. Some of the most common types include:
- Determinate Tomatoes: These are bush varieties that grow to a certain height and produce fruit all at once. They’re great if you want to can or preserve your tomatoes.
- Indeterminate Tomatoes: These plants continue to grow and produce fruit throughout the season. I often prefer these because they provide a longer harvest period.
- Heirloom Tomatoes: Known for their rich flavors and unique shapes, heirloom varieties are often passed down through generations. I love growing these for their diversity.
- Hybrid Tomatoes: These are bred for specific traits, like disease resistance or higher yield. While I usually go for heirlooms, I’ve found some hybrids to be very productive too.
Benefits of Starting with Seedlings
Starting your tomato garden with seedlings comes with several benefits. For one, seedlings allow you to have a head start on the growing season since they are already germinated and growing. I remember when I first tried starting tomatoes from seeds; it took forever for them to sprout, and I was left waiting impatiently. With seedlings, I could plant them directly in the garden, leading to earlier harvests.
Another advantage is that seedlings can be hardier and more resilient than seeds. They’ve already established roots and can handle being transplanted better. Plus, I find it easier to manage pests and diseases at the seedling stage, as they’re often less vulnerable than young seeds. Overall, using seedlings simplifies the process and can lead to a more fruitful harvest. Read Interesting article: How to Use Neem Oil on Plants (Safe & Effective)
Preparing for Planting
Choosing the Right Tomato Variety
Choosing the right tomato variety is crucial. I’ve learned that the best tomatoes for me depend on my climate, soil type, and what I want to do with the tomatoes. If you live in a cooler climate, you might want to consider varieties that mature quickly. On the other hand, if you’re in a warmer area, indeterminate varieties that grow throughout the season might be the best choice. I always recommend researching which types grow well in your area and perhaps even chatting with local gardeners for their insights.
Gathering Necessary Supplies
Before planting your tomato seedlings, gathering the right supplies is essential. Here’s what I typically prepare:
Planting Containers
If you’re starting your seedlings indoors or in containers, choose pots that are at least 3-4 inches deep. I’ve often used biodegradable pots, which can be planted directly into the ground, reducing transplant shock. Whichever container you choose, make sure it has good drainage; nobody likes soggy roots!
Soil Requirements
Tomatoes thrive in well-draining, nutrient-rich soil. I always opt for a potting mix designed for vegetables or make my own by combining equal parts of peat moss, compost, and perlite. This mix has always worked wonders for me, ensuring the seedlings have the nutrients they need to grow strong.
Fertilizers and Nutrients
Before planting, I usually mix in a balanced fertilizer to give my seedlings a nutrient boost. It’s crucial to follow the instructions carefully to avoid over-fertilizing, which can harm young plants. Organic options like fish emulsion or seaweed extract have also worked great for me and are gentle on the soil. Read Interesting article: How to Plant Okra for Maximum Yield
When to Plant Tomato Seedlings
Understanding Frost Dates
Knowing your local frost dates is essential when planning to plant tomato seedlings. I remember my first year trying to plant too early and losing all my seedlings to a late frost. It was a hard lesson learned! Generally, tomatoes should be planted after the last frost date in your area. You can usually find this information online or through your local gardening center.
Optimal Planting Seasons
Typically, the best time to plant tomato seedlings is in the spring when the soil temperature reaches around 60°F (15°C). For me, that’s when the excitement really kicks in. In warmer climates, you might even get away with planting in late winter. I like to keep an eye on the weather and soil temperature, ensuring the conditions are just right.
How to Plant Tomato Seedlings
Selecting the Right Location
Finding the perfect spot for your tomato seedlings can make a world of difference in their growth. I’ve learned that tomatoes love sunshine, so the ideal location is one that gets at least 6 to 8 hours of direct sunlight each day. I remember one year, I planted my tomatoes in a shaded area thinking it would keep them cool, but they barely produced any fruit. It was such a disappointing experience! I always recommend looking for a location that’s sunny and has good air circulation. This helps keep the plants healthy and minimizes the risk of diseases.
Preparing the Soil
Before planting, preparing the soil is key. I’ve found that healthy soil leads to healthy plants. Here are a few steps I take to ensure my soil is ready for my tomato seedlings:
Testing Soil pH
Tomatoes prefer a slightly acidic to neutral soil pH, ideally between 6.0 and 7.0. I usually test my soil using a kit from the local garden center or send a sample to a lab for more detailed analysis. It’s surprising how much the pH can affect plant growth! If the pH is too low, I add lime to raise it; if it’s too high, I incorporate sulfur to lower it. Keeping an eye on the pH has made a significant difference in my harvests.
Adding Organic Matter
I can’t stress enough how beneficial organic matter is for tomato plants. Each year, I mix in well-rotted compost or aged manure into my planting area. This not only enriches the soil but also improves its structure and drainage. I’ve seen my plants thriving after making this a regular practice. If it’s possible, I also like to add some mulch, which helps retain moisture and suppresses weeds. It’s a simple step that pays off big time!
Planting Techniques
When it comes to actually planting my tomato seedlings, I’ve developed a few techniques that make the process smoother and more effective.
Spacing and Depth Considerations
Spacing is crucial for tomato plants. I typically plant them about 18 to 24 inches apart to give them room to grow and spread out. This distance helps with air circulation and reduces the chances of diseases. When it comes to planting depth, I’ve learned that burying the seedlings deeper than they were in their pots can actually benefit them. The stems can develop additional roots, which strengthen the plant. I’ve seen my plants grow sturdier when I follow this technique.
Watering After Planting
Right after planting, I like to give my seedlings a good drink of water. This helps settle the soil around the roots and reduces transplant shock. I usually water them deeply but avoid soaking them too much, as soggy soil can lead to root rot. I keep an eye on the weather for the first few weeks after planting; if it’s especially hot or windy, I make sure to water more frequently to keep them hydrated.
Care and Maintenance Post-Planting
Watering Guidelines
Watering is one of the most important aspects of maintaining healthy tomato plants. I’ve found that consistent moisture is key, especially during the fruiting stage. I aim to water my tomatoes deeply once or twice a week rather than giving them light, frequent waterings. This encourages deeper root growth, which helps the plants withstand dry spells. I often check the soil moisture by sticking my finger in the soil; if it feels dry an inch or two down, it’s time to water.
Sunlight Requirements
As I mentioned earlier, tomatoes crave sunlight. After planting, I make sure to monitor their exposure to the sun. If I notice that any of my plants are not getting enough light, I may need to adjust their surroundings or even prune back nearby plants that might be casting shadows. Ensuring they receive plenty of sunlight has always led to better yields in my garden.
Fertilizing Schedule
Fertilizing after planting is another essential step. I usually start with a balanced fertilizer a few weeks after planting, then switch to a fertilizer higher in potassium and phosphorus once the plants start to flower. I’ve learned that over-fertilizing can lead to lush foliage but fewer fruits, so I follow the recommended rates on the fertilizer packaging. It’s a delicate balance, but getting it right has made all the difference in my harvests.
Supporting Tomato Plants
As my tomato plants grow, I’ve discovered that they often need some support, especially the indeterminate varieties. I generally stake or cage them to keep the stems upright and prevent them from sprawling on the ground. I remember my first attempt at growing tomatoes without support; it was chaotic, and many fruits ended up rotting on the soil! Now, I use sturdy stakes or cages, and I always tie the stems gently to avoid damaging them. Not only does this keep my garden looking tidy, but it also helps the plants get better airflow and sun exposure.
Common Problems and Solutions
Pests to Watch For
As much as I love tending to my tomato plants, I’ve learned that they can attract a variety of pests. It’s important to keep an eye out for these little critters, as they can wreak havoc on your garden. One pest that I’ve encountered often is the aphid. These tiny insects suck the sap from the plants, leading to stunted growth and yellowing leaves. I usually spot them on the undersides of leaves, and when I do, I give them a blast of water from the hose to dislodge them. If that doesn’t work, I’ve found insecticidal soap to be quite effective.
Another pest I’ve had to deal with is the tomato hornworm. These large, green caterpillars can quickly defoliate a tomato plant if left unchecked. I remember finding one on my plant one year and was shocked at how much damage it had already done. Now, I regularly check my plants and manually remove any hornworms I find. Sometimes, I even enlist the help of birds by creating a welcoming environment for them in my garden.
Lastly, I’ve learned that whiteflies can also be a nuisance. They tend to form a cloud around the plant when disturbed. If I notice them, I often use sticky traps to catch them and help reduce their population. Monitoring for pests and addressing them early has made a huge difference in keeping my plants healthy.
Disease Management
In addition to pests, diseases can be another challenge for tomato growers. One of the most common diseases I’ve encountered is blight, which can ruin an entire crop if not managed quickly. I remember my first year dealing with early blight, where the leaves started showing dark spots and then wilted. To combat this, I ensure to practice crop rotation and avoid planting tomatoes in the same spot year after year, as this helps prevent the buildup of pathogens in the soil.
I also try to water the plants at the base rather than overhead to minimize moisture on the leaves, which can encourage fungal diseases. If I do notice signs of blight, I promptly remove any infected leaves and dispose of them far from my garden. In some cases, I’ve turned to organic fungicides as a last resort, but prevention is always my first line of defense.
Another common issue is blossom end rot, which shows up as dark, sunken spots on the bottom of the tomatoes. I’ve learned that this often occurs due to inconsistent watering or calcium deficiency. To avoid this, I make it a point to maintain consistent moisture levels and incorporate lime into the soil if necessary. Keeping track of these diseases has made my gardening experience less stressful and far more productive.
Signs of Nutrient Deficiency
Understanding what my tomato plants need is crucial, and sometimes, they send signals when they’re lacking nutrients. One of the first signs I’ve noticed is yellowing leaves. If the older leaves turn yellow while the younger ones remain green, it might indicate a nitrogen deficiency. In this case, I usually apply a balanced fertilizer to give them a boost.
On the other hand, if the leaves develop a bluish tint and appear to be curling, they might be lacking phosphorus. I’ve had to adjust my fertilizing schedule to ensure my plants receive the right nutrients at the right times. For potassium deficiency, I see the leaf edges browning, which prompts me to use a fertilizer higher in potassium.
Sometimes, I also find that my tomatoes aren’t fruiting well, which can indicate a lack of nutrients or improper watering. Keeping a close eye on my plants and understanding their needs has helped me maintain healthier, more productive plants. I always remind myself that a little observation can go a long way in preventing bigger problems down the line.
Harvesting Your Tomatoes
When to Harvest
After putting in all that hard work, the moment of truth arrives—harvesting my tomatoes! I’ve learned that timing is everything. Generally, tomatoes are ready to be harvested when they achieve their full color and feel slightly soft to the touch. I remember my first experience waiting for my tomatoes to ripen; I was so eager that I picked them too early, and they never quite had the flavor I was hoping for. Now, I make it a point to be patient and wait for the right moment.
Typically, for red varieties, I wait until they turn a deep, rich red. For other colors like yellow or purple, I watch for their specific shades. I also check for a slight give when I gently squeeze them. If I see any signs of cracking or splitting, I know I need to harvest immediately to prevent further damage.
How to Harvest Tomatoes Properly
When it comes to harvesting, I’ve found that the right technique matters. I usually avoid pulling tomatoes off the vine, as this can damage the plant and other fruit. Instead, I gently twist and lift the fruit to detach it from the stem. I also make sure to use clean, sharp pruning shears if needed, especially for larger varieties. This helps prevent any unnecessary bruising and keeps the fruit intact.
After harvesting, I always handle the tomatoes with care, placing them in a basket or container to avoid squishing. I avoid washing them until I’m ready to use them, as moisture can promote mold growth. Enjoying the fruits of my labor is one of the best parts of gardening, and I look forward to using my homegrown tomatoes in various dishes!
Frequently Asked Questions
What are tomato seedlings?
Tomato seedlings are young tomato plants that have been started from seeds and are ready to be transplanted into the garden or containers. They typically have a few sets of true leaves and are around 6-8 weeks old when ready for this transition.
What are the different types of tomato seedlings?
The common types of tomato seedlings include determinate tomatoes (bush varieties that produce fruit all at once), indeterminate tomatoes (that grow and produce fruit throughout the season), heirloom tomatoes (known for their rich flavors and unique shapes), and hybrid tomatoes (bred for specific traits like disease resistance or higher yield).
What are the benefits of starting with tomato seedlings?
Starting with seedlings allows for a head start on the growing season, as they are already germinated and growing. Seedlings are generally hardier and more resilient than seeds and are easier to manage regarding pests and diseases.
How do I prepare for planting tomato seedlings?
Preparation involves choosing the right tomato variety based on climate and soil type, gathering necessary supplies like planting containers and nutrient-rich soil, and mixing in a balanced fertilizer before planting.
When is the best time to plant tomato seedlings?
The best time to plant tomato seedlings is in the spring after the last frost date in your area, ideally when the soil temperature reaches around 60°F (15°C). In warmer climates, planting may be possible in late winter.
How should I plant tomato seedlings?
When planting, find a location that receives at least 6 to 8 hours of direct sunlight, prepare the soil by testing pH and adding organic matter, space the seedlings 18 to 24 inches apart, and water them well after planting.
What are the watering guidelines for tomato plants?
Watering should be consistent, with deep watering once or twice a week rather than frequent shallow watering. Checking soil moisture by feeling it can help determine when to water.
What pests should I watch for when growing tomatoes?
Common pests include aphids, tomato hornworms, and whiteflies. Regular monitoring and early intervention, such as using water blasts or insecticidal soap, can help manage these pests effectively.
How can I tell when my tomatoes are ready to be harvested?
Tomatoes are ready to be harvested when they reach their full color and feel slightly soft to the touch. For red varieties, they should be a deep, rich red, while for other colors, specific shades indicate ripeness.
What is the proper technique for harvesting tomatoes?
To harvest tomatoes, gently twist and lift them to detach from the stem rather than pulling them off. Using clean, sharp pruning shears for larger varieties can prevent bruising and ensure the fruit remains intact.