
Planting watermelon involves choosing the right variety, preparing the soil, and ensuring optimal sunlight and watering conditions. When done right, you’ll enjoy fresh, juicy watermelons from your garden. Read Interesting article: How to Plant Watermelon for Big Sweet Fruit
Understanding Watermelon Varieties
As I dove into the world of gardening, one of my most exciting discoveries was the incredible variety of watermelons available. Choosing the right type is essential to your success, as different varieties have unique characteristics suited for various climates and preferences. Let’s explore these varieties together.
Seedless vs. Seeded Watermelons
One of the first decisions I faced was whether to grow seedless or seeded watermelons. Seedless varieties are fantastic for those who want to enjoy the fruit without the hassle of seeds. However, seedless watermelons require specific pollination conditions and are usually a bit trickier to grow. I remember the first time I tried to grow seedless watermelons; I was excited but also a bit nervous about the pollination process. On the other hand, seeded watermelons are generally easier to cultivate and come in many delicious varieties. If you’re new to gardening, I recommend starting with seeded watermelons. They tend to be more forgiving and reliable.
Types of Watermelons: Picnic, Icebox, and Seedless
Watermelons come in a few different types that cater to various needs and preferences. Picnic watermelons are large and perfect for gatherings. They can weigh between 15 to 40 pounds and are great for sharing with friends and family. I recall one summer when I brought a picnic watermelon to a barbecue, and it was a hit!
Icebox watermelons, on the other hand, are smaller, typically weighing 5 to 15 pounds. They fit easily in the refrigerator and are great for personal consumption. If you have limited space or want to enjoy a cool treat without cutting into a giant watermelon, icebox varieties are your best bet.
Lastly, we have seedless watermelons, which I’ve mentioned earlier. They are increasingly popular for their convenience but come with a bit more care required during the growing process. If you decide to go for seedless, ensure you have a good understanding of pollination techniques to help them thrive. Read Interesting article: How Many Sugar Baby Watermelons per Plant Indoors? Grow Secrets
Essential Tools and Supplies for Planting
Before you start planting, gathering the right tools and supplies is crucial. I learned this lesson the hard way when I attempted to plant without proper preparation. Having everything ready before you start can make the process a lot smoother and more enjoyable.
Gardening Tools Needed
Basic gardening tools are essential for planting watermelon successfully. Here’s a quick list of what you’ll need:
- Shovel or Trowel: For digging holes and turning the soil.
- Garden Rake: To level the soil and remove debris.
- Watering Can or Hose: For watering your plants efficiently.
- Garden Fork: Helpful for aerating the soil.
- Gloves: To protect your hands while gardening.
These tools are not just useful; they make the experience a lot more enjoyable. I always find myself getting lost in the task when I have everything I need at hand.
Seeds vs. Seedlings: Which to Choose?
Deciding between seeds and seedlings is another important step. I used to think starting from seeds was the only way to go, but I quickly learned that both options have their benefits. Seeds are more cost-effective and offer a wider variety, while seedlings provide a head start, allowing you to bypass the germination stage.
If you’re in a cooler climate or have a shorter growing season, I recommend opting for seedlings from a local nursery. I remember the first time I planted seedlings; it felt like I was already halfway to my goal! However, if you have the time and patience, starting from seeds can be incredibly rewarding.
Soil Requirements and Amendments
Watermelons thrive in well-drained, sandy loam soil with a pH of 6.0 to 6.8. When I first planted my watermelons, I didn’t pay much attention to soil quality, and it led to some disappointing results. It’s essential to prepare your soil before planting.
Adding organic matter, like compost or well-rotted manure, can greatly enhance soil fertility. When I started incorporating organic amendments, I noticed a huge difference in the health and productivity of my plants. Additionally, testing your soil can provide insights into what amendments you might need. Local garden centers often provide soil testing kits, which I found helpful.
When to Plant Watermelon
Timing plays a crucial role in the success of growing watermelons. I’ve learned that planting too early or too late can significantly affect the yield and quality of your fruit. Understanding the growing season is essential to ensure that your watermelons thrive. Read Interesting article: When to Plant Corn for Best Harvest
Understanding the Growing Season
Watermelons are warm-season crops that love heat. In my experience, they require a long growing season of about 70 to 90 days, depending on the variety you choose. They need warm soil, ideally around 70°F or higher, to germinate well. I remember feeling a bit impatient one spring when I wanted to get started, but I held off until the soil was warm enough. It was worth the wait because the plants grew vigorously!
It’s also important to keep an eye on the last frost date in your area. I like to mark it on my calendar each year. Planting too soon can expose young plants to frost, which can be devastating. Once you know the frost-free days in your region, you can plan accordingly to give your watermelons the best chance to flourish.
Ideal Planting Dates by Region
Different regions have varying climates, so knowing when to plant based on where you live is key. I’ve found that in the southern states, like Florida and Texas, you can typically plant watermelons as early as March. In contrast, up north, where the seasons are shorter, late May or early June is often the best time. Here’s a simple breakdown based on general regions:
- Southern States: March to April
- Midwestern States: Late April to early June
- Northern States: Late May to early June
Additionally, it’s always a good idea to check your local gardening zone and talk to neighbors who also grow watermelons. They can offer insight based on their experiences!
Choosing the Right Location
After figuring out the timing, the next big step is finding the right location for your watermelon patch. I’ve learned that location can make or break your crop, so let’s dive into the details.
Sunlight Requirements
Watermelons thrive in full sun, so choosing a spot that gets at least 6 to 8 hours of sunlight daily is crucial. I remember selecting a location in my yard that seemed sunny, but as the trees grew, they shaded some of my plants. It was a valuable lesson! If you’re unsure about sunlight, observe your yard throughout the day to see where the sun hits the hardest.
Soil Drainage and Quality
Good drainage is equally important for watermelons. They don’t like “wet feet,” which can lead to root rot. I once planted in an area where water tended to pool after heavy rains, and it didn’t end well. If you notice that the spot you’re considering doesn’t drain well, you might want to build raised beds or amend the soil with sand and organic matter to improve drainage.
Another consideration is the quality of the soil. Watermelons prefer nutrient-rich soil. If you can, conduct a soil test. I did this, and it helped me understand what nutrients I needed to add before planting, which made a world of difference in my harvest.
Spacing and Layout Considerations
When designing your watermelon patch, proper spacing is vital. I used to think I could cram my plants close together, but I quickly learned that they need room to spread out. Ideally, you want to space your plants about 2 to 3 feet apart. This allows for good air circulation and helps prevent disease.
Additionally, consider the layout of your garden. I’ve found that a staggered row system works well, allowing vines to spread out without crowding each other. If you have limited space, vertical gardening methods, like using trellises, can be a fun option! Just make sure your chosen variety can handle being trained upward.
Taking the time to choose the right location and preparing your garden properly can set you up for a successful watermelon-growing adventure. I can’t wait to share the next steps with you!
Step-by-Step Guide to Planting Watermelon
Preparing the Soil
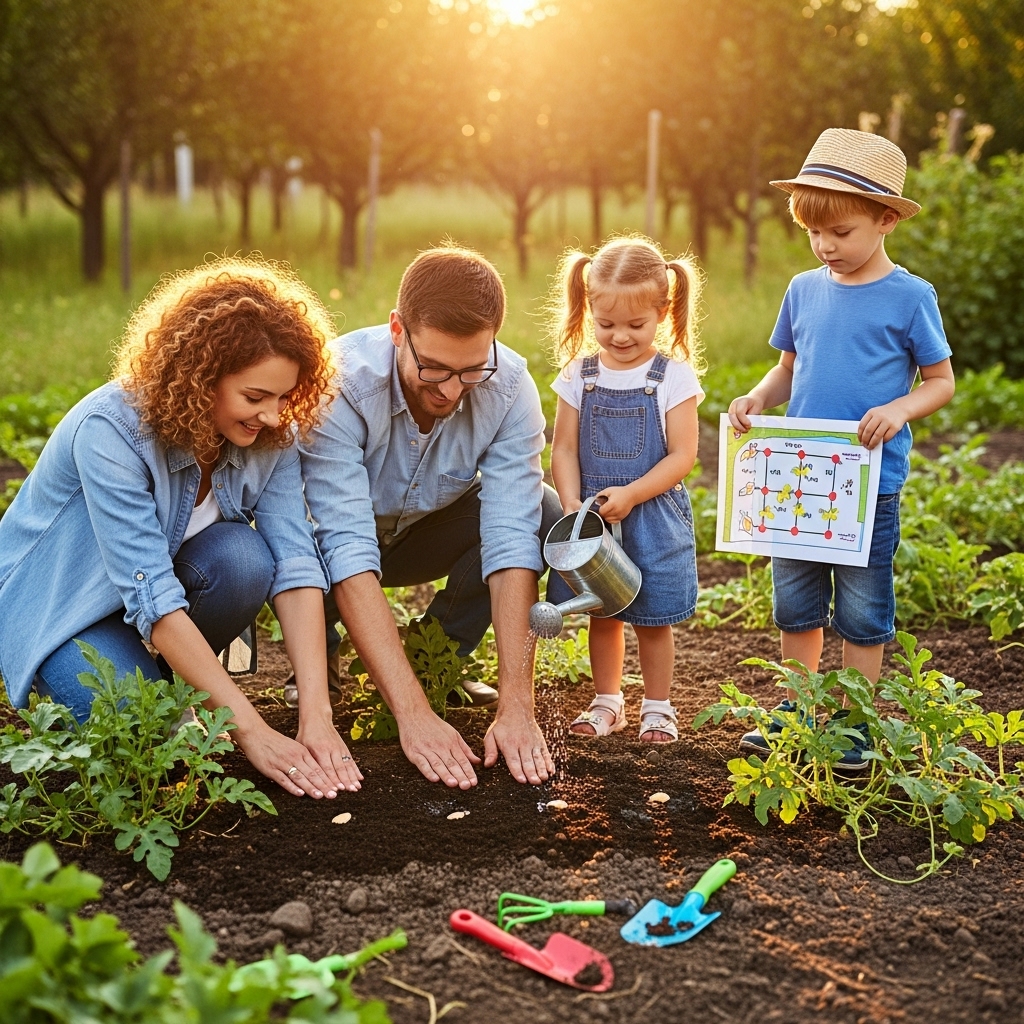
Once you’ve picked the perfect spot for your watermelon patch, the next step is preparing the soil. I can’t emphasize enough how crucial this stage is. I remember my first attempt at planting; I was so eager to get started that I overlooked this step, and it showed in my harvest. Start by clearing the area of any weeds, rocks, or debris. Weeds can compete for nutrients and water, so I always make sure to give my plants a clean slate.
Next, it’s time to till the soil. I use a garden fork or a tiller to aerate the soil, which helps improve drainage and allows nutrients to penetrate deeper. If you haven’t already done a soil test, this is a great time to do it! Based on the results, I often add organic matter like compost to enrich the soil. Mixing in about 2 to 4 inches of compost really made a difference in my watermelon crops. The soil should feel loose and crumbly when you’re done, which is a good sign that it’s ready for planting.
Sowing Seeds Directly into the Ground
Sowing seeds directly into the ground is one of the most rewarding experiences for me as a gardener. I usually wait until the soil temperature reaches at least 70°F, as I’ve found that warm soil helps with germination. When I’m ready to plant, I create small hills or mounds about 3 feet apart, as this encourages proper drainage and helps the plants thrive.
I typically plant 2 to 3 seeds per hill, about an inch deep. I remember the excitement of seeing those tiny green sprouts push through the soil a week or so later. It’s a magical moment! After sowing, I give them a gentle watering to help settle the soil around the seeds. Keep in mind that once the seedlings emerge, I thin them out to the strongest plant per hill to prevent overcrowding. It’s tough to do, but I’ve learned it’s essential for a healthy harvest!
Transplanting Seedlings
If you’ve chosen to start with seedlings, transplanting can be a bit easier. I’ve found that getting seedlings ready for the garden requires a little prep work. A week or so before transplanting, I harden them off by gradually exposing them to outdoor conditions. I remember the first time I forgot this step, and my poor seedlings struggled to adapt. To harden them off, I’d place them outside for a few hours each day, gradually increasing the time until they’re ready for their new home.
When I’m ready to transplant, I dig holes in the soil that are large enough to accommodate the root ball of each seedling. I make sure to keep the top of the root ball level with the soil surface, as burying them too deep can lead to rot. After placing them in their new holes, I gently pack the soil around the roots and water them well. It’s fascinating to watch these little plants settle into their new environment!
Watering and Fertilizing Techniques
Watering Schedule for Watermelons
Watering is another crucial aspect of growing watermelons. I learned early on that watermelons need plenty of moisture, especially during the hot summer months. I typically aim to water deeply once a week, allowing the soil to dry out slightly between watering sessions. This approach encourages the roots to grow deeper, making the plants more resilient.
In my experience, I’ve found that watering early in the morning is the best time. It gives the plants a head start for the day and reduces evaporation. I also try to avoid getting the leaves wet to minimize the risk of fungal diseases. To check if my plants need water, I stick my finger in the soil about an inch deep. If it feels dry, I know it’s time to water.
Types of Fertilizers: Organic vs. Chemical
Choosing the right fertilizer can be a game-changer for your watermelon plants. I’ve experimented with both organic and chemical fertilizers, and I tend to lean toward organic options. They not only nourish the plants but also improve the overall health of the soil. I usually start with an all-purpose organic fertilizer when I plant and then switch to a high-potassium fertilizer as the fruits start to develop. This helps enhance sweetness and overall flavor.
It’s important to follow the instructions on the fertilizer package, as I’ve seen firsthand how over-fertilizing can harm the plants. I remember one year when I got a bit too enthusiastic, and my watermelon plants grew huge leaves but produced very few fruits. Keeping a balanced approach has made my gardening experience much more enjoyable and productive.
Frequently Asked Questions
What are the primary types of watermelons?
The primary types of watermelons are picnic, icebox, and seedless varieties. Picnic watermelons are large, weighing between 15 to 40 pounds, while icebox watermelons are smaller, typically weighing 5 to 15 pounds. Seedless watermelons are popular for their convenience but require specific care during the growing process.
What tools are essential for planting watermelons?
Essential tools for planting watermelons include a shovel or trowel, garden rake, watering can or hose, garden fork, and gloves. These tools help with digging, leveling the soil, watering, aerating, and protecting your hands during gardening tasks.
Should I start with seeds or seedlings for planting watermelons?
Both seeds and seedlings have their benefits. Seeds are more cost-effective and offer a wider variety, while seedlings provide a head start by bypassing the germination stage. If you live in a cooler climate or have a shorter growing season, seedlings may be the better choice.
What soil conditions are best for growing watermelons?
Watermelons thrive in well-drained, sandy loam soil with a pH of 6.0 to 6.8. Adding organic matter, like compost or well-rotted manure, can enhance soil fertility and improve the health of your plants.
When is the best time to plant watermelons?
The best time to plant watermelons depends on your region. In southern states, you can typically plant as early as March, while in northern states, late May or early June is often ideal. It’s important to wait until the soil temperature is around 70°F or higher for optimal germination.
How much sunlight do watermelons need?
Watermelons require full sun, needing at least 6 to 8 hours of sunlight daily for optimal growth. It’s important to choose a planting location that receives plenty of sunlight to ensure healthy plants.
What is the recommended spacing for watermelon plants?
Watermelon plants should ideally be spaced about 2 to 3 feet apart. This spacing allows for good air circulation and helps prevent disease among the plants.
How often should I water watermelon plants?
Watermelon plants should be watered deeply once a week, allowing the soil to dry out slightly between watering sessions. This encourages deeper root growth, making the plants more resilient, especially during hot summer months.
What type of fertilizer is best for watermelons?
Organic fertilizers are often recommended for watermelons, as they nourish the plants and improve soil health. Starting with an all-purpose organic fertilizer and switching to a high-potassium fertilizer as the fruits develop can enhance sweetness and flavor.
What should I do if my soil does not drain well?
If your soil does not drain well, consider building raised beds or amending the soil with sand and organic matter to improve drainage. This is crucial, as watermelons do not tolerate “wet feet,” which can lead to root rot.