
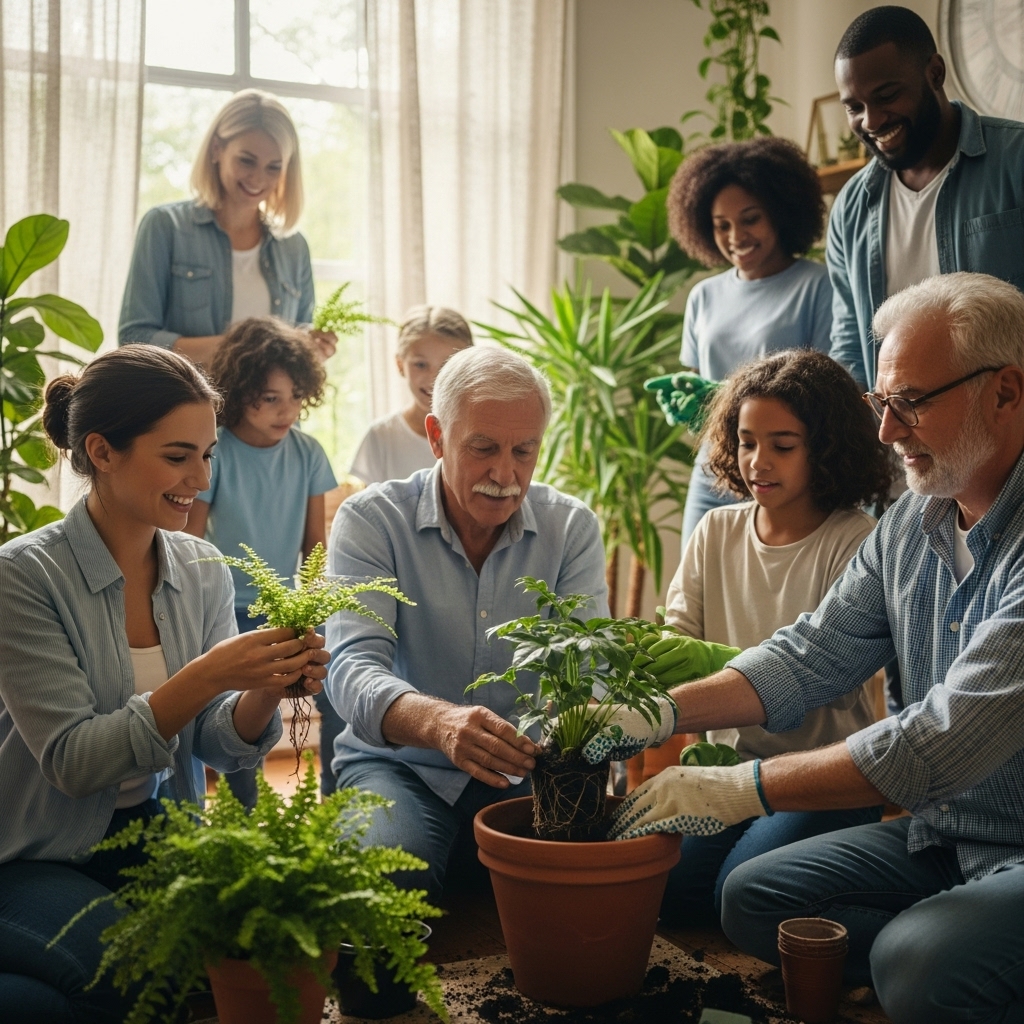
Replanting a plant without harming it requires careful planning, timing, and technique to ensure its health and continued growth. I’ve found that understanding the signs of when to repot and following a step-by-step approach can make a big difference. Read Interesting article: How to Harvest & Store Cucamelon Tubers for Replanting
Understanding the Importance of Repotting
Why Repotting is Necessary
Repotting is more than just a routine chore; it’s a crucial aspect of plant care that helps ensure our green friends thrive. Over time, plants outgrow their pots, and their roots can become cramped, restricting their growth. When I first started gardening, I underestimated how vital it was to give my plants room to grow. I remember seeing roots poking out of the bottom of the pot and thinking it was just a quirky feature. But I soon learned that this was a clear sign my plants needed more space!
Signs Your Plant Needs Repotting
There are several telltale signs that it’s time to repot a plant. If you notice that water is pooling on the surface of the soil or draining too quickly, this could indicate that the root system is taking up most of the space. I’ve also seen plants become root-bound, where the roots circle around the pot rather than spreading out. Another sign is when growth slows down, or the plant looks unhealthy despite regular care. In my experience, becoming familiar with these signs has helped me keep my plants healthy and vibrant.
Benefits of Repotting for Plant Health
Repotting offers numerous benefits that can lead to a happier, healthier plant. I’ve found that fresh potting soil replenishes nutrients, allowing my plants to absorb what they need for growth. Furthermore, repotting can help remove old roots and dead material, which can harbor pests or diseases. It’s also an opportunity to inspect the roots and prune them if necessary, promoting a robust root system. I remember feeling a sense of accomplishment after repotting my first plant, watching it bounce back with renewed energy was incredibly satisfying.
Choosing the Right Time to Replant
Best Seasons for Repotting
The timing of repotting plays a significant role in the success of the process. I’ve discovered that spring is often the best season to repot most plants since they are coming out of dormancy and entering their active growing phase. However, I’ve also had success with fall repotting, especially for certain indoor plants. It’s important to avoid repotting during the winter when plants are typically less active.
Identifying the Right Growth Stage
Knowing the right growth stage for repotting is essential. I usually look for signs that the plant is actively growing, like new leaves or stems forming. This is when the plant can handle the stress of being disturbed. It’s a bit like knowing when to strike while the iron is hot; timing is everything! I remember repotting a peace lily just as it started to bloom, and it thrived beautifully afterward. That joy of seeing it flourish afterward made me realize how important this timing is.
How Weather Conditions Affect Repotting
Weather conditions can also impact the repotting process. If it’s too hot or too cold, the stress on the plant can be detrimental. I’ve learned to keep an eye on the forecast; repotting during mild, overcast days can help minimize stress. I remember one time repotting during a particularly sunny day only to see some of my plants droop the next day. Now, I always try to repot when conditions are just right, making it easier for the plants to adjust.
Gathering the Essential Tools and Materials
Types of Pots and Containers
Choosing the right pot is a critical step in repotting. I’ve experimented with various types, including plastic, ceramic, and terracotta. My personal favorite is terracotta, as it allows for better airflow to the roots. However, every plant has its preferences, and I’ve noticed that some plants thrive better in plastic pots due to their lightweight nature and water retention. When selecting a new pot, I always ensure there are drainage holes to prevent water from sitting at the bottom.
Choosing the Right Potting Soil
The potting soil you choose can make or break your repotting efforts. I’ve learned that not all soil is created equal. For most of my houseplants, a well-draining potting mix works best, while succulents and cacti require a specialized mix to prevent rot. I always check the label to ensure it meets the needs of the specific plant I’m repotting. A good quality potting soil can make a significant difference in how quickly the plant adjusts after repotting. Read Interesting article: What Does Perennial Plant Mean? Simple Explanation
Essential Tools for Repotting
Having the right tools can simplify the repotting process. I usually gather a few essential items: a trowel for scooping soil, scissors or pruning shears for trimming roots, and gloves to protect my hands. I’ve also found it helpful to have a small watering can nearby for a quick drink after repotting. Preparing my workspace with all these tools laid out makes the experience smoother and more enjoyable.
Step-by-Step Guide to Repotting
Preparing the New Pot
Before diving into the actual repotting, I always start by preparing the new pot. I make sure it’s clean and free from any old soil or debris. Sometimes, I even soak terracotta pots in water for a few hours to prevent them from drawing moisture away from the plant’s roots. I also add a layer of small stones or gravel at the bottom of the pot to improve drainage. This step has saved me from many overwatering issues in the past. Having a solid base is crucial, and it gives me peace of mind knowing that my plant will have the best chance to thrive.
Removing the Plant from Its Current Pot
Gently removing the plant from its current pot can feel a bit like a delicate operation. I always make sure to hold the base of the stem while tipping the pot sideways. If the plant is stubborn, I tap the sides of the pot or gently squeeze it to loosen the soil. I remember the first time I struggled with a plant that had roots tightly wound around the pot; it was a little nerve-wracking! But I’ve learned that a gentle wiggle usually does the trick. I try to be as careful as possible to avoid damaging the roots, as they are essential for the plant’s health.
Inspecting and Pruning Roots
Once I have the plant out, inspecting the roots is the next step. I take a good look at them to see if they are healthy. If I notice any brown or mushy roots, I know it’s time to prune. I usually use my scissors or pruning shears for this, cutting away the dead sections. This act of pruning may seem harsh, but in my experience, it encourages new growth and helps the plant flourish. I often find that my plants bounce back stronger after a good root trim. It’s like giving them a fresh start!
Adding New Soil and Positioning the Plant
Now comes the fun part—adding new soil! I fill the new pot with enough potting mix to bring the plant to the right height, ensuring the top of the root ball is just below the rim of the pot. I carefully place the plant in the center and add more soil around it. This is where I pay close attention to avoid air pockets, which can hinder root growth. I like to gently press down on the soil to pack it in without compacting it too tightly. There’s something gratifying about seeing everything come together, and I can’t help but feel excited for my plant’s new chapter.
Watering After Repotting
After the plant is securely in its new home, I give it a good drink of water. This not only helps settle the soil around the roots but also provides the plant with some much-needed hydration after the ordeal of being repotted. I’ve learned to be cautious with the amount of water I use; overwatering right after repotting can lead to shock. I usually water until I see it drain from the bottom of the pot, but I also make sure to let the soil dry a little before the next watering. Watching the plant perk up after this step is incredibly rewarding! Read Interesting article: How to Plant Rhubarb for Best Growth
Common Mistakes to Avoid When Repotting
Choosing the Wrong Pot Size
One mistake I made early on was choosing a pot that was too large for my plant. I thought it would give the roots plenty of room to grow, but it actually caused water retention issues. When the pot is too big, the soil can stay soggy for too long, leading to root rot. I now aim for a pot that’s only one size larger than the current one. This balance helps keep my plants healthy without overwhelming them.
Overwatering or Underwatering
Another common pitfall is the watering routine after repotting. I’ve experienced both sides of this coin—overwatering, which can suffocate the roots, and underwatering, which leaves the plant parched. I’ve learned that monitoring the moisture level in the soil is vital. I often stick my finger into the soil about an inch deep; if it feels dry, it’s time to water. This simple check has helped me avoid some costly mistakes.
Neglecting Root Health
When repotting, it’s so easy to focus on the pot and soil that I sometimes forget about the roots. I’ve learned the hard way that neglecting to inspect and prune unhealthy roots can lead to problems down the road. Keeping an eye on root health during the process has become a priority for me, as it directly impacts the overall well-being of my plants.
Ignoring Plant Stress Signs
Finally, I’ve realized that every plant reacts differently to repotting. Some thrive, while others may show signs of stress. I’ve had plants droop or lose leaves after repotting and learned to listen to their cues. If I notice any changes, I try to adjust my care accordingly, whether that’s altering the watering schedule or providing a bit of shade. It’s all about being in tune with my plants and helping them through the transition.
Post-Repotting Care Tips
Optimal Light Conditions
After repotting, I’ve learned that it’s essential to pay attention to the light conditions for my plants. Right after the stress of being moved, they can be a bit sensitive. I usually find a spot with bright, indirect light for them to recover. This way, they still get the light they need without the harshness of direct sun, which can scorch their leaves. I remember a time when I placed a newly repotted plant in direct sunlight, thinking it would get a boost. Instead, I returned to find scorched leaves and drooping stems. That was a valuable lesson for me! Now, I always give my plants a gentle transition back into their normal light conditions, gradually exposing them to more sunlight as they adjust.
Watering Schedule After Repotting
Establishing a proper watering routine post-repotting is crucial for my plants’ recovery. Right after repotting, I typically water them thoroughly to help settle the soil around the roots. However, I quickly learned that it’s important to wait a bit before watering again. I like to check the soil moisture about an inch down; if it feels dry, it’s time for another drink. Overwatering can lead to root rot, especially after repotting when the plant is already stressed. I often find that allowing the soil to dry out slightly between waterings encourages strong root growth and helps the plant adapt better to its new environment.
Fertilizing Your Plant Post-Repotting
Fertilizing right after repotting can be a bit of a double-edged sword. I’ve learned that plants need time to adjust to their new pot and soil before introducing any nutrients. I usually wait at least a month after repotting before fertilizing. This pause allows the roots to grow into the fresh soil and helps them utilize the nutrients more effectively when I do start fertilizing. When I finally do feed my plants, I opt for a diluted liquid fertilizer to give them a little boost without overwhelming them. Watching my plants respond positively to the nutrients after this waiting period is incredibly rewarding.
Specific Tips for Different Types of Plants
Repotting Succulents and Cacti
Repotting succulents and cacti comes with its unique challenges. These plants thrive in well-draining soil and can be sensitive to excess moisture. When I repot my succulents, I always use a special cactus mix, which has the ideal texture to prevent root rot. I remember the first time I repotted a succulent; I didn’t realize how crucial it was to let the soil dry out completely before watering again. I ended up with a mushy mess! Now, I ensure the soil is bone dry before giving them any water after repotting, and I also make sure to place them in a bright spot where they can absorb plenty of sunlight.
Repotting Flowering Plants
Flowering plants often require a bit more finesse during repotting. I find it helpful to repot them right after their blooming period, which gives them a chance to focus on root development instead of flowering. When I repot flowering plants, I also try to avoid disturbing the roots too much; I gently shake off the old soil while being careful not to damage any flower buds. I remember repotting a beautiful African violet, and I was amazed at how much more vibrant it became when I repotted it at the right time. Keeping an eye on their blooming cycle has really helped me maintain their beauty.
Repotting Foliage Plants
For foliage plants, I’ve noticed that repotting is essential for maintaining their lush appearance. These plants usually thrive in a rich, well-draining potting mix. When I repot my leafy friends, I make sure to choose a pot that allows for good airflow around the roots. I often choose a pot that’s only one size larger than the previous one, as this helps prevent the roots from sitting in excess moisture. I’ve found that foliage plants are quite forgiving; if I make a mistake with the timing or care, they often bounce back quickly. I try to keep their humidity levels in check post-repotting, as they often appreciate a bit of extra moisture in the air.
Frequently Asked Questions (FAQs)
How often should I repot my plants?
From my experience, the frequency of repotting depends on the type of plant and its growth rate. Fast-growing plants may need repotting every year, while slower-growing types might only need it every couple of years. I always keep an eye on the signs of needing repotting, like root-bound conditions or slow growth, to guide my timing.
Can I repot a plant that is flowering?
It’s best to wait until after the flowering period to repot a plant. I’ve found that repotting while a plant is in bloom can stress it out and may cause it to drop flowers. However, if the plant is severely root-bound and in danger, I would recommend repotting it with caution and taking care not to disturb the flowers too much.
What should I do if my plant shows signs of shock?
If a plant shows signs of shock after repotting, such as drooping leaves or stunted growth, I usually adjust my care. Ensuring it has the right light conditions, watering carefully, and sometimes providing a little extra humidity can help. I’ve also learned that patience is key; giving the plant time to adjust often resolves these issues.
Frequently Asked Questions
Why is repotting necessary for plants?
Repotting is crucial as it helps plants thrive by giving their roots more space to grow, preventing them from becoming cramped and root-bound.
What are the signs that my plant needs repotting?
Signs that your plant needs repotting include water pooling on the soil surface, rapid drainage, slow growth, and a plant that looks unhealthy despite regular care.
When is the best time to repot my plants?
Spring is generally the best season for repotting most plants, as they are coming out of dormancy and entering their active growing phase. Fall can also be suitable for certain indoor plants.
What types of pots are best for repotting?
The best type of pot depends on the plant. Terracotta pots are great for airflow, while plastic pots are lightweight and retain moisture well. Always ensure the pot has drainage holes.
What kind of potting soil should I use?
For most houseplants, a well-draining potting mix is ideal. Succulents and cacti require specialized mixes to prevent rot, so always check the label for specific needs.
What tools do I need for repotting?
Essential tools for repotting include a trowel for scooping soil, scissors or pruning shears for trimming roots, gloves for protection, and a watering can for hydrating the plant afterward.
How should I water my plant after repotting?
After repotting, give the plant a good drink of water to help settle the soil, but be cautious not to overwater, as this can lead to shock. Water until it drains from the bottom, then allow the soil to dry a bit before the next watering.
What common mistakes should I avoid when repotting?
Avoid choosing a pot that is too large, which can lead to water retention issues, overwatering or underwatering, neglecting root health, and ignoring signs of plant stress.
How can I help my plant recover from repotting stress?
To help a plant recover from repotting stress, ensure it has the right light conditions, adjust the watering schedule carefully, and provide a bit of extra humidity if needed.
How long should I wait to fertilize after repotting?
It’s best to wait at least a month after repotting before fertilizing, allowing the roots to grow into the fresh soil and utilize nutrients more effectively when you do start fertilizing.