
Replanting an aloe vera plant is a straightforward process that involves choosing the right pot, inspecting the roots, and providing proper care afterward. I’ve found that with a little preparation and the right approach, anyone can successfully replant their aloe and help it thrive. Read Interesting article: Propagate Aloe Vera Easily with This Simple Method!
Understanding Aloe Vera: A Quick Overview
What is Aloe Vera?
Aloe vera is a succulent plant that has been cherished for its healing properties and easy care. I remember my first aloe vera; it was a small, unassuming plant gifted to me by a friend. Little did I know that this little green gem would become a staple in my home, not just for its beauty but also for its versatility. Aloe vera is primarily known for its thick, fleshy leaves that store water, allowing it to survive in arid conditions. It’s a member of the lily family, and aside from being a popular houseplant, it has been used for centuries in traditional medicine and cosmetics.
Benefits of Aloe Vera Plants
The benefits of having an aloe vera plant are numerous, and I’ve experienced many of them firsthand. These plants are not only low-maintenance but also serve as natural air purifiers. They can help filter out toxins from the air, making your home a healthier place. Additionally, the gel inside the leaves is known for its soothing properties, especially for minor burns, cuts, and skin irritations. I often use the gel directly from the leaf for my sunburns – it feels cool and refreshing. Beyond health benefits, aloe vera is a great addition to your home decor, providing a touch of greenery and a tropical vibe. Grow and Trim Aloe Vera Like a Pro!
Common Aloe Vera Varieties
While most people think of the classic green aloe vera, there are several varieties worth noting. One of my favorites is the ‘Variegata’, which features striking white stripes on its leaves. There’s also the ‘Aloe Vera Barbadensis Miller’, which is the most commonly used variety for medicinal purposes. I’ve even seen a red-tipped variety, known as ‘Aloe Red’, which can be a stunning centerpiece in a pot. Each variety has its unique characteristics, but they all share the same basic care needs, making them perfect for plant lovers of all levels.
When to Replant Your Aloe Vera Plant
Signs Your Aloe Vera Needs Replanting
Knowing when to replant your aloe vera is crucial for its health. I’ve learned to watch for several signs that indicate it’s time for a new pot. One of the most obvious signs is when the roots start to poke out of the drainage holes at the bottom of the pot. This means the plant is root-bound, which can limit its growth and lead to health issues. Another sign is when the plant seems to be growing slower than usual or looks unhealthy, which might indicate it needs more space. If you notice yellowing leaves or a plant that’s top-heavy and tipping over, it’s definitely time to consider replanting.
Best Time of Year for Replanting
The timing of replanting can significantly impact the success of the transition. From my experience, the best time to replant an aloe vera plant is during the spring or early summer. This is when the plant is naturally growing and can recover quickly from the shock of being moved. I remember replanting mine in early June, and it thrived! Replanting during this active growth phase allows the roots to establish themselves in the new pot before the dormancy period in the fall and winter.
Essential Tools and Materials for Replanting
Choosing the Right Pot
When selecting a new pot for your aloe vera, I recommend going for one that is slightly larger than the current one, allowing room for growth. Make sure it has drainage holes, as aloe vera doesn’t like to sit in water. I once made the mistake of choosing a pot without drainage, and my aloe suffered. Terra cotta pots are a great option since they are porous and can help with moisture control.
Soil Requirements
The soil you choose is just as important as the pot. Aloe vera thrives in well-draining soil. I’ve found that a cactus or succulent potting mix works wonders. You can also make your own by mixing regular potting soil with sand or perlite to enhance drainage. I always add a bit of gravel at the bottom of the pot to prevent water from pooling and to ensure that my aloe vera has the best chance of thriving.
Necessary Gardening Tools
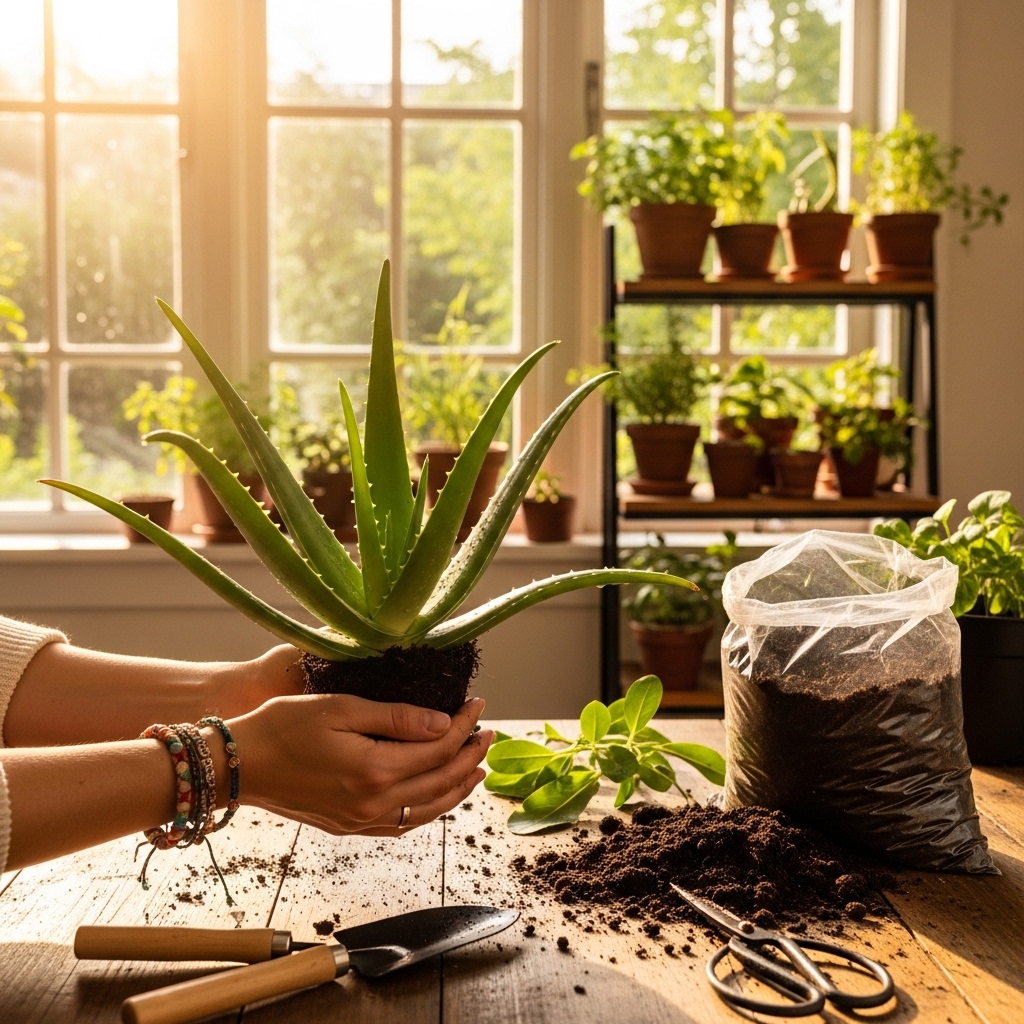
Before I start the replanting process, I gather a few essential tools. I typically use a small trowel for digging, gloves for protection, and scissors or pruning shears to trim any damaged roots. Having a spray bottle filled with water is handy, too, as I like to mist the roots lightly when I replant to help them settle in. It’s all about making the process smooth and ensuring my plant gets the best start possible.
Step-by-Step Guide to Replanting an Aloe Vera Plant
Step 1: Preparing the New Pot
Before I dive into replanting, I like to prepare the new pot. First, I make sure it’s clean and free of any old soil or residues. Sometimes, I give it a quick rinse with warm water to ensure it’s ready for my aloe. Then, I add a layer of gravel or small stones at the bottom. This step is essential, as it helps with drainage and prevents the roots from sitting in water, which I know can lead to root rot. I also set the pot where I can easily access it for the next steps.
Step 2: Removing the Aloe Vera from Its Current Pot
When it’s time to take my aloe vera out of its old pot, I handle it with care. I start by gently gripping the base of the plant and tipping the pot to its side. Sometimes, I give the pot a little squeeze to loosen the soil. If it still doesn’t come out easily, I use a trowel to loosen the soil around the edges. I remember the first time I did this, I was so worried about damaging the roots, but I found that a little patience goes a long way. Once it’s out, I try to shake off any excess soil gently without pulling too hard on the roots.
Step 3: Inspecting the Roots
This part is crucial – inspecting the roots gives me a chance to assess the plant’s health. I look for any discolored or mushy roots, which could indicate rot. I’ve learned that healthy roots should be firm and white or light tan. If I find any unhealthy roots, I carefully trim them with my scissors to promote new growth. This can feel a bit nerve-wracking, but I remind myself that it’s all part of helping my aloe flourish in its new home.
Step 4: Adding Soil to the New Pot
Once the roots are in good shape, I fill the new pot with my well-draining soil mix. I usually add enough soil to create a base for the roots, ensuring they have room to spread out. I like to make a small mound in the center of the pot, which helps support the plant upright when I place it in. As I add soil, I make sure not to pack it down too tightly – I’ve found that aloe vera prefers a bit of aeration in the soil to keep the roots happy.
Step 5: Planting the Aloe Vera
Now comes the exciting part – planting my aloe vera! I carefully position the plant on the mound I created, ensuring that the bottom of the leaves is just above the soil line. I like to take a moment at this point to appreciate how much my plant has grown. After positioning it, I gently fill in around the roots with more soil, making sure it’s stable but not too compact. I always double-check that the plant is straight and upright, as this helps it grow evenly.
Step 6: Watering and Caring for the Newly Planted Aloe Vera
After planting, I give my aloe vera a light watering. I’ve learned that it’s best to keep the soil slightly moist but not soaking wet, especially right after a transplant. I usually mist the leaves lightly to help them adjust to their new environment. Then, I place my aloe in a spot with bright, indirect sunlight. I try to avoid direct sunlight for a few days after replanting, as the plant can be sensitive to changes during this period. This transitional care has always made a difference for my aloe, helping it settle in comfortably.
Post-Replanting Care for Aloe Vera
Optimal Light Conditions
Light is essential for my aloe vera’s recovery, and I’ve found that bright, indirect light works best. After replanting, I keep mine away from harsh rays for a week or so, allowing it to adapt. I remember moving mine to a window where it gets filtered sunlight, which seems to help it bounce back quickly. A little observation goes a long way – if I notice the leaves stretching or turning pale, I know it’s time to adjust its position.
Watering Schedule
Finding the right watering schedule has been one of my biggest learning curves. After replanting, I wait a week before giving it a good soak. Then, I typically water my aloe every two to three weeks, depending on the season. I’ve learned to check the soil moisture by sticking my finger about an inch deep into the soil. If it feels dry, it’s time to water. This simple trick has saved me from overwatering, which I know can be a common mistake.
Fertilizing Your Aloe Vera
Fertilizing after replanting is something I do cautiously. I usually wait about a month before adding any fertilizer to give the roots time to adjust. When I do fertilize, I opt for a diluted, balanced fertilizer specifically for succulents. I’ve found that this keeps my aloe happy and encourages growth without overwhelming it. A little goes a long way, and I make sure to follow the instructions on the fertilizer package to avoid any mishaps.
Common Mistakes to Avoid When Replanting Aloe Vera
Overwatering Issues
When it comes to caring for my aloe vera, I’ve learned that overwatering is one of the most common pitfalls. After replanting, I initially got a little too enthusiastic with the watering can, thinking more water would help my plant adjust faster. Instead, I ended up with a soggy mess, and my poor aloe suffered from root rot. I now remind myself that aloe vera is a drought-tolerant plant. After replanting, I wait a week before giving it a drink, and I’m careful not to drown it. The key is to keep the soil slightly moist but not soaking wet. It’s all about balance, and I’ve found that letting the soil dry out between waterings has made a world of difference.
Choosing the Wrong Soil
Another mistake I made early on was using regular potting soil, which can retain too much moisture for aloe vera. I didn’t realize that aloe prefers a well-draining mix, which allows excess water to escape quickly. Now, I always opt for a cactus or succulent potting mix or create my own by mixing potting soil with sand or perlite. I remember when I finally switched to a better soil mix; my aloe started thriving again! It’s amazing how something as simple as soil can impact the health of my plant. When replanting, always check the soil composition to ensure it meets the needs of your aloe vera.
Neglecting Root Health
Inspecting the roots is a crucial step that I used to overlook. I’d simply remove my aloe from its old pot and plant it right away without examining the roots. This can be a huge mistake! I’ve discovered that taking the time to check for any unhealthy roots is essential in promoting new growth. Healthy roots should be firm and light in color, while any mushy or dark ones need to be trimmed away. I’ve learned that a little extra care during this step can prevent issues down the line, helping my aloe thrive in its new pot. Treating those roots with the care they deserve has become second nature to me. ¿Qué plantas son tóxicas para los gatos? Lista completa + síntomas
Frequently Asked Questions (FAQs)
How often should I replant my Aloe Vera?
In my experience, replanting aloe vera isn’t something you need to do constantly. Typically, I find that every 2 to 3 years is a good interval, depending on the growth rate and size of the plant. I like to keep an eye on the roots and the overall health of my aloe. If I notice it becoming root-bound or the growth slowing down significantly, it’s a sign that it’s time for a new home. Regularly checking in on your plant can help you determine the right timing for replanting.
Can I propagate my Aloe Vera while replanting?
Absolutely! I’ve actually had great success propagating my aloe vera while replanting. When I remove the plant from its pot, I often spot offsets or “pups” growing at the base. These little ones can be carefully separated and potted in their own containers. It’s a rewarding process and allows me to expand my aloe collection. Just make sure each pup has some roots attached, and follow the same replanting steps to ensure they thrive in their new pots. I love sharing these pups with friends and family; it makes me feel like I’m spreading a little green joy!
What if my Aloe Vera is root-bound?
If I find my aloe vera is root-bound, it’s time to take action. This usually means the roots have filled the pot and are growing out of the drainage holes. The first thing I do is gently remove it from its pot, just like I described earlier. After inspecting the roots, I’m careful to trim away any that are damaged or excessively tangled. I then select a new pot that’s 1-2 inches larger in diameter, giving my aloe the space it needs to grow. Replanting in a larger pot allows the roots to spread out without being cramped, which can rejuvenate the plant and encourage healthy growth.