
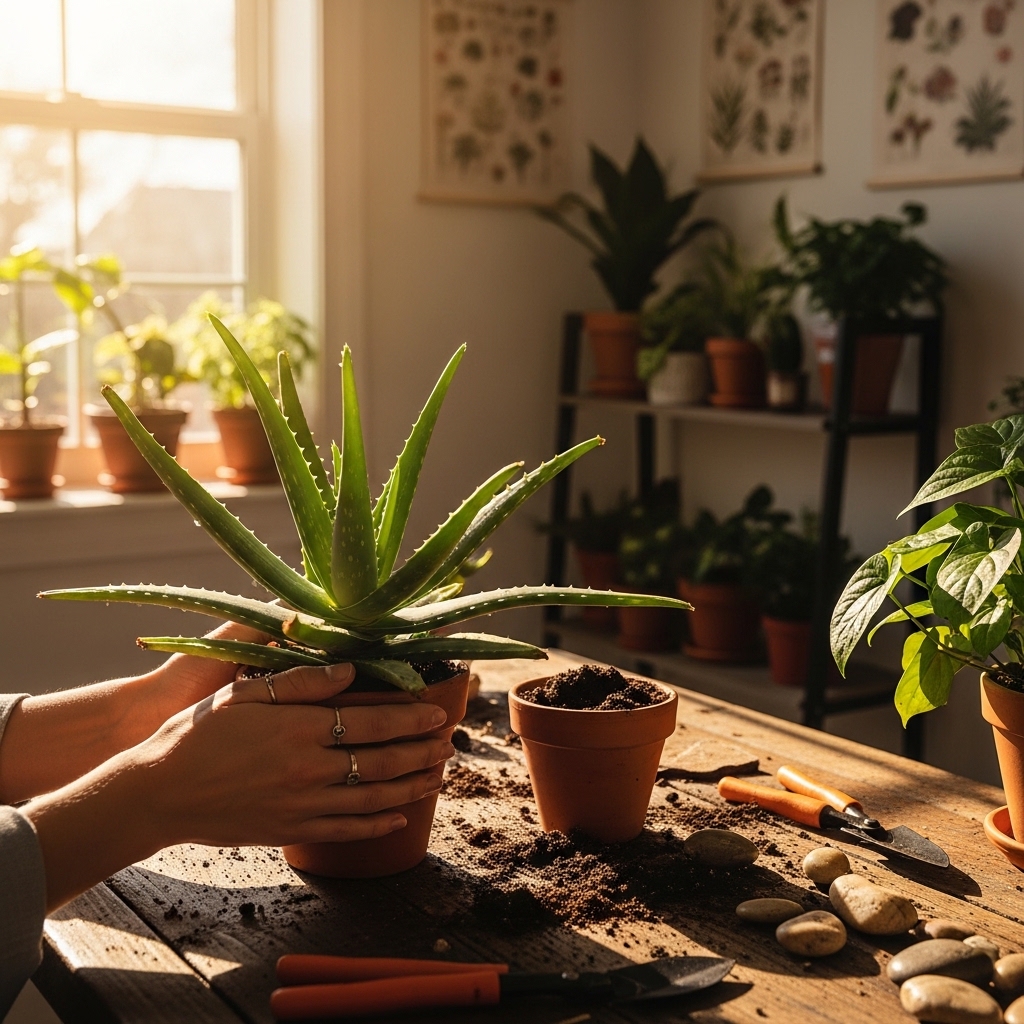
Repotting aloe plants the right way involves choosing the right time, pot, and soil to ensure your aloe thrives. With proper care during repotting, we can help these resilient plants grow stronger and healthier. For more tips on maintaining healthy plants, check out How to Care for Succulent Plants (No Rot Tips).
Understanding Aloe Plants
Aloe plants are not just beautiful; they are also incredibly resilient and versatile. I remember the first time I brought home an aloe plant. Its thick, fleshy leaves were so inviting, and I was eager to learn more about its unique characteristics. Over time, I’ve discovered that understanding these plants can make a huge difference in how we care for them. Let’s dive deeper into the world of aloe plants, focusing on their common types, benefits, and ideal growing conditions.
Common Types of Aloe Plants
There are over 500 species of aloe, but a few stand out as favorites among plant enthusiasts. The most well-known is the Aloe vera, famous for its soothing gel that many of us use for burns and skin irritations. Another popular type is the Aloe aristata, also called the lace aloe, which features beautiful white spots on its leaves. I’ve also come across the Aloe polyphylla, known for its spiral growth pattern, which always captivates attention. Each type has its charm and specific care needs, but they all share the characteristic of being relatively low-maintenance, which is a huge plus for busy people like us.
Benefits of Aloe Plants
Aloe plants are not just pretty faces; they offer a plethora of benefits. First and foremost, they are excellent air purifiers. I’ve noticed that having a few aloe plants around my home has helped improve air quality. These plants filter toxins and release oxygen, making our living spaces feel fresher. Additionally, aloe vera is known for its medicinal properties. I often use the gel from the leaves to soothe minor burns or cuts, and it works wonders. Plus, having aloe around can bring a sense of calm and relaxation, thanks to their lovely green hue and unique appearance.
Ideal Growing Conditions
Creating the right environment for our aloe plants is crucial. These plants thrive in bright, indirect sunlight, which mimics their natural habitat. I’ve found that placing my aloe near a window where it gets plenty of light, but not direct sun, keeps it happy and healthy. Temperature-wise, aloe prefers warmth. They do best in temperatures between 60°F and 75°F (15°C to 24°C). In my experience, it’s important to avoid cold drafts or extreme temperature changes, as this can stress the plant. Lastly, aloe plants like well-draining soil. A cactus mix or a blend made for succulents works perfectly. I learned this the hard way when I used regular potting soil once, and my poor plant suffered from root rot!
When to Repot Aloe Plants
Knowing when to repot your aloe is just as important as knowing how to do it. I’ve often found that waiting too long can lead to issues, so let’s explore the signs that indicate it’s time for a repot, along with the best timing for the process.
Signs Your Aloe Needs Repotting
I’ve learned to watch for specific signs that tell me my aloe is ready for a new pot. The first sign is when roots start to emerge from the drainage holes at the bottom of the pot. This usually means that the plant has outgrown its space. Another sign is if the leaves start to droop or become mushy, indicating that the plant is stressed and needs more room to grow. I remember once when my aloe looked healthy on the surface, but when I lifted it out of the pot, I was shocked to see the roots were overcrowded. It’s crucial to be proactive!
Best Time of Year for Repotting
The best time to repot aloe plants is during the spring or early summer. This is when the plant is actively growing and can recover more quickly from the shock of repotting. I made the mistake of repotting my aloe in the fall once, and it took much longer for it to bounce back. Spring gives them a fresh start, allowing them to thrive in their new home.
Frequency of Repotting Aloe Plants
In my experience, repotting every two to three years is generally sufficient for most aloe plants. Younger plants may need repotting more frequently, as they grow faster. I’ve found that keeping an eye on their growth and being attentive to their signs will help me determine the right timing. Remember, though, that repotting too often can stress the plant, so finding that balance is essential.
Choosing the Right Pot for Your Aloe
When it comes to repotting aloe plants, selecting the right pot is a crucial step that can influence the health and growth of your plant. I’ve learned that not all pots are created equal, and the material, size, and drainage capabilities can make a big difference. Let’s break down these factors to help us choose wisely.
Material Options: Terracotta vs. Plastic
One of the first decisions I faced was choosing between terracotta and plastic pots. Terracotta pots are a favorite among many plant lovers, including myself, because they are porous. This means they allow moisture to evaporate, reducing the risk of overwatering—a common mistake I’ve made in the past. Plus, they add a rustic charm to any space. However, they can be heavy and break easily. On the other hand, plastic pots are lightweight and come in various colors and designs. They retain moisture longer, which can be beneficial in dry climates. I’ve found that if you go with plastic, just be extra careful with watering to avoid root rot.
Size Matters: How to Select the Right Pot Size
Choosing the right pot size is another important aspect of repotting. I remember when I first repotted my aloe, I went a bit overboard and selected a pot that was way too big. This ended up causing more harm than good. Ideally, the new pot should be just a couple of inches larger in diameter than the one it’s coming from. This gives the roots enough room to grow without overwhelming the plant with too much extra soil, which can retain excess moisture. I often measure the current pot and select a new one based on that size, keeping in mind that aloe plants prefer to be a bit snug in their pots.
Drainage Holes and Their Importance
Drainage holes are non-negotiable when it comes to repotting aloe plants. I can’t stress this enough! When I once neglected to check for drainage holes in a pot I was excited about, my aloe paid the price. Without proper drainage, excess water can collect at the bottom, leading to root rot. I always make sure that my pots have multiple drainage holes to facilitate proper water flow. If you find a pot you love that doesn’t have holes, I recommend drilling a few in the bottom. It’s a small step that can save your plant from significant trouble down the line.
Preparing to Repot Your Aloe Plant
Now that we’ve covered choosing the right pot, let’s talk about the preparation process before we actually start the repotting. I’ve learned that a little bit of preparation goes a long way in making the process smooth and stress-free.
Gathering Necessary Tools and Materials
Before I get started with repotting, I gather all the necessary tools and materials. This usually includes a new pot, succulent or cactus soil mix, a pair of scissors, and a small trowel or my hands for handling the soil. I’ve also found it helpful to have some gloves on hand for working with soil and roots. It’s a good idea to lay down some newspaper or an old towel on my working surface to catch any mess. I remember the first time I repotted my aloe, I didn’t have everything ready, and it made the process much more chaotic than it needed to be!
Selecting the Right Soil for Aloe
Choosing the right soil is just as critical as selecting the pot. I always opt for a well-draining soil mix specifically designed for succulents or cacti. I’ve experimented with different types over the years, and I’ve found that a blend with sand or perlite works wonders for providing the drainage that aloe plants crave. Regular potting soil retains too much moisture, which can lead to those dreaded root rot issues. If I’m feeling adventurous, I sometimes mix my own soil using a combination of potting soil, sand, and perlite, which I find gives my aloe the perfect environment to thrive. For more detailed tips on caring for aloe plants, visit How to Care for an Aloe Plant (Easy Guide).
How to Prepare the New Pot
Before placing my aloe in the new pot, I make sure to prepare it properly. First, I add a layer of soil to the bottom of the pot, creating a nice base for the roots. I also like to tap the pot gently to ensure the soil settles a bit. If the pot has drainage holes, I sometimes place a small piece of mesh or a coffee filter over the holes to prevent soil from spilling out while still allowing water to drain. This small step has helped me maintain a clean environment while also keeping the soil intact. It’s these little details that can make the whole repotting experience much easier!
Step-by-Step Guide to Repotting Aloe Plants
Now that we’ve prepared everything, it’s time to dive into the actual repotting process. I’ve found that having a clear step-by-step approach makes everything so much easier and less stressful. Following these steps can help ensure that our aloe plants transition smoothly to their new homes.
Removing the Aloe Plant from Its Current Pot
To begin the repotting process, I gently squeeze the sides of the current pot to loosen the soil. If the pot is a bit stubborn, I sometimes use a small trowel to carefully work around the edges. I remember the first time I tried to remove my aloe, I was too rough and ended up breaking a leaf! Gently pulling the plant from the base while supporting the leaves can yield better results. It’s important to be patient here, as our goal is to preserve as many roots as possible.
Inspecting the Roots: What to Look For
Once the aloe is out of the pot, I take a moment to inspect the roots. Healthy roots are usually white and firm, while unhealthy roots may be brown or mushy. I’ve learned that this inspection is crucial because it can tell us a lot about the plant’s health. If the roots are tightly coiled or appear to be overcrowded, it’s a clear sign that the plant has outgrown its pot. If I see any signs of rot or damage, I know I’ll need to make some cuts. It’s a bit like going to the doctor for a check-up, but for my plant!
Trimming Damaged Roots
If I find any damaged or rotten roots during my inspection, I carefully trim them with clean scissors. I remember feeling a bit hesitant my first time, but I’ve found that it’s necessary to encourage healthy growth. I cut away any brown or mushy roots, leaving the healthy white ones intact. Trimming also helps the plant fit better in its new pot, allowing it to spread out and thrive. After trimming, I give the roots a gentle shake to remove any excess soil, which helps reduce the risk of transplant shock.
Placing the Aloe in the New Pot
With the roots trimmed and ready, it’s time to place the aloe in the new pot. I carefully position the plant in the center and make sure it stands upright. I’ve learned that it’s best to ensure that the top of the root ball is about an inch below the rim of the pot. This prevents soil from spilling out when I water later. It’s a bit of an art to get the placement just right, but with practice, it becomes a breeze!
Filling with Soil and Watering Techniques
Now comes the fun part—filling in with soil! I gently add my well-draining soil mix around the roots, tapping the pot lightly as I go to eliminate air pockets. I remember the first time I repotted, I was so eager to finish that I forgot to tap the pot. The result was a lot of air pockets, which can be problematic for the root system. After filling in the soil, I water lightly, just enough to help settle the soil around the roots. It’s important not to drench the plant right away, as too much water can stress it further. I try to keep it light and easy to give my aloe the best chance to adjust to its new environment.
Post-Repotting Care for Aloe Plants
After repotting, I’ve found that taking care of my aloe is just as important as the repotting process itself. Ensuring optimal conditions during this recovery phase can help the plant thrive.
Optimal Light Conditions After Repotting
Once I’ve repotted my aloe, I make sure to place it in a spot with bright, indirect light. Direct sunlight can be too harsh during this recovery period, and I want to avoid stressing the plant further. I often keep my newly repotted aloe in a slightly shaded area for the first week or so. This gives it a chance to adjust without feeling overwhelmed. I’ve seen great success with this approach, as it allows my aloe to focus on root growth before dealing with light exposure.
Watering Schedule for Newly Repotted Aloes
Watering is another crucial factor after repotting. I typically wait about a week before giving my aloe a good drink. This allows the roots to recover from any shock they may have experienced during the process. When I do water, I make sure to do it thoroughly but avoid leaving the plant sitting in water. I’ve learned that establishing a watering routine based on the plant’s needs has been key for me. Usually, I find that watering every two to three weeks works best, but I always check the soil moisture to ensure it’s not too dry or too soggy.
Fertilization Tips for Aloe Plants
Fertilizing isn’t always necessary after repotting, but I’ve found that a diluted, balanced fertilizer can give my aloe a nice boost. I generally wait about a month after repotting before adding any fertilizer. This gives the plant a chance to settle into its new pot and avoid any risk of burning the roots with too much fertilizer. I like to use a fertilizer specifically designed for succulents, following the recommended dilution rate. It’s important to remember that less is more in this case; I’ve learned that too much of a good thing can harm my aloe!
Frequently Asked Questions
What are the common types of aloe plants?
The most well-known types of aloe plants include Aloe vera, famous for its soothing gel, Aloe aristata (lace aloe) which features white spots on its leaves, and Aloe polyphylla, recognized for its spiral growth pattern.
What benefits do aloe plants offer?
Aloe plants are excellent air purifiers, filtering toxins and releasing oxygen. They also have medicinal properties, particularly Aloe vera, which can soothe minor burns and cuts.
What are the ideal growing conditions for aloe plants?
Aloe plants thrive in bright, indirect sunlight, prefer temperatures between 60°F and 75°F (15°C to 24°C), and need well-draining soil such as a cactus mix or a blend made for succulents.
When is the best time to repot aloe plants?
The best time to repot aloe plants is during the spring or early summer when the plant is actively growing and can recover more quickly from repotting shock.
How often should aloe plants be repotted?
Most aloe plants should be repotted every two to three years, but younger plants may need repotting more frequently due to faster growth.
What type of pot is best for repotting aloe plants?
Choosing a pot made of terracotta or plastic is important. Terracotta pots are porous and reduce the risk of overwatering, while plastic pots are lightweight and retain moisture longer.
Why are drainage holes important for aloe pots?
Drainage holes are crucial as they prevent excess water from collecting at the bottom of the pot, which can lead to root rot. It’s important to ensure the pot has multiple drainage holes.
What soil should be used for repotting aloe plants?
A well-draining soil mix specifically designed for succulents or cacti is essential. A blend with sand or perlite is ideal to prevent moisture retention that can cause root rot.
What should be done after repotting an aloe plant?
After repotting, place the aloe in bright, indirect light and wait about a week before watering. It’s also advisable to wait about a month before fertilizing the plant.
How do you care for a newly repotted aloe plant?
Care for a newly repotted aloe involves providing optimal light conditions, establishing a watering schedule that checks soil moisture, and using diluted fertilizer about a month after repotting.