
Taking care of an Aloe Vera plant is straightforward: provide it with plenty of light, water it sparingly, and ensure good drainage. I’ve found that with just a little attention, this resilient plant thrives beautifully. Read Interesting article: How to Take Care of an Aloe Vera Plant (Easy Guide)
Table of Contents
Aloe Vera is not only a stunning addition to your home but also offers a range of benefits. In this guide, I’ll share everything I’ve learned about nurturing this delightful succulent.
Understanding Aloe Vera: A Brief Overview
What is Aloe Vera?
Aloe Vera is a succulent plant species that belongs to the genus Aloe. Known for its thick, fleshy leaves that can grow up to 36 inches long, it’s often recognized for its gel-like sap. I remember the first time I laid eyes on an Aloe Vera plant; the unique leaf structure and vibrant green color immediately drew my attention. Native to the Arabian Peninsula, this plant has been cherished for centuries for its medicinal properties and aesthetic appeal.
Benefits of Aloe Vera Plants
The benefits of Aloe Vera extend far beyond its good looks. One of the most popular uses of Aloe Vera is its soothing properties. The gel inside its leaves is known for its ability to heal burns, cuts, and skin irritations. I’ve personally used it to calm sunburns after long days at the beach, and it works wonders! Additionally, Aloe Vera is often used in skincare products, thanks to its hydrating properties.
Beyond skincare, Aloe Vera can also purify the air in our homes. I’ve noticed that having a few potted plants around not only adds beauty but also makes the air feel fresher. Plus, it’s a low-maintenance option for those of us who may not have a green thumb! For a more comprehensive understanding of its care, check out the How to Care for Aloe Vera Plant (Complete Guide).
Common Varieties of Aloe Vera
While the standard Aloe Vera is the most recognized, there are several varieties worth mentioning. One of my favorites is the Aloe Vera ‘Barbadensis Miller,’ which boasts the highest medicinal properties. Then there’s the ‘Aloe Vera Variegata,’ also known as the Tiger Aloe, which has stunning striped leaves and makes for a striking houseplant.
Another variety that I’ve come across is the ‘Aloe Vera ‘Haworthiopsis,’ which is smaller and more compact, perfect for those with limited space. Each type has its own unique charm, and choosing the right one can depend on personal preference and the care environment.
Ideal Growing Conditions for Aloe Vera
Light Requirements
Aloe Vera plants thrive in bright, indirect sunlight. I’ve discovered that placing them near a sunny window works best, but be careful of direct sunlight, especially during the hottest part of the day, as it can scorch the leaves. If you notice the plant stretching towards the light, it might be a sign that it needs more sunlight. I’ve had success rotating my plants occasionally to ensure even exposure to light.
Temperature Preferences
These hardy plants prefer warmer temperatures, ideally between 60°F and 75°F (15°C to 24°C). They can tolerate higher temperatures too, but as a rule of thumb, I try to keep them away from cold drafts or sudden temperature changes. During the colder months, I make it a point to bring my Aloe indoors if it’s been outside, as they don’t fare well in frost.
Soil Type and Drainage
When it comes to soil, Aloe Vera loves well-draining potting mixes. I usually opt for a cactus or succulent mix, which helps prevent water from pooling around the roots. If you’re feeling adventurous, you can even make your own mix by combining regular potting soil with sand or perlite to enhance drainage. Just remember, the key is to ensure that the roots don’t sit in water.
Humidity Levels
Aloe Vera plants are quite adaptable when it comes to humidity. They thrive in low to moderate humidity levels, which is why they do so well indoors. I’ve noticed that in a more humid environment, like a bathroom, my Aloe Vera tends to grow more vigorously. However, if your home is very humid, it’s crucial to ensure that the plant has good airflow to avoid rot.
Watering Your Aloe Vera Plant
How Often to Water
One of the most common mistakes I see with Aloe Vera plants is overwatering. These succulents prefer to dry out between waterings. I usually wait until the top inch or two of soil feels dry before giving my plant a drink. In the growing season (spring and summer), I might water every 2-3 weeks, while in the winter, I reduce this to once a month or even less depending on the indoor temperature.
Signs of Overwatering
Overwatering can lead to root rot, which is a sure way to kill your Aloe. I’ve experienced this firsthand when I noticed the leaves turning yellow and mushy. If you see these signs, it’s crucial to cut back on watering and ensure your plant is in well-draining soil. Sometimes, I even take the plant out of its pot to inspect the roots and let them dry out if they appear waterlogged.
Signs of Underwatering
On the flip side, underwatering can also pose problems. If your Aloe’s leaves start to wrinkle or feel soft, it’s a sign that it’s thirsty. I’ve learned to pay close attention to these cues. A good soak during the growing season can help revive an underwatered plant. Just be careful not to drown it afterwards!
With these foundational tips, I hope you feel more prepared to care for your Aloe Vera plant. It’s a journey of learning, and I’m excited to share more about keeping this lovely succulent happy and healthy in the next sections!
Fertilizing Aloe Vera
Types of Fertilizers Suitable for Aloe Vera
When it comes to fertilizing my Aloe Vera, I’ve learned that less is often more. Aloe Vera doesn’t require a lot of nutrients, which is one reason why it’s such a low-maintenance plant. I prefer to use a balanced, water-soluble fertilizer that’s diluted to half strength. This way, it provides just enough nutrients without overwhelming the plant. I’ve also come across cactus fertilizers, which work well due to their lower nitrogen content—perfect for succulents like Aloe Vera.
Organic options, such as fish emulsion or compost tea, can also be beneficial. I remember a time when I tried compost tea on my Aloe, and it seemed to respond positively! Just keep in mind that whatever fertilizer you choose, it should be suitable for succulents to avoid promoting excessive growth at the expense of the plant’s health.
How Often to Fertilize
In my experience, Aloe Vera doesn’t need fertilizing very often. I typically fertilize my plants once in the spring and once in the summer. This aligns with their growing season, helping to boost their vitality during those warmer months. I always make sure to skip fertilizing during the fall and winter months when the plant is dormant. It’s amazing how such a small change in care can make a difference in how my Aloe thrives!
Signs of Nutrient Deficiency
It’s important to keep an eye on our plants for any signs of nutrient deficiency. I’ve noticed that if my Aloe Vera’s leaves begin to pale, become weak, or exhibit stunted growth, it might be crying out for some nutrients. Yellowing leaves can also indicate a lack of nitrogen. When this happens, I gently adjust my fertilizing routine to ensure the plant gets what it needs. I’ve learned that paying attention to these signals helps keep my Aloe healthy and vibrant.
Repotting Your Aloe Vera
When to Repot Aloe Vera
Repotting might sound daunting, but it’s vital for keeping our Aloe Vera happy. I’ve found that repotting is necessary every 2-3 years or when the plant outgrows its current container. I usually notice this when the roots start to peek out of the drainage holes or if the growth seems stunted. It’s also a good idea to repot if you’ve had any issues with root rot, as this allows you to refresh the soil and give the plant a fresh start.
Choosing the Right Pot
Choosing the right pot is just as important as the timing. I always opt for a pot that’s slightly larger than the previous one to give my Aloe room to grow. Make sure it has good drainage holes to prevent water from sitting at the bottom. I’ve learned that terracotta pots are a great choice because they allow moisture to evaporate, helping to keep the roots dry and healthy.
Repotting Steps
When it’s time to repot, I follow a few simple steps. First, I carefully remove the plant from its old pot, taking care not to damage the roots. Then, I inspect the roots for any signs of rot or damage and trim away any unhealthy parts. Next, I fill the new pot with fresh, well-draining soil before placing my Aloe Vera back in. I always make sure it’s at the same depth as before and then gently pack the soil around the roots. Finally, I give it a light watering, just enough to settle the soil, and let my Aloe adjust to its new home.
Common Pests and Diseases
Identifying Common Pests
Even though Aloe Vera plants are generally resilient, they can fall prey to pests like aphids, mealybugs, and spider mites. I remember finding tiny white cotton-like spots on my Aloe once, which turned out to be mealybugs. It was a wake-up call for me to check my plants more frequently. I’ve learned to inspect the leaves, especially the undersides, and the stem areas regularly to catch any pests early.
Preventive Measures
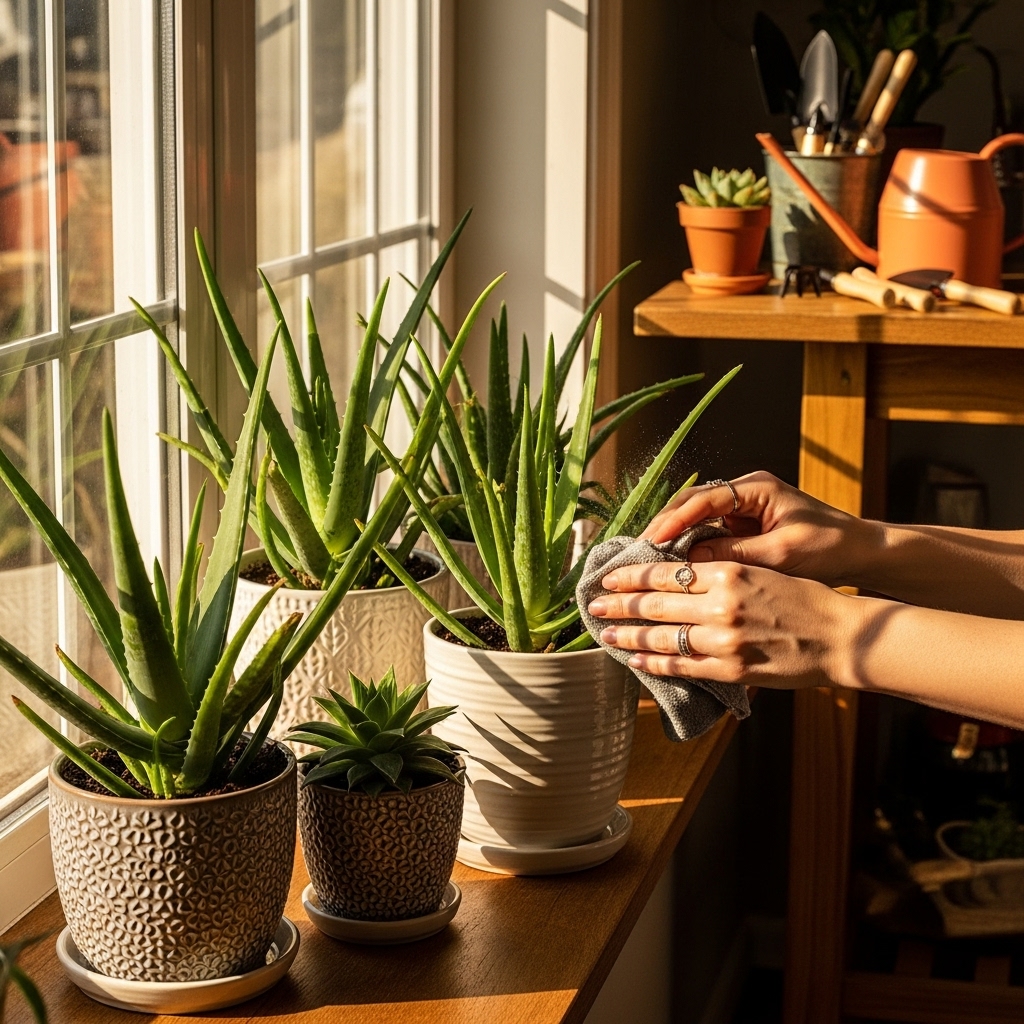
To keep pests at bay, I take a few preventive measures. I make sure to avoid overcrowding my plants, as good airflow is crucial. I also clean the leaves occasionally with a damp cloth to remove dust and debris, which can attract pests. Occasionally, I’ll spray my plants with a gentle soap solution if I suspect any pests might be lurking. It’s simple, but it has worked wonders for me!
Treatment Options for Infestations
If I do discover a pest infestation, I act quickly. For mealybugs, I like to dab them with a cotton swab dipped in rubbing alcohol; it usually kills them on contact. For larger infestations, a neem oil solution can be effective. I’ve found that persistence is key—treating the plant multiple times over a few weeks ensures that any eggs or remaining pests are dealt with. My Aloe has bounced back beautifully each time I handle a pest issue promptly!
Propagation of Aloe Vera
Methods of Propagation
One of the most rewarding experiences I’ve had with Aloe Vera is propagation. There are two common methods: offsets (or pups) and leaf cuttings. I’ve had the best luck with offsets. When my Aloe grows, it often produces little rosettes at its base. I gently separate these pups from the mother plant and pot them up. It’s like giving my Aloe a little family!
When to Propagate
The best time to propagate is during the growing season, typically in spring or early summer. I’ve noticed that my plants are most vigorous during this period, which seems to help the pups establish roots more easily. If I see healthy offsets, I take that as a sign that it’s time to propagate.
Care for New Aloe Vera Plants
After propagating, I treat the new Aloe Vera plants with extra care. I usually keep them in a warm, bright spot but out of direct sunlight for a few weeks to allow them to adjust. I water them sparingly, just enough to keep the soil lightly moist until they establish roots. Watching them grow and thrive has been an incredibly fulfilling part of my Aloe journey!
Common Mistakes to Avoid
Overwatering Issues
One of the biggest mistakes I see many beginners make is overwatering their Aloe Vera plants. I’ve been there myself! It’s easy to think that more water means a happier plant, but in reality, Aloe Vera is designed to store water in its leaves. I’ve learned to be cautious and always check the soil moisture before watering. A good rule of thumb is to wait until the top couple of inches of soil are completely dry. If I ever notice my Aloe’s leaves getting mushy or yellowing, it’s a clear sign that I need to ease up on the watering. Trust me, your plant will thank you for it!
Pest Neglect
Pests can sneak up on you, and I learned this the hard way. I used to think that as long as my Aloe looked fine, everything was okay. But one day, I found my plant infested with mealybugs. Now, I make it a point to check my plants regularly for any signs of pests. You might be surprised at how quickly they can multiply! I recommend inspecting the undersides of leaves and around the base of the plant. If you notice anything unusual, it’s best to act fast to prevent a larger infestation.
Improper Lighting Conditions
Monitoring the light conditions for your Aloe Vera is crucial. I remember placing my plant in a spot where it received too much direct sunlight, and the poor thing ended up with scorched leaves. I realized that while Aloe loves bright light, it prefers indirect sunlight. Finding the right balance can make an enormous difference in how my plant grows. If you find your Aloe stretching toward a window, it may need a little more light. I’ve adopted the habit of rotating my plants every couple of weeks to ensure they’re getting even light exposure.
Seasonal Care Tips for Aloe Vera
Spring and Summer Care
Spring and summer are prime growing seasons for Aloe Vera, and I always take extra care during these months. I find that my plants thrive when I follow a routine. During this time, I increase my watering frequency slightly, but I still make sure the soil dries out between waterings. I also keep an eye out for any new pups that appear. It’s so exciting to see my Aloe plant multiply! Fertilizing during this season helps provide the nutrients they need for growth, as I mentioned earlier.
Fall and Winter Care
As the days grow shorter and cooler, my care routine for Aloe Vera shifts. I tend to cut back on watering since the plant’s growth slows down significantly. I’ve learned to watch for the signs of dormancy—sometimes the leaves might look a little droopy or less vibrant, which is completely normal. During the winter months, I also ensure my Aloe is kept away from drafty windows or cold spots in my house. A stable temperature helps keep my plant cozy and healthy. If I notice my Aloe isn’t getting enough light, I might move it closer to a window or even supplement with a grow light. It’s all about adapting to the seasonal changes!
Frequently Asked Questions (FAQs)
How long can an Aloe Vera plant live?
From my experience, Aloe Vera plants can live for many years, often exceeding 10 years with proper care. I’ve seen some people keep theirs for decades, which is quite impressive! The key is to maintain their growing conditions and address any issues like pests or overwatering promptly.
Can Aloe Vera survive indoors?
Absolutely! I’ve kept several Aloe Vera plants indoors for years, and they thrive beautifully. The important thing is to provide them with enough light, so I always place them near a sunny window. With the right care, indoor Aloe Vera can be just as healthy and vibrant as those grown outside.
What to do if my Aloe Vera is turning yellow?
If I notice my Aloe Vera turning yellow, it usually indicates a problem, often related to watering. Yellowing leaves can be a sign of overwatering or, in some cases, nutrient deficiency. I’d suggest checking the soil moisture first. If it’s too wet, I let the soil dry out completely before watering again. If the leaves remain yellow, I take a look at my fertilizing routine to ensure it’s getting the nutrients it needs.
Frequently Asked Questions
“`html
What is Aloe Vera?
Aloe Vera is a succulent plant species known for its thick, fleshy leaves that can grow up to 36 inches long and contains a gel-like sap. It is native to the Arabian Peninsula and has been cherished for centuries for its medicinal properties and aesthetic appeal.
What are the benefits of Aloe Vera plants?
The benefits of Aloe Vera include its soothing properties for healing burns, cuts, and skin irritations, as well as its use in skincare products for hydration. Additionally, Aloe Vera can purify the air in homes and is a low-maintenance plant.
How much light do Aloe Vera plants need?
Aloe Vera plants thrive in bright, indirect sunlight. It’s best to place them near a sunny window while avoiding direct sunlight, especially during the hottest parts of the day, to prevent leaf scorching.
How often should I water my Aloe Vera plant?
Aloe Vera prefers to dry out between waterings. In the growing season (spring and summer), watering every 2-3 weeks is typical, while in winter, watering can be reduced to once a month or less, depending on indoor temperature.
What should I do if my Aloe Vera leaves are turning yellow?
If Aloe Vera leaves are turning yellow, it often indicates overwatering or nutrient deficiency. Check the soil moisture first; if it’s too wet, allow the soil to dry out completely before watering again. If the leaves remain yellow, adjust the fertilizing routine.
How often should I fertilize my Aloe Vera plant?
Aloe Vera does not require frequent fertilization. It is typically fertilized once in the spring and once in the summer during its growing season to boost vitality, while fertilization should be skipped during fall and winter when the plant is dormant.
When is the best time to propagate Aloe Vera?
The best time to propagate Aloe Vera is during the growing season, typically in spring or early summer, when the plants are most vigorous and can establish roots more easily.
What type of soil is best for Aloe Vera?
Aloe Vera thrives in well-draining potting mixes, such as cactus or succulent mixes. You can also create a mix by combining regular potting soil with sand or perlite to enhance drainage.
How can I identify pests on my Aloe Vera plant?
Common pests include aphids, mealybugs, and spider mites. Look for signs such as tiny white cotton-like spots, especially on the undersides of leaves and around the stem areas. Regular inspections can help catch pests early.
How long can an Aloe Vera plant live?
Aloe Vera plants can live for many years, often exceeding 10 years with proper care. Some people have kept theirs for decades by maintaining optimal growing conditions and addressing issues like pests or overwatering promptly.
“`