
Pruning elder trees is essential for promoting healthy growth and maximizing the yield of medicinal and herbal harvests. Proper techniques enhance air circulation and sunlight exposure, leading to robust flowers and berries, which are valuable for various herbal remedies.
Table of Contents
Elder trees, scientifically known as Sambucus, are renowned for their medicinal properties. The flowers, berries, and even the bark of elder trees have been used in traditional medicine for centuries. These trees are not only beneficial for human health but also provide habitat and food for various wildlife. Pruning these trees correctly is crucial to ensure they thrive and produce high-quality herbal materials.

Understanding the right time and method to prune elder trees is paramount. In general, the best time to prune is late winter or early spring before new growth begins. This timing helps to minimize stress on the tree and encourages vigorous growth in the upcoming season.
Benefits of Pruning Elder Trees
Pruning elder trees offers several advantages that contribute to both the health of the tree and the quality of its harvests. Here are some key benefits:
- Improved Air Circulation: Pruning opens up the canopy of the tree, allowing better airflow. This helps prevent diseases caused by excess moisture on leaves and branches.
- Enhanced Sunlight Exposure: By removing crowded branches, more sunlight reaches the inner parts of the tree, promoting healthier growth and flowering.
- Increased Fruit Production: Proper pruning encourages the production of more flowers, leading to an abundant harvest of berries.
- Shape and Structure Maintenance: Regular pruning helps maintain a desirable shape and structure, making harvesting easier and more efficient.
In addition to these benefits, pruning can also help in managing the size of the elder tree. This is particularly useful in small gardens where space is limited. Keeping the tree smaller makes it easier to reach branches for harvesting flowers and berries.
Tools Needed for Pruning Elder Trees
Having the right tools is essential for effective pruning. Here are some tools that are commonly used when pruning elder trees:
- Pruning Shears: Ideal for cutting small branches and stems.
- Loppers: Useful for cutting thicker branches that are too large for pruning shears.
- Saw: A small saw may be necessary for very thick branches.
- Gloves: Protect your hands from cuts and scratches.
- Tar or Sealant: To apply on larger cuts to prevent disease entry.
Techniques for Pruning Elder Trees
To achieve optimal results when pruning elder trees, certain techniques should be followed. These techniques ensure that the tree remains healthy while maximizing its medicinal benefits.
1. Assess the Tree
Before starting, evaluate the overall health of the tree. Look for dead or diseased branches, as well as areas of overcrowding. Identifying these issues will guide your pruning choices.

2. Start with Dead or Diseased Wood
The first step in pruning should be to remove any dead, damaged, or diseased branches. This not only improves the appearance of the tree but also protects it from pests and diseases.
3. Thin Out Crowded Areas
If there are branches growing too close together, thin them out. This practice helps to improve air circulation and light penetration. Aim to leave enough space between branches so that air can flow freely.
4. Cut at an Angle
When making cuts, do so at a slight angle just above a bud or node. This encourages new growth to emerge in the right direction and minimizes water retention on the cut surface.

Timing Your Pruning
The timing of your pruning efforts is critical. Performing this task at the right moment can significantly influence the health of your elder tree and its yield. As mentioned earlier, late winter or early spring is ideal.
However, it’s also beneficial to monitor the growth throughout the season. If you notice any unhealthy growth or excessive crowding during the summer months, light pruning may be performed then as well. Just be cautious not to remove too much foliage at once.
| Season | Activity | Focus |
|---|---|---|
| Winter | Main Pruning | Remove dead/diseased wood |
| Spring | Light Pruning | Encourage new growth |
| Summer | Tidying Up | Thin crowded areas |
| Fall | No major pruning | Allow recovery before winter |
By following these guidelines for pruning elder trees, you can ensure a healthy harvest of medicinal herbs while maintaining the overall health of your trees. Each season offers unique opportunities to care for your elder trees effectively.
Common Mistakes When Pruning Elder Trees
While pruning elder trees can be beneficial, there are common mistakes that many gardeners make. Understanding these pitfalls can help you avoid them and ensure your tree remains healthy and productive.
1. Pruning at the Wrong Time
One of the most significant mistakes is pruning at the wrong time of year. As discussed earlier, late winter or early spring is ideal for major pruning. If you prune too late in the season, you risk cutting off new buds and limiting the tree’s growth for the year. Similarly, pruning in the fall can expose the tree to winter damage.
2. Over-Pruning
Another common error is over-pruning. Removing too much foliage can stress the tree and inhibit its ability to photosynthesize effectively. It’s essential to leave enough healthy branches to support the tree’s growth.
3. Ignoring Tree Health
Failing to assess the health of the tree before pruning can lead to problems. Always check for signs of disease or pest infestation before making cuts. If a branch appears unhealthy, it should be removed to protect the rest of the tree.
4. Using Dull Tools
Using dull or inappropriate tools can lead to ragged cuts that may not heal properly. This can create openings for pests and diseases. Always ensure your tools are sharp and clean before starting the pruning process.
Identifying When to Harvest
Knowing when to harvest elder flowers and berries is just as important as knowing how to prune. Each part of the elder tree has its optimal harvest time, which can affect the quality of your herbal remedies.
Harvesting Elder Flowers
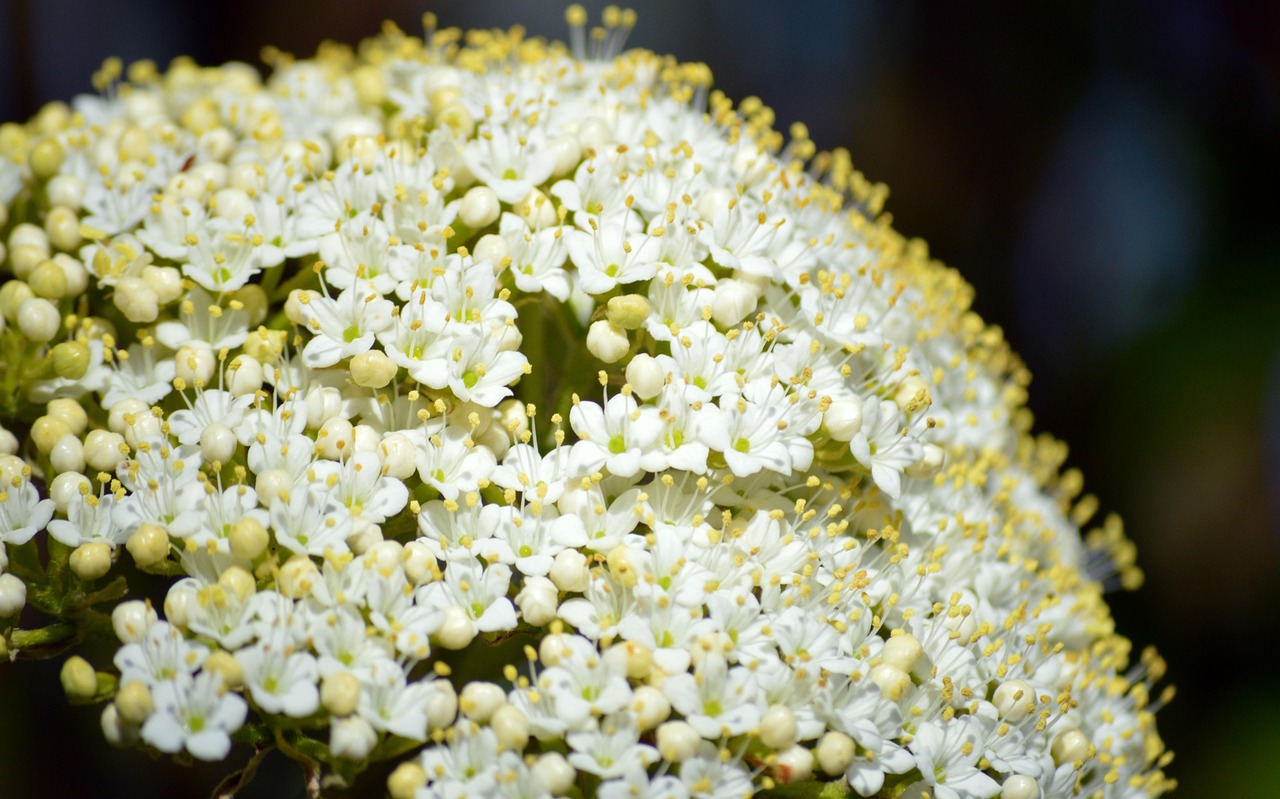
Elder flowers are typically harvested in late spring to early summer when they are in full bloom. The flowers should be picked on dry days, as moisture can lead to mold growth. Look for clusters that are fully open and fragrant.
- Signs of Readiness: Flowers should be creamy white and fully open.
- Timing: Best harvested from late May to early July, depending on your location.
- Method: Use scissors or pruning shears to cut clusters just above the leaf nodes.
Harvesting Elder Berries
Elder berries are ready to be harvested in late summer to early fall when they have turned a deep purple or black color. Like flowers, berries should be harvested on dry days to avoid spoilage. They can be used fresh or dried for later use.
- Signs of Readiness: Berries should be fully ripe, dark in color, and easily detach from the stem.
- Timing: Typically ready from August to September.
- Method: Gently pull clusters off the stems, taking care not to crush them.
Storing Harvested Elder Parts
Proper storage is crucial to maintain the medicinal properties of harvested elder flowers and berries. Here are some effective storage methods:
Storing Elder Flowers
Elder flowers can be stored in several ways:
- Dried: Hang flower clusters upside down in a cool, dark place with good air circulation until completely dry. Store in airtight containers away from light.
- Infused: Create elderflower syrup by steeping flowers in water with sugar and lemon juice. This syrup can be stored in the refrigerator for several weeks.
- Frozen: Lay flowers flat on a baking sheet, freeze them, and then transfer to freezer bags for long-term storage.
Storing Elder Berries
Elder berries can also be preserved using various methods:
- Dried: Spread berries on a baking sheet and place them in a dehydrator or low-temperature oven until dried. Store in airtight containers.
- Made into Jam or Jelly: Cook berries with sugar and pectin to create preserves that can be stored in jars.
- Frozen: Freeze berries in single layers on a baking sheet before transferring them to freezer bags for later use.
Pest and Disease Management
Like any other plants, elder trees are susceptible to pests and diseases. Knowing how to manage these threats is essential for maintaining a healthy tree and maximizing your harvests.
Pests
The most common pests that affect elder trees include:
- Aphids: These small insects suck sap from leaves, leading to wilting and stunted growth. Control them by introducing beneficial insects like ladybugs or using insecticidal soap.
- Elder Moth: Caterpillars can defoliate trees quickly. Hand-picking caterpillars or using organic pesticides can help keep their numbers down.
- Spider Mites: These tiny pests thrive in dry conditions and can cause leaf discoloration. Increase humidity around the tree or apply miticides as needed.
Diseases
Elder trees may also face several diseases, including:
- Elder Leaf Spot: This fungal disease causes dark spots on leaves. Ensure good air circulation by proper pruning and avoid overhead watering.
- Crown Gall: This bacterial disease leads to galls on roots and stems. Remove affected parts promptly to prevent spread.
- Bacterial Blight: Symptoms include wilting leaves and blackened stems. Prune out infected areas and maintain tree health to reduce risk.
Regular monitoring of your elder trees for pests and diseases will help you take preventive measures early, ensuring a thriving tree that produces abundant medicinal herbs.
Creating a Healthy Environment for Elder Trees
To maximize the health and productivity of your elder trees, creating a supportive environment is essential. This includes proper soil management, adequate watering, and providing the right conditions for growth. Let’s explore these factors in more detail.
Soil Requirements
Elder trees thrive in well-drained soil that is rich in organic matter. The right soil conditions can significantly influence the tree’s growth and medicinal yield.
- pH Level: Elder trees prefer slightly acidic to neutral soil, ideally with a pH of 6.0 to 7.0. Conducting a soil test can help you determine the pH level and necessary amendments.
- Organic Matter: Incorporate compost or well-rotted manure into the soil to improve fertility. Organic matter not only enriches the soil but also enhances its structure and moisture retention.
- Drainage: Ensure that the planting area has good drainage. Elder trees do not tolerate waterlogged conditions, which can lead to root rot.
Watering Practices
Proper watering is crucial for elder trees, especially during their establishment phase and in dry periods.
- Initial Establishment: Newly planted elder trees require regular watering until they are established. This may be every few days, depending on weather conditions.
- Deep Watering: Once established, elder trees benefit from deep watering rather than frequent shallow watering. This encourages deeper root growth.
- Signs of Underwatering: Wilting leaves or dry soil are indicators that your tree may need more water.
- Signs of Overwatering: Yellowing leaves and root rot are signs of excessive moisture; adjust your watering schedule accordingly.
Fertilization Needs
Providing the right nutrients is vital for the health of elder trees. Here’s how to approach fertilization:
Types of Fertilizers
Both organic and synthetic fertilizers can be used, but organic options are often preferred for their long-term benefits.
- Organic Fertilizers: Use compost, well-rotted manure, or specific organic fertilizers that release nutrients slowly over time.
- Synthetic Fertilizers: If using synthetic options, look for balanced fertilizers with equal parts nitrogen (N), phosphorus (P), and potassium (K).
Fertilization Schedule
A regular fertilization schedule can enhance the growth and yield of elder trees:
- Spring Application: Apply fertilizer in early spring as new growth begins. This supports vigorous growth and flowering.
- Mid-Summer Boost: A light application in mid-summer can help sustain growth through the growing season.
- Fall Preparation: Avoid fertilizing in late fall to prevent new growth that could be damaged by winter frost.
Companion Planting with Elder Trees
Companion planting can enhance the growth of elder trees while also helping to manage pests naturally. Certain plants can provide benefits when grown near elder trees.
Beneficial Companions
- Basil: Known to repel pests like aphids and mosquitoes, basil can thrive in similar soil conditions as elder trees.
- Nasturtiums: These flowers attract beneficial insects while deterring harmful pests. They also add beauty to your garden.
- Coriander: This herb can attract pollinators and beneficial insects, enhancing the overall ecosystem around your elder trees.
Plants to Avoid
Certain plants may compete with elder trees for nutrients and space, leading to poor growth. It is wise to avoid planting:
- Brassicas: Cabbage family plants may draw nutrients away from elder trees.
- Pine Trees: They can create acidic soil conditions that are unsuitable for elder trees.
- Mint: While beneficial in some contexts, mint can become invasive and compete aggressively with elder trees for resources.
Cultivating Elder Trees for Maximum Yield
The goal of cultivating elder trees is to achieve maximum yield while maintaining their health. Here are some strategies to optimize your harvest.
Regular Monitoring
Keep a close eye on your elder trees throughout the growing season. Regularly check for signs of pests, diseases, or nutrient deficiencies. Early detection allows for timely intervention.
Cultivation Techniques
- Mulching: Applying a layer of mulch around the base of the tree helps retain moisture, suppress weeds, and regulate soil temperature.
- Pruning for Yield: As mentioned earlier, proper pruning not only maintains tree health but also enhances fruit production by allowing better light penetration and air circulation.
- Crown Management: Maintain an open crown structure to ensure all parts of the tree receive adequate sunlight.
Pest Monitoring Strategies
Utilizing integrated pest management (IPM) strategies can help control pests effectively without harming beneficial insects. Here are some tips:
- Regular Inspections: Check leaves and stems weekly for any signs of pest activity.
- Baiting Traps: Use traps to monitor and reduce pest populations before they become a problem.
- Naturally Deterring Pests: Introduce natural predators such as ladybugs or lacewings that feed on common pests like aphids.
By focusing on creating a healthy environment and utilizing effective cultivation techniques, you can ensure that your elder trees thrive and yield abundant medicinal herbs each season.
Advanced Techniques for Pruning Elder Trees
As you become more experienced in pruning elder trees, there are advanced techniques that can further enhance the health and productivity of your trees. These methods focus on maximizing blossoms and fruit while ensuring the tree remains resilient against diseases and pests.
Espaliering Elder Trees
Espaliering is a technique that involves training plants to grow flat against a structure. This method can be applied to elder trees to create a decorative and productive addition to your garden.
- Space Efficiency: Espaliered elder trees can fit into smaller spaces, making them ideal for urban gardens.
- Ease of Harvesting: This method allows for easier access to flowers and berries, facilitating harvesting.
- Controlled Growth: Espaliering helps maintain the tree’s size and shape while promoting healthy growth.
Layering Techniques
Layering is an effective propagation technique that can also benefit your elder trees. This method involves bending a branch to the ground and covering it with soil to encourage root growth while still attached to the parent tree.
- Simple Layering: Bend a low branch to the ground, cover it with soil, and wait for roots to develop. Once rooted, it can be cut from the parent tree.
- Mound Layering: Create mounds of soil around the base of the tree to encourage new shoots to root and grow.
Seasonal Maintenance Practices
In addition to regular pruning, implementing seasonal maintenance practices is crucial for keeping your elder trees healthy year-round.
- Spring Cleanup: Remove any dead leaves or debris from around the base of the tree to prevent disease.
- Summer Watering: Ensure consistent watering during dry spells, especially for young trees.
- Fall Mulching: Apply mulch around the base in the fall to protect roots during winter and suppress weeds.
Harvesting Techniques for Quality Medicinal Products
The quality of your harvested elder flowers and berries greatly influences their medicinal efficacy. Here are some techniques to ensure that you collect high-quality materials.
Timing Your Harvest
The timing of your harvest is critical. For elder flowers, aim to pick them in the morning when they are fully open, as this is when their fragrance is strongest, indicating peak potency.
- Dry Conditions: Harvest on dry days to minimize moisture, which can cause spoilage and mold during storage.
- Avoid Pests: Check for any signs of pests before harvesting. Choose clusters that are free from damage or insect activity.
Proper Handling After Harvest
Once harvested, handling elder flowers and berries with care is essential to preserve their quality.
- Avoid Crushing: Handle flowers and berries gently to prevent bruising, which can lead to spoilage.
- Cooling: Place harvested materials in a cool place as soon as possible to maintain freshness.
- Storage Containers: Use breathable containers like baskets rather than plastic bags, which can trap moisture and promote decay.
Culinary Uses of Elder Flowers and Berries
Elder flowers and berries are not only valuable for their medicinal properties but also have a range of culinary uses. Incorporating these ingredients into your cooking can enhance both flavor and nutrition.
Elder Flower Recipes
- Elderflower Cordial: A refreshing beverage made by infusing elderflowers in sugar syrup with lemon juice.
- Elderflower Fritters: Lightly battered and fried elderflower clusters make a delightful snack or dessert.
- Elderflower Jelly: A sweet jelly made from cooked elderflowers, sugar, and pectin, perfect for spreading on toast.
Elder Berry Recipes
- Elderberry Syrup: A popular remedy for colds and flu, made by simmering berries with water and sugar.
- Elderberry Pie: A delicious pie that showcases the sweet-tart flavor of elderberries.
- Elderberry Wine: Homemade wine made from fermented elderberries offers a unique flavor profile.
Final Thoughts
Cultivating elder trees for medicinal and herbal harvests requires knowledge, care, and attention. By understanding the importance of proper pruning techniques, environmental conditions, pest management, and harvesting methods, you can significantly enhance the health and productivity of your elder trees. Whether you are using the flowers and berries for culinary delights or traditional remedies, proper care will ensure that your harvests remain abundant and beneficial.
The journey of growing elder trees is rewarding not only for gardeners but also for those looking to tap into natural remedies. With patience and dedication, you can cultivate these remarkable trees to produce high-quality herbal materials that contribute positively to health and well-being.
Embrace the art of pruning and caring for elder trees as part of your gardening practice. Each season brings new opportunities to learn and improve your techniques, leading to a fruitful partnership with these resilient plants.