
The best time to plant garlic for a bountiful harvest is in the fall, about 4-6 weeks before the ground freezes. I’ve found that planting in this timeframe allows the garlic to establish roots before winter, leading to a stronger crop in the warmer months. For those interested in other crops, How to Plant Broccoli Plants for Best Harvest is a fantastic read.
Understanding Garlic Planting Basics
What is Garlic?
Garlic, scientifically known as Allium sativum, is a bulbous plant belonging to the onion family. Known for its strong flavor and aroma, garlic is a staple in kitchens around the world. Besides enhancing dishes, it’s revered for its health benefits, including its potential to boost the immune system and reduce blood pressure. My journey with garlic started in my own garden, where I quickly realized how rewarding it is to grow this essential ingredient.
Types of Garlic (Hardneck vs. Softneck)
When I first decided to grow garlic, I was surprised to learn there are two main types: hardneck and softneck. Hardneck garlic has a stiff flower stalk and tends to thrive in colder climates. It offers a robust flavor and produces larger cloves, which I found to be perfect for roasting. On the other hand, softneck garlic is more commonly found in grocery stores. It has a milder taste and a longer shelf life. I’ve experimented with both types, and while I love the hearty taste of hardneck, the convenience of softneck for long-term storage is also appealing.
Benefits of Growing Garlic
Growing garlic comes with a plethora of benefits. For starters, it’s easy to grow, even for beginners like I was once. Garlic requires minimal maintenance and can thrive in various soil types, which I learned when I tested my soil with different garlic varieties. Not only does it enhance the flavor of countless dishes, but it also offers significant health benefits. Plus, there’s something incredibly satisfying about harvesting your own garlic, knowing you’ve nurtured it from a tiny clove to a flourishing bulb. And let’s not forget: garlic can help deter pests in the garden, making it a great companion plant. If you’re looking for more tips on planting, check out How to Plant Garlic Bulbs the Right Way.
When to Plant Garlic
Ideal Planting Seasons
Timing is everything when it comes to planting garlic. I’ve found that the ideal season for planting is in the fall, typically between September and November. This timing allows the garlic to root before winter sets in, giving it a head start for growth in the spring. However, I’ve also seen some gardeners experiment with spring planting. While this can work, I personally prefer the fall approach because it yields a more substantial harvest. I remember my first fall planting; I was thrilled to see the little sprouts poking through the soil as spring arrived.
Climate Considerations
Climate plays a crucial role in when to plant garlic. Garlic prefers a temperate climate, thriving in areas with cold winters and warm summers. I live in an area where winters can be harsh, but I’ve learned that this actually benefits my garlic. The cold period helps to break dormancy and promotes bulb development. If you’re in a warmer climate, you might need to adjust your planting time or consider varieties that are more suited to your environment. I once tried planting garlic too early in a mild winter, and the results were disappointing. Now, I pay close attention to the weather patterns before deciding when to plant.
Soil Temperature Requirements
The temperature of the soil is another key factor in garlic planting. Ideally, you want to plant garlic when the soil temperature is around 50°F to 60°F. I remember using a simple thermometer to check my garden soil before planting. If the soil is too warm, the garlic may not develop properly. I’ve found that waiting for the right temperature makes all the difference. Often, I loosely cover the garlic with mulch after planting to help maintain the soil temperature and moisture, which has proven effective in my garden.
Regional Planting Times in the U.S.
Understanding the regional differences in planting times can be a game changer for garlic growers. For instance, in the northern U.S., planting typically occurs in mid to late September. On the other hand, in the southern regions, gardeners might plant as late as November. I’ve chatted with other gardeners from different states and learned about their unique experiences. For example, those in warmer climates often grow garlic in the fall but harvest in late spring or early summer, while those in cooler areas have a longer growing season. This regional insight has helped me plan my planting schedule more effectively. Additionally, if you’re interested in other crops, When to Plant Beets for Best Growth is a great resource.
Preparing to Plant Garlic
Choosing the Right Garlic Variety
Picking the right garlic variety can be a fun yet daunting task. I remember standing in the seed catalog aisle, feeling overwhelmed by all the options. My first advice is to consider your local climate and growing conditions. As I mentioned before, hardneck and softneck garlic have distinct characteristics suited for different environments. If you’re in a colder area, hardneck might be your best bet. I tried planting both, and I found that hardneck varieties like ‘Music’ and ‘Spanish Roja’ thrived beautifully in my garden. Softneck varieties like ‘Silverskin’ and ‘Artichoke’ were also great, but they didn’t seem to have the same robust flavor as the hardneck types. It’s worth it to experiment with a few different varieties to see what you prefer and what grows best in your soil.
Soil Preparation Techniques
Preparing the soil is one of my favorite parts of gardening. I learned early on that garlic thrives in well-drained, fertile soil. Before planting, I make sure to clear the area of any weeds or debris. I usually turn the soil and mix in some compost or well-rotted manure. This not only enriches the soil but also improves drainage. I remember the first time I used compost; my garlic grew larger and healthier than ever before. Aim for a soil pH between 6.0 and 7.0, as garlic prefers slightly acidic to neutral conditions. If you’re unsure about your soil’s pH level, investing in a simple soil test kit can be very helpful. I did this and was amazed at how much it informed my gardening practices.
Site Selection for Optimal Growth
Choosing the right spot in your garden is crucial for garlic success. I’ve found that garlic loves full sun, so I always pick a site that receives at least 6 hours of direct sunlight each day. This really makes a difference in the size and flavor of the bulbs. The location should also have good air circulation to help prevent diseases. I remember once planting garlic in a shady corner, and I was disappointed with the results. It’s also essential to rotate your garlic planting location each year to prevent soil-borne diseases. I’ve kept a simple garden journal to track where I plant different crops, and it has made crop rotation a breeze.
How to Plant Garlic
Preparing Garlic Cloves for Planting
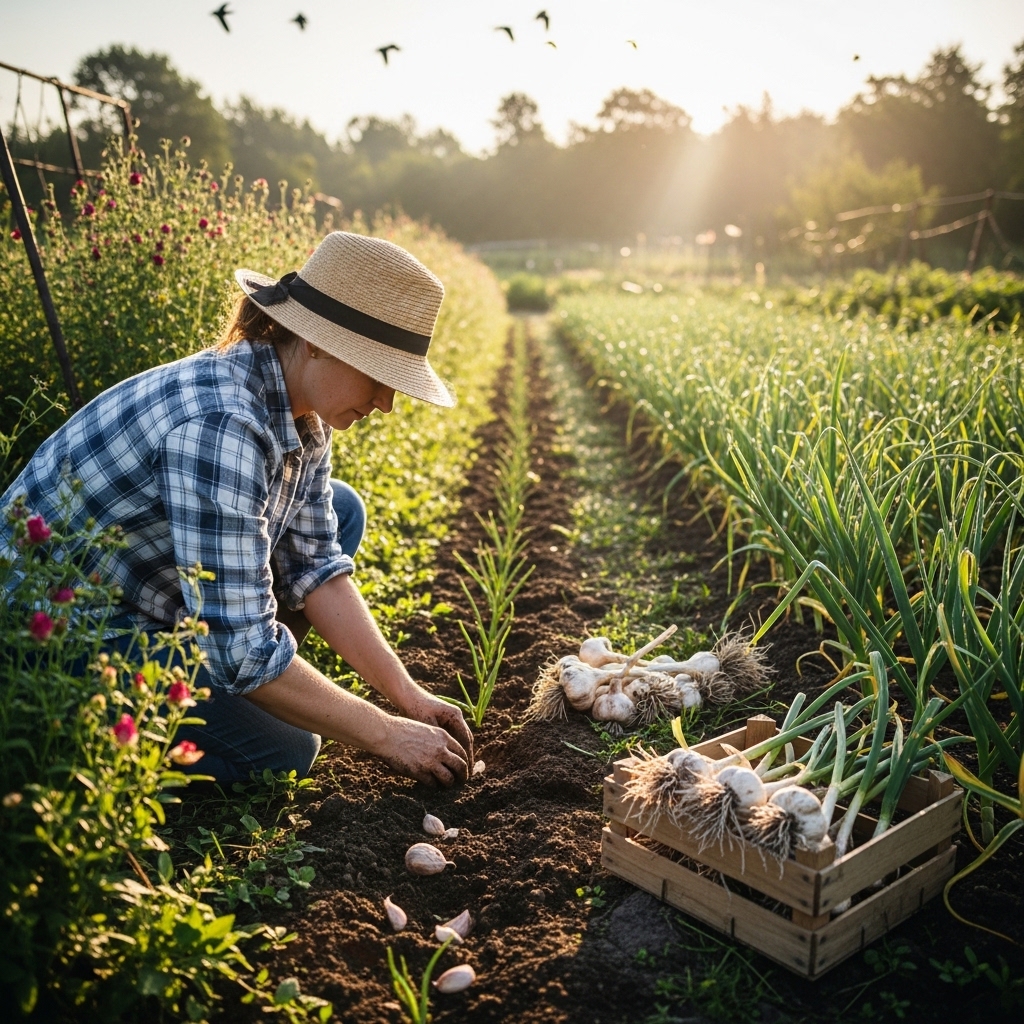
Preparing the garlic cloves is an exciting step in the planting process. I always choose the largest, healthiest cloves from my bulbs to plant. When I first started, I learned that smaller cloves often produce smaller bulbs, so I focus on selecting the best. I separate the cloves from the bulb just before planting to maximize their freshness. This helps them to maintain their vitality. I’ve found that if I plant cloves that have started to sprout, they tend to grow faster. Just remember to keep the papery skins on the cloves intact, as they provide a protective layer that keeps them healthy.
Planting Depth and Spacing Guidelines
When it’s time to plant, I usually dig holes about 2 inches deep for each clove. I like to space them about 6 inches apart, giving them room to grow. I remember the first year I planted them too closely together, and they ended up competing for nutrients. That year, I learned the importance of spacing! In rows, I maintain about 12 inches between them, which has worked well in my garden. After placing the cloves in the holes, I cover them with soil and give them a gentle press. I often add a layer of mulch on top to help retain moisture and keep weeds at bay.
Watering and Fertilization Tips
Watering garlic is a bit of an art. After planting, I give my garlic a good watering to help settle the soil around the cloves. Throughout the growing season, I aim to keep the soil consistently moist but not soggy. I’ve learned to water deeply and less frequently, which encourages the roots to grow deeper. I try to avoid overhead watering to reduce the risk of fungal diseases. As for fertilization, I typically apply a balanced fertilizer in the spring when the shoots begin to emerge. I remember being hesitant about using fertilizer at first, but it did wonders for the growth of my garlic. Just be sure to follow the instructions on the package for best results.
Garlic Care Throughout the Growing Season
Weed Management Strategies
Weeding is an ongoing battle in any garden, but I’ve found some effective strategies for managing weeds around my garlic. I usually mulch around the plants with straw or grass clippings, which helps suppress weed growth. This also retains moisture and gradually enriches the soil as it breaks down. If any weeds do pop up, I hand-pull them carefully to avoid disturbing the garlic roots. Sometimes, I even invite my kids to help out; they love being part of the gardening process. I remember how much fun we had pulling weeds one sunny afternoon, and it made the task feel less like work.
Pest and Disease Control
Keeping an eye out for pests and diseases is crucial for a successful garlic harvest. I’ve encountered a few issues, like aphids and onion flies, but I learned that regular inspection can catch problems early. When I spot any pests, I often use insecticidal soap or neem oil as a natural treatment. This approach aligns with my desire to keep my garden as chemical-free as possible. I also practice good hygiene by rotating crops and cleaning up debris at the end of the season to prevent diseases from over-wintering.
Watering Needs During Growth Stages
As garlic grows, its water needs change. I keep an eye on the weather and adjust my watering schedule accordingly. Early in the season, when the plants are establishing, I make sure they have enough moisture. As they approach maturity, I reduce watering to allow the bulbs to harden off. I’ve learned that too much water just before harvest can lead to rot. This is one of those small details that can significantly impact the final product.
Signs of Garlic Maturity
When to Harvest Garlic?
Knowing when to harvest garlic can be a bit tricky, but I’ve learned to look for specific signs that indicate it’s time to pull those bulbs out of the ground. Typically, I aim to harvest garlic when the bottom leaves turn brown and start to dry out. This usually happens around late spring to early summer, depending on when I planted them. I remember my first year of harvesting; I was so excited that I couldn’t wait for all the leaves to yellow fully. I ended up pulling some too early, and while they were still edible, they didn’t have the robust flavor I was hoping for. Now, I resist the urge to dig them up too soon and instead keep a close eye on the foliage.
Indicators of Garlic Readiness
There are a few indicators I look for when determining if my garlic is ready for harvest. One key sign is the number of leaves left on the plant. I’ve learned that a good rule of thumb is to leave at least 5 to 6 green leaves on the plant when harvesting. This is because those leaves continue to provide nutrition to the bulb until the very end. Another sign I pay attention to is the size of the bulbs. I often gently dig around a few cloves to see how they’re developing. If they feel firm and substantial, I know I’m getting close to harvest time. The weather also plays a role; if I see that rain is forecasted, I try to harvest a few days before to avoid any issues with rot.
Post-Harvest Garlic Care
Curing Garlic for Storage
After pulling my garlic from the ground, the next crucial step is curing it. This process helps to dry the bulbs, allowing their skins to harden, which is essential for long-term storage. I like to lay my garlic in a single layer in a cool, dry, and well-ventilated area. For me, the garage or a shaded spot outside works perfectly. I remember one year I didn’t have enough airflow, and some of my garlic developed mold. Now, I always make sure there’s enough space and air circulation around each bulb. Curing typically takes about two to three weeks, and I keep an eye on them, checking occasionally to ensure they’re drying properly.
Storing Garlic Effectively
Once my garlic is cured, it’s time to store it properly. I’ve found that the best way to store garlic is in a cool, dark place, like a pantry or cupboard. I avoid putting them in the fridge, as the humidity can cause them to sprout. Instead, I keep them in a mesh bag or a basket that allows for airflow. I remember my first attempt at storing garlic; I made the mistake of sealing them in a plastic bag. They ended up sprouting and going bad much faster than expected. Now, I stick to breathable storage solutions. Properly stored garlic can last several months, and I love the fact that I can enjoy the fruits of my labor long after the growing season is over.
Using Garlic in Cooking and Preserving
Garlic is such a versatile ingredient in cooking, and after all the hard work of growing and curing, I love putting it to use in the kitchen. I enjoy using fresh garlic in everything from marinades to roasted vegetables. There’s nothing quite like the flavor of homegrown garlic, and I’ve often found that it has a stronger taste than store-bought varieties. I remember experimenting with garlic in different recipes, like homemade garlic bread and garlic-infused olive oil, which quickly became family favorites. Besides cooking, I also enjoy preserving garlic by making garlic confit or pickling it. I’ve found that these methods not only extend its shelf life but also add unique flavors to my dishes.
Frequently Asked Questions
When is the best time to plant garlic?
The best time to plant garlic is in the fall, about 4-6 weeks before the ground freezes, typically between September and November.
What are the two main types of garlic?
The two main types of garlic are hardneck and softneck. Hardneck garlic thrives in colder climates and offers a robust flavor, while softneck garlic has a milder taste and a longer shelf life.
What are the benefits of growing garlic?
Growing garlic is easy, requires minimal maintenance, enhances the flavor of dishes, offers health benefits, and can deter pests in the garden.
What soil temperature is ideal for planting garlic?
The ideal soil temperature for planting garlic is around 50°F to 60°F.
How should I prepare the soil for planting garlic?
Prepare the soil by ensuring it is well-drained and fertile. Clear the area of weeds, turn the soil, and mix in compost or well-rotted manure. Aim for a soil pH between 6.0 and 7.0.
How deep should garlic cloves be planted?
Garlic cloves should be planted about 2 inches deep and spaced about 6 inches apart, with rows maintaining about 12 inches between them.
What watering techniques are recommended for garlic?
Water garlic deeply and less frequently to encourage deep root growth. Keep the soil consistently moist but avoid overhead watering to reduce fungal disease risk.
How can I tell when garlic is ready to be harvested?
Garlic is ready to harvest when the bottom leaves turn brown and dry out, typically around late spring to early summer. It’s best to leave at least 5 to 6 green leaves on the plant when harvesting.
What is the process for curing garlic after harvest?
Cure garlic by laying the bulbs in a single layer in a cool, dry, and well-ventilated area for about two to three weeks to allow their skins to harden.
How should garlic be stored after curing?
Store cured garlic in a cool, dark place like a pantry or cupboard in a breathable storage solution, such as a mesh bag or basket, to prevent sprouting.