
The best time to plant tulips for stunning spring blooms is in the fall, typically between September and November. This timing allows the bulbs to establish roots before winter sets in, ensuring vibrant blooms in spring.
Table of Contents
Understanding Tulips: Types and Varieties
Tulips are one of the most beloved flowers in spring gardens, and for good reason. With their bright colors and elegant shapes, they bring joy and a burst of life after the cold winter months. I remember the first time I saw a field of tulips in full bloom; it was like stepping into a painting. But before we dive into the planting process, it’s essential to understand the different types and varieties of tulips available. Each has unique characteristics that can influence your gardening choices. Read Interesting article: Are Tulips Perennial Plants? Do They Come Back?
Popular Tulip Varieties for Spring Blooms
When it comes to tulips, the choices can be overwhelming! I’ve often found myself wandering through garden centers, captivated by the numerous options. Some of the most popular tulip varieties include:
- Darwin Hybrid Tulips: These are known for their large, sturdy blooms and long-lasting flowers. They come in a variety of colors and are perfect for garden borders.
- Triumph Tulips: A cross between early flowering and late flowering tulips, these offer a nice balance. They have strong stems and are great for cut flowers.
- Parrot Tulips: With fringed edges and vibrant colors, these tulips are eye-catching and often have a unique, feathery appearance.
- Fringed Tulips: Similar to parrot tulips, these have fringed petals that give them a delicate look, making them a favorite among gardeners.
- Single Late Tulips: Blooming in late spring, these tulips have classic cup-shaped flowers and are often used in formal gardens.
I’ve personally planted Darwin Hybrids and was amazed at how robust and beautiful they were when they bloomed. They really made my garden pop!
Color and Shape Variations in Tulips
The beauty of tulips extends beyond just their types; it’s also in their colors and shapes. Tulips come in nearly every color imaginable. From bold reds and deep purples to soft pinks and creamy whites, there’s a tulip for every taste. Some tulips even have multi-colored petals or unique patterns, which can add an artistic touch to your garden. I’ve found that planting a mix of colors creates a stunning visual effect that can brighten up any space.
Additionally, tulips can vary in shape. Some have a classic cup shape, while others might have fringed or ruffled edges. The variety in both color and shape allows for creativity in garden design. In my experience, pairing different shapes together can create a dynamic and interesting display that draws the eye and sparks conversation.
When to Plant Tulips: Seasonal Considerations
Deciding when to plant tulips is crucial for ensuring a vibrant spring bloom. While most of us think of spring as the time to enjoy these flowers, the real work starts in the fall! This timing allows the bulbs to establish their roots in the cooler soil before winter, which is essential for their growth.
Best Planting Time for Tulips in Different Climates
The ideal planting time for tulips can vary based on your climate. In my experience, I’ve learned that:
- In warmer climates: Planting can start as early as mid-September and go until the end of October. I’ve noticed that the soil doesn’t freeze as quickly in these regions, allowing for a longer planting window.
- In temperate climates: The best time to plant is usually from late September to early November. I’ve found that mid-October works best for me, as it’s cool enough for the bulbs to settle in.
- In colder climates: Aim for planting in late October to early November. This ensures the bulbs are in the ground before the first hard freeze. I remember waiting until I was sure the threat of frost was gone before I planted, and it paid off with a stunning display in spring.
Soil Temperature and Its Impact on Planting
Soil temperature plays a significant role in when to plant tulips. Ideally, you want to plant when the soil temperature is between 50°F and 60°F. This temperature range encourages the bulbs to start rooting without prompting them to sprout prematurely. I’ve often used a simple soil thermometer to check the ground temperature before planting, and it’s helped me avoid planting too early or too late.
As the temperature drops in the fall, the bulbs go into a dormancy phase that’s crucial for their development. If you plant too late, the ground can freeze, making it difficult for the bulbs to establish roots. I’ve learned that waiting for the right soil temperature is key to a successful tulip garden.
Factors Influencing Planting Time (Frost Dates, Local Weather)
Local weather conditions and frost dates can also influence when to plant tulips. I’ve found that it’s essential to pay attention to your area’s first frost date. Generally, you want to plant at least six weeks before this date to allow the bulbs to root properly. Checking local gardening resources or extension services can provide valuable information about frost dates in your area.
Additionally, I’ve noticed that some years have warmer or cooler temperatures than usual. Watching the weather trends can help you make a more informed decision about when to plant. If you know that a warm spell is coming, I might delay planting until temperatures drop again. The goal is to ensure the tulips have enough time to settle in before winter hits.
Read Interesting article: Planting Raised Flower Beds: Helpful Tips for Beautiful Designs
Preparing for Planting: Soil and Location
Once you’ve got the timing down for planting tulips, the next step is preparing the soil and choosing the right location. I’ve found that the success of my tulip garden largely depends on these factors. Getting them right can make all the difference in the health and vibrancy of your blooms.
Choosing the Right Soil Type for Tulips
Tulips thrive in well-draining soil that is rich in organic matter. I’ve learned that heavy, compacted soils can lead to rot and other issues. Ideally, you want soil that’s loamy and slightly sandy, which allows water to flow through without pooling around the bulbs. I often mix in some compost or well-rotted manure to enrich the soil before planting. This not only provides the nutrients the tulips need but also improves drainage.
To check your soil’s drainage, I recommend doing a simple test: dig a hole about a foot deep, fill it with water, and see how long it takes to drain. If it’s still muddy after a few hours, you might need to amend the soil or consider a different location for your tulips. In my garden, I’ve found that raised beds can work wonders for drainage, especially in areas where the soil tends to retain water.
Optimal Sunlight Exposure for Tulip Growth
Sunlight is another critical factor in growing healthy tulips. Ideally, tulips thrive in full sun, meaning they need at least six hours of direct sunlight each day. I remember the first year I planted tulips in a partially shaded spot, thinking it would be okay. They bloomed, but the flowers were sparse and not as vibrant as I had hoped. Since then, I’ve made it a priority to choose locations that get plenty of sun.
When planning your garden layout, consider the sun’s path and how it will shift through the seasons. I often find that southern-facing areas tend to get the most sunlight. Also, if you have taller plants nearby, make sure they won’t overshadow your tulips as they grow. I’ve learned that positioning tulips in a sunny location not only helps them flourish but also enhances the overall beauty of my garden.
How to Prepare the Planting Site
Before planting tulips, it’s essential to prepare the site properly. I take a few steps to ensure the ground is ready for those beautiful bulbs. First, I clear the area of any weeds, rocks, or debris that could hinder growth. Weeds can compete for nutrients and water, so I always make sure to get rid of them beforehand.
Next, I loosen the soil to a depth of about 12 inches. You can use a garden fork or tiller for this. Loosening the soil not only helps with drainage but also allows the tulips to send their roots down more easily. If the soil feels too sticky or compacted, I add some sand or compost to improve its texture.
Once the soil is well-prepared, I rake it smooth and create a slight mound if I’m planting in a row. This helps with drainage and can give your garden a more polished look. After all that preparation, I can hardly wait to plant those bulbs and see the beauty they will bring to my garden!
Planting Techniques for Healthy Tulips
Now that we’ve covered the essentials of soil and location, let’s dive into how to plant tulip bulbs properly. This part is exciting because it’s the moment we put all our hard work into action!
How to Properly Plant Tulip Bulbs
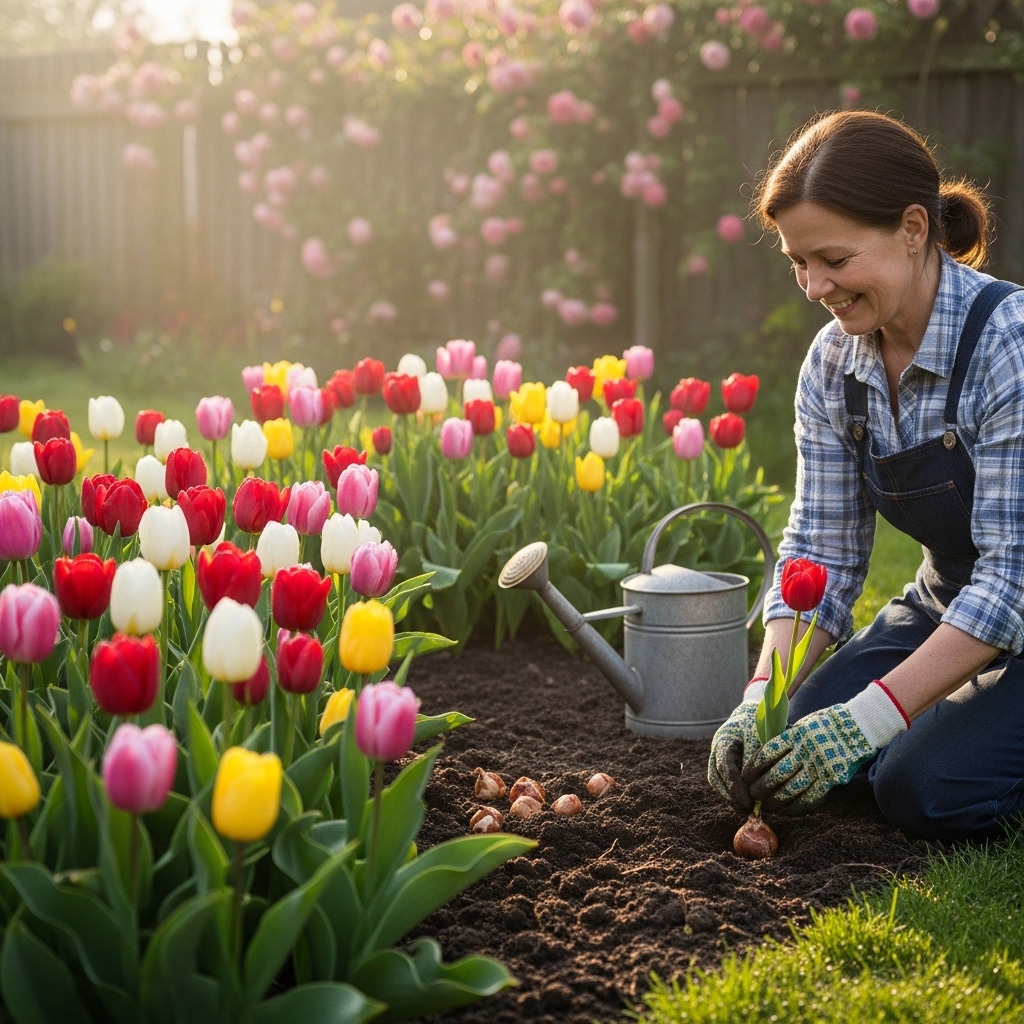
When I’m ready to plant my tulip bulbs, I make sure to handle them gently. I’ve learned that bruising or damaging the bulbs can affect their growth. First, I dig holes about 6 to 8 inches deep. The general rule is to plant the bulbs at a depth of three times their height. For example, if the bulb is 2 inches tall, I plant it about 6 inches deep.
As I place the bulbs in the holes, I ensure that the pointed end is facing upwards. I used to get this wrong, but trust me, planting them upside down can lead to disappointing results! Once the bulbs are positioned correctly, I cover them with soil and gently press down to eliminate air pockets, which can hinder root development.
Spacing and Depth Recommendations
Spacing is another important consideration when planting tulips. I typically space my bulbs about 4 to 6 inches apart. This gives them enough room to grow and flourish without competing too much for nutrients. I remember my first attempt at planting, where I crammed them close together, thinking it would create a full look. While it did bloom beautifully, the flowers were smaller than I expected. I’ve since learned that giving them some space leads to more robust and healthier blooms.
Watering Guidelines After Planting
Once the tulips are in the ground, I give them a good watering. It’s crucial to not drown them, though! I simply moisten the soil without soaking it. After that, I usually let nature take its course. I’ve found that tulips don’t require much watering, especially in the fall when the rains start to pick up. Just keep an eye on the weather and water them if it’s particularly dry. I’ve learned that keeping the soil moist but not soggy is key to ensuring those bulbs settle in nicely.
Caring for Tulips Post-Planting
Once the excitement of planting tulips is behind us, the focus shifts to caring for them as they settle into their new home. I’ve realized that proper care can make a significant difference in how my tulips perform and bloom in spring. Here are some essential tips for keeping your tulips healthy and vibrant.
Fertilization Tips for Strong Blooms
Fertilizing tulips can be a game-changer for their growth. I’ve learned that a little nourishment goes a long way in producing stunning blooms. After planting, I typically wait until the tulips begin to sprout in the spring before fertilizing. At this stage, I use a balanced fertilizer, like a 10-10-10 mix, to provide the essential nutrients they need. I usually sprinkle the fertilizer around the base of the plants, taking care not to let it touch the bulbs directly.
It’s also helpful to follow the instructions on the fertilizer package for the right amount to use. I remember my first attempt at fertilizing where I was a bit too generous, and it ended up burning some of my bulbs. I’ve since learned the importance of moderation! Additionally, I often apply a second round of fertilizer just after the tulips bloom to support any new growth and help them store energy for next year.
Dealing with Pests and Diseases
Pests and diseases can be a gardener’s worst nightmare, but I’ve found that with some vigilance, they can be managed effectively. One of the most common pests I’ve encountered is the aphid. These little bugs love to suck the sap from the tulip leaves. I usually keep an eye on the underside of the leaves and, if I see any, I rinse them off with a strong spray of water. In cases of a larger infestation, I’ve used insecticidal soap, which is effective and safe for my plants.
Another issue that can arise is fungal diseases. I’ve had to deal with various forms of blight, particularly in wet seasons. To combat this, I ensure my soil has good drainage and avoid overhead watering. Keeping the area around the tulips clean and free from debris also helps reduce the risk of disease. If I notice any affected leaves, I remove them immediately to prevent further spread. Being proactive has saved many of my tulips from potential disasters!
Mulching and Other Maintenance Practices
Mulching is something I’ve come to appreciate in my tulip care routine. After planting, I apply a layer of organic mulch, like shredded leaves or straw, around the base of the tulips. This helps retain soil moisture, suppress weeds, and regulate soil temperature. I’ve found that a good mulch layer can help keep the tulips happy, especially during dry spells.
Another maintenance practice that’s become part of my routine is deadheading. As the tulips finish blooming, I cut off the spent flowers to prevent them from going to seed. This allows the plants to redirect their energy back into the bulbs, which is crucial for next year’s growth. I remember the first time I let my tulips go to seed; they didn’t perform nearly as well the following year. Since then, I’ve made deadheading a priority, and the results speak for themselves!
When to Expect Blooms: Growth Timeline
The anticipation of seeing my tulips bloom is always thrilling! Knowing when to expect flowers is part of the excitement of planting. I’ve learned that the growth timeline can vary depending on the tulip variety and the climate, but generally, here’s what I’ve observed.
Average Blooming Times for Different Tulip Varieties
Most tulips typically bloom in early to late spring, depending on the variety. For instance, early-blooming varieties like ‘Tulip Kaufmanniana’ often start showing their colors as early as March. On the other hand, late-blooming types, such as ‘Darwin Hybrids,’ usually wait until late April to early May to make their grand entrance. I’ve enjoyed experimenting with multiple varieties to create a staggered blooming effect. This way, I get to enjoy tulips for a more extended period!
In my experience, the exact bloom time can also fluctuate based on the weather. A warm spring might prompt earlier blooms, while a cooler season could delay them. I’ve learned to keep an eye on the weather and adjust my expectations accordingly. Whenever I see those first green shoots pushing through the soil, I can hardly contain my excitement!
Signs of Healthy Growth and Potential Issues
As my tulips grow, I love watching for signs that they’re thriving. Healthy tulips usually have strong stems and vibrant green leaves. If I notice that the leaves are yellowing or wilting, it can be an indication of problems, such as overwatering or nutrient deficiencies. This experience has taught me to regularly check my plants and adjust my care as needed.
Another issue to look out for is the presence of any unusual spots or discoloration on the leaves. This could signal pest infestations or diseases. I’ve often found that the sooner I address these signs, the better my chances of saving my tulips. Regularly inspecting my garden has become second nature, and it’s always rewarding to see healthy, happy blooms making their way toward the sun!
Frequently Asked Questions
When is the best time to plant tulips?
The best time to plant tulips for stunning spring blooms is in the fall, typically between September and November.
What types of tulips are popular for spring blooms?
Some popular tulip varieties include Darwin Hybrid Tulips, Triumph Tulips, Parrot Tulips, Fringed Tulips, and Single Late Tulips.
What soil type is best for planting tulips?
Tulips thrive in well-draining soil that is rich in organic matter, ideally loamy and slightly sandy to prevent rot.
How deep should tulip bulbs be planted?
Tulip bulbs should be planted about 6 to 8 inches deep, which is generally three times their height.
How far apart should tulip bulbs be spaced when planting?
Tulip bulbs should be spaced about 4 to 6 inches apart to allow for proper growth without competition for nutrients.
What is the ideal soil temperature for planting tulips?
The ideal soil temperature for planting tulips is between 50°F and 60°F, which encourages rooting without premature sprouting.
How can I ensure my tulips receive enough sunlight?
Tulips thrive in full sun and need at least six hours of direct sunlight each day for optimal growth.
What should I do to care for tulips after planting?
After planting, care for tulips by watering them moderately, fertilizing them in spring, and watching for pests and diseases.
How can I manage pests and diseases affecting tulips?
To manage pests like aphids, rinse them off with water or use insecticidal soap. For diseases, ensure good drainage and remove affected leaves promptly.
When can I expect my tulips to bloom?
Most tulips typically bloom in early to late spring, with early-blooming varieties starting as early as March and late-blooming types around late April to early May.