
Planting milkweed in the fall and winter is crucial for supporting monarch butterflies, as it allows seeds to undergo natural cold stratification. This guide outlines 11 essential steps for effectively planting milkweed seeds, ensuring successful germination and growth in spring [1].
Table of Contents
Understanding the Importance of Milkweed for Monarchs
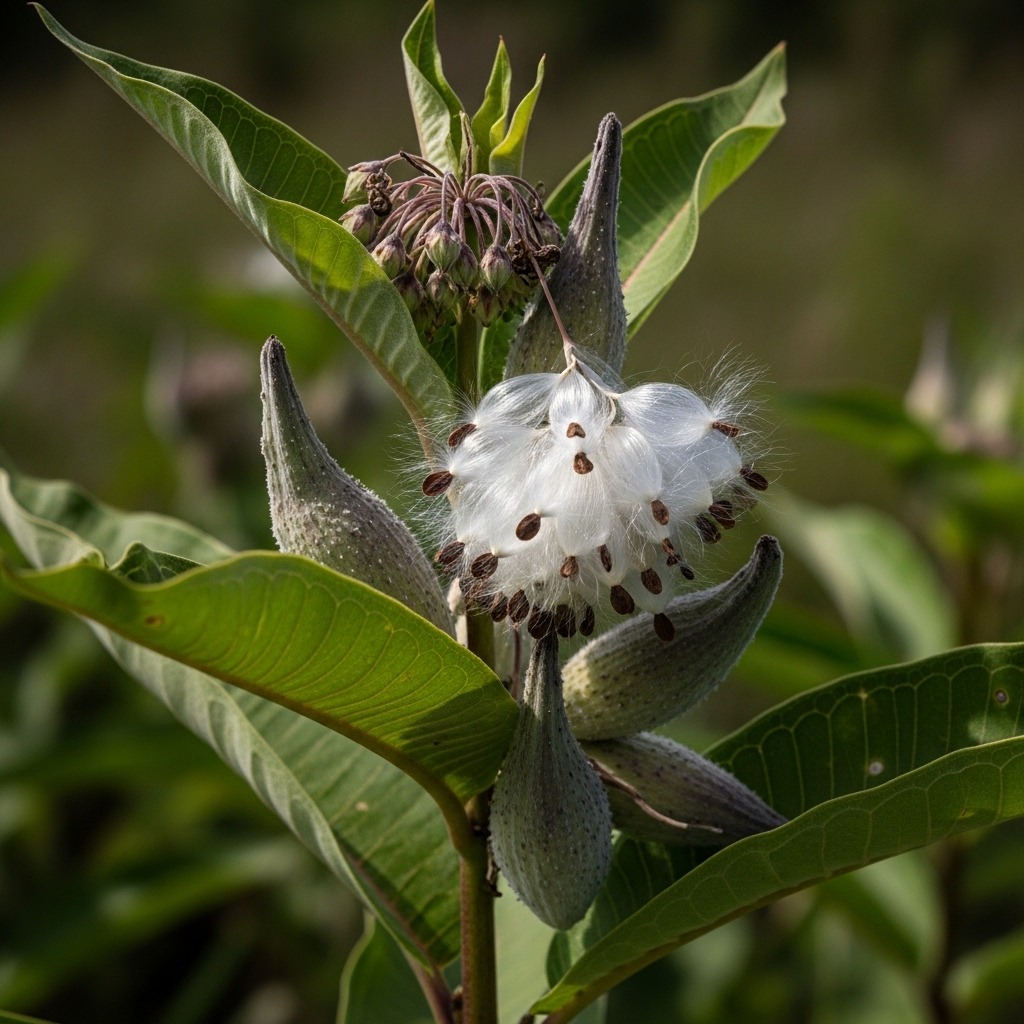
Milkweed is not merely a beautiful addition to your garden; it is the essential host plant for monarch caterpillars. Without it, the life cycle of these iconic butterflies cannot continue. Understanding its ecological significance is vital for successful planting and supporting biodiversity.
The Role of Milkweed in the Monarch Life Cycle
Milkweed serves as the sole food source for monarch caterpillars. Female monarchs lay their eggs exclusively on its leaves. Hatchling caterpillars consume these leaves, which are rich in nutrients necessary for their growth. This relationship is not just biological; it is critical for the survival of monarch populations. In fact, the decline of milkweed due to herbicide use has contributed to a staggering 90% drop in monarch numbers over the past few decades.
- Monarch Lifecycle Stages:
- Egg: Laid on milkweed leaves.
- Caterpillar: Feeds exclusively on milkweed.
- Chrysalis: Transforms into a butterfly.
- Adult: Seeks nectar from various flowers but relies on milkweed for reproduction.
How Milkweed Supports Other Pollinators
In addition to serving monarchs, milkweed attracts a variety of other pollinators. Its nectar-rich flowers draw in bees, butterflies, and hummingbirds, making it a cornerstone of pollinator-friendly gardens. By planting milkweed, you contribute to a diverse ecosystem that supports multiple species.
- Benefits of Milkweed:
- Provides habitat and food for various pollinators.
- Contributes to soil health and biodiversity.
- Acts as a natural pest deterrent due to its toxic compounds, which protect both caterpillars and adult butterflies from predators.
Decision Framework for Choosing Milkweed Varieties
Selecting the right milkweed variety is crucial for your local ecosystem. Here’s a quick framework:
- Common Milkweed (Asclepias Syriaca): Best for open fields and naturalized areas.
- Swamp Milkweed (Asclepias Incarnata): Ideal for wet areas and gardens.
- Butterfly Weed (Asclepias Tuberosus): Perfect for dry, sandy soils.
Consider your local climate and soil conditions when selecting a variety. Always opt for native species to maximize ecological benefits.
By planting milkweed in the fall and winter, you not only prepare the seeds for optimal germination through cold stratification but also play a critical role in conserving monarch butterflies and supporting broader biodiversity. For those looking to start their planting journey, consider purchasing Milkweed Seed Packets to ensure you have the right seeds for your area.
Choosing the Right Milkweed Varieties for Your Region
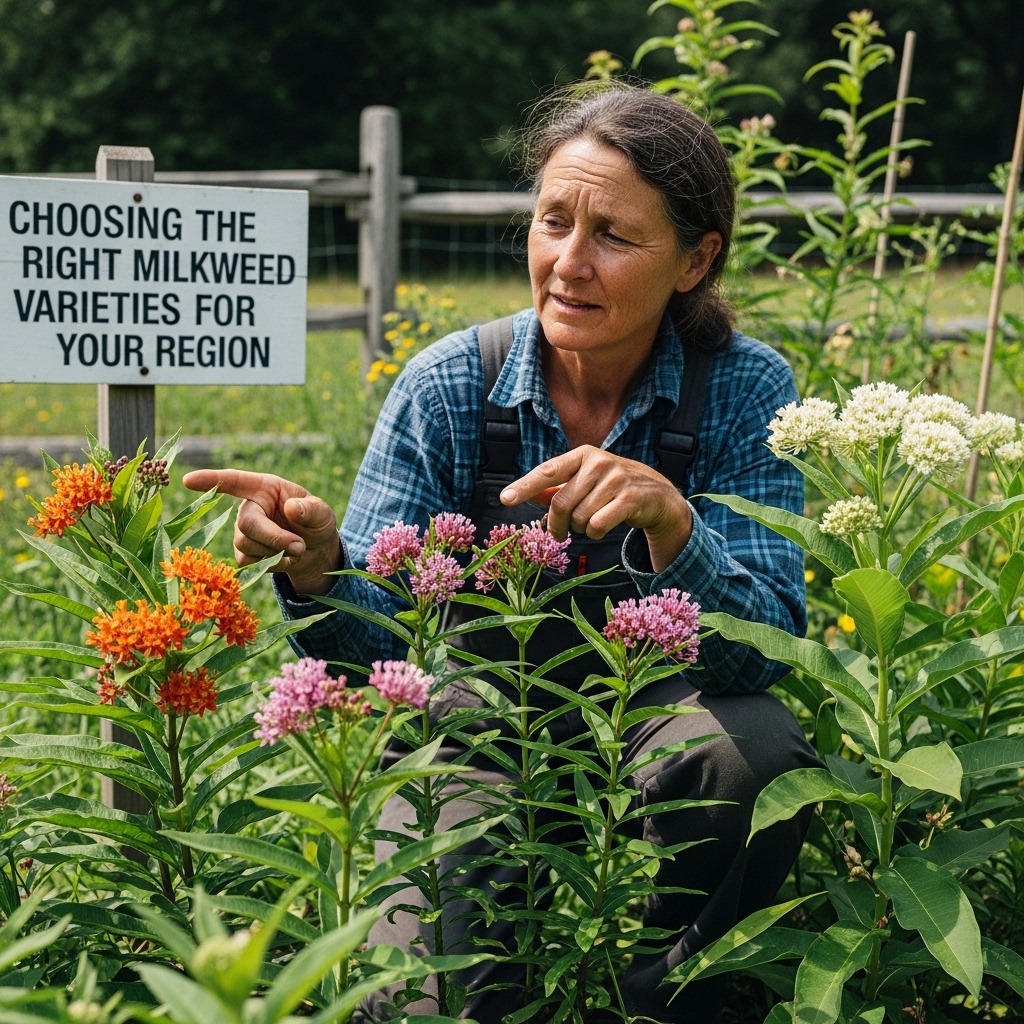
Selecting the appropriate milkweed variety is essential for successful planting. Different species thrive in specific climates, making it vital to align your choice with your USDA hardiness zone.
Overview of Common Milkweed Species
Here’s a quick list of native milkweed varieties suited for different regions:
- Common Milkweed (Asclepias syriaca): Thrives in Zones 3-7. It is adaptable and grows well in various soil types.
- Swamp Milkweed (Asclepias incarnata): Perfect for Zones 3-8. It prefers moist soil, ideal for wetland areas.
- Whorled Milkweed (Asclepias verticillata): Best in Zones 3-7. This drought-resistant species excels in dry soils.
- Butterfly Weed (Asclepias tuberosa): A favorite in Zones 3-9. It loves well-drained soil and full sun, attracting pollinators.
- Showy Milkweed (Asclepias speciosa): Thrives in Zones 3-7. It features striking flowers and is great for garden aesthetics.
Climate Considerations for Milkweed Selection
Understanding your USDA hardiness zone is crucial for selecting the right milkweed. Here’s how different zones impact your planting strategy:
| USDA Zone | Recommended Varieties | Ideal Planting Time |
|---|---|---|
| 3-5 | Common Milkweed, Swamp Milkweed | Fall (Sept-Nov) |
| 6-8 | Butterfly Weed, Showy Milkweed | Fall or Winter (Oct-Mar) |
| 9-10 | Tropical Milkweed, Butterfly Weed | Early spring (Feb-April) |
Decision Framework for Varieties
1. Assess Local Climate: Identify your USDA zone.
2. Evaluate Soil Conditions: Consider moisture levels and drainage.
3. Select Species: Choose based on regional compatibility and growth preferences.
4. Plan for Overwintering: Ensure seeds undergo cold stratification if necessary.
For an easy start, consider purchasing Milkweed Seed Packets that are specifically labeled for your zone. This ensures you plant varieties best suited for your region’s climate and soil types.
Utilizing native milkweed species not only supports local ecosystems but also enhances the chances of successful germination and growth in spring.
Preparing the Soil for Fall Planting

Soil preparation is crucial for successful milkweed planting. This process ensures that your seeds have the best environment for germination and growth come spring.
Soil Type and Drainage Requirements
Milkweed thrives in well-drained, sandy or loamy soils. Avoid heavy clay that retains water, as it can suffocate roots. Here are key soil characteristics to consider:
- pH Level: Aim for a pH of 6.0 to 7.0, which is optimal for milkweed growth [5].
- Drainage: Ensure good drainage to prevent waterlogging. Raised beds can enhance drainage if your soil is dense.
- Soil Texture: Light and fluffy soil promotes root development.
How to Amend Soil Properly
Amending your soil right is vital. Here’s a checklist for effective soil preparation tailored for milkweed:
- Clear Existing Vegetation: Remove weeds and debris to reduce competition.
- Loosen Soil: Use a rake or garden fork to aerate the soil. This helps with root penetration.
- Add Organic Matter: Incorporate a small amount of compost. Avoid excessive nutrients; milkweed is adapted to lean soils [6].
- Scarify the Surface: Lightly scratch the soil surface to create grooves. This ensures optimal seed-to-soil contact [7].
Soil Preparation Checklist
- [ ] Check soil pH (aim for 6.0-7.0)
- [ ] Clear weeds and debris
- [ ] Aerate soil to a depth of 12 inches
- [ ] Add a modest amount of compost (if necessary)
- [ ] Scarify the soil surface
By following these steps, you will create an ideal environment for your milkweed seeds. This preparation supports the natural cold stratification process essential for seed germination.
Mastering Cold Stratification Techniques
Understanding cold stratification is crucial for successfully planting milkweed in the fall and winter. This natural process ensures that seeds are conditioned for optimal germination come spring. Here’s what you need to know about cold stratification for milkweed.
What is Cold Stratification?
Cold stratification mimics the natural winter conditions that seeds experience outdoors. It involves exposing seeds to cold, moist environments for a sustained period. This exposure breaks seed dormancy, a survival mechanism that prevents premature germination during unfavorable conditions. Most perennial milkweed varieties, including common milkweed (Asclepias syriaca) and swamp milkweed (Asclepias incarnata), require this process for successful germination [8].
Benefits of Natural Stratification in Fall
Planting milkweed seeds in the fall allows nature to perform cold stratification. This method offers several advantages:
- Simplicity: You avoid the complexities of artificial stratification, which requires controlled environments and precise moisture levels.
- Stronger Plants: Seeds that undergo natural stratification often develop into more resilient plants. They are better adapted to local conditions and more capable of surviving environmental stressors.
- Synchronized Growth: Timing aligns with the natural lifecycle of milkweed, ensuring seeds germinate when conditions are optimal in spring.
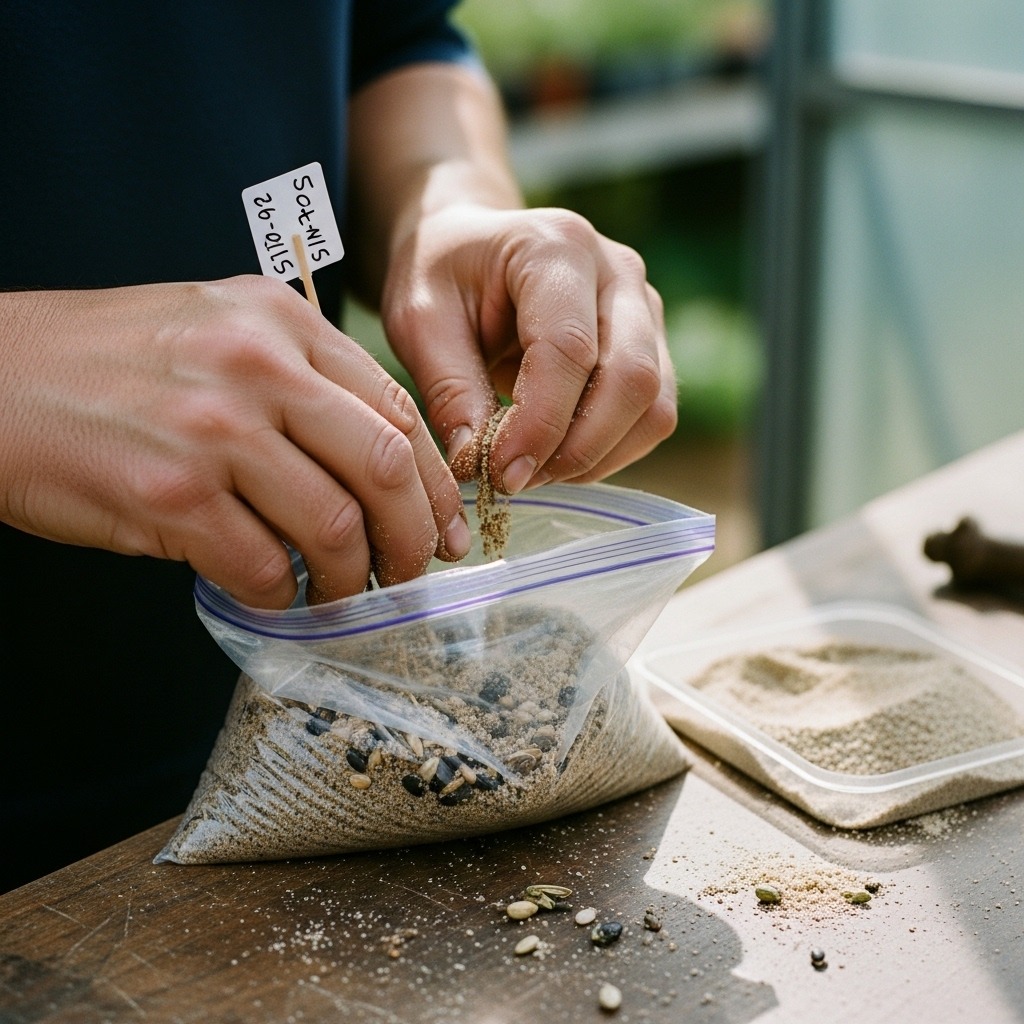
Natural vs. Artificial Stratification
While natural stratification is effective, some gardeners may opt for artificial methods. Here’s a comparison:
| Aspect | Natural Stratification | Artificial Stratification |
|---|---|---|
| Process | Seeds are sown in fall and left outdoors. | Seeds are soaked, placed in a fridge, and maintained in moisture. |
| Maintenance | Minimal; relies on natural conditions. | Requires careful monitoring of temperature and moisture. |
| Suitability | Ideal for most perennial milkweeds. | Useful for seeds that need tailored conditions. |
| Germination Success | Often leads to stronger plants. | Can result in variable success depending on execution. |
For many gardeners, the natural route is the preferred choice due to its ease and effectiveness. However, understanding both methods allows for flexibility based on specific gardening needs.
Practical Tips for Cold Stratification
- Seed Selection: Choose native milkweed varieties suited to your climate zone for the best results.
- Timing: Sow seeds in late fall after the first frost. This timing ensures seeds remain dormant until spring warmth encourages germination.
- Soil Conditions: Prepare soil as outlined previously, ensuring it is free of weeds and well-aerated to support seed health.
- Monitor Weather: Be aware of late frosts or heavy rains that may impact seed establishment.
By mastering these techniques, you will enhance your chances of successfully growing milkweed and supporting monarch butterfly populations in your area.
Steps for Planting Milkweed Seeds in the Fall
Planting milkweed seeds in the fall is a strategic move that aligns with the plant’s natural lifecycle. This process not only supports the growth of vibrant milkweed but also plays a crucial role in conserving monarch butterfly populations.
Timing Your Planting for Optimal Success
To achieve optimal results, plant your milkweed seeds after the first frost, usually between late September and early November. This timing allows the seeds to experience cold stratification naturally, which is essential for breaking dormancy and stimulating germination in spring [6].
Step-by-Step Planting Instructions
1. Select Your Site: Choose a sunny location with well-drained soil. Milkweed thrives in full sun and can tolerate various soil types but prefers slightly moist conditions.
2. Prepare the Soil: Clear the area of existing vegetation. Loosen the soil to a depth of at least 12 inches. Adding organic matter, such as compost, enriches the soil and improves drainage [4].
3. Sow the Seeds:
- Scatter seeds evenly across the prepared area.
- Rake lightly to cover the seeds with about 1/8 to 1/4 inch of soil. This depth protects them from birds and ensures adequate moisture retention.
4. Watering: After sowing, water the area gently to settle the soil around the seeds. Avoid overwatering, as this can lead to seed rot.
5. Winter Care: Once planted, minimize disturbance to the area. Natural snowfall can help insulate the seeds over winter. Monitor for excessive rain that might wash away seeds and take corrective action if necessary.
6. Spring Expectations: As temperatures rise in spring, expect to see milkweed seedlings emerge. Patience is key, as germination may take several weeks due to the cold stratification process.
Troubleshooting Common Issues
- Poor Germination: If seeds do not sprout in spring, check for adequate soil moisture and ensure seeds were sown at the correct depth [10].
- Seed Washing Away: During heavy rains, use mulch or a light topsoil cover to protect seeds from being washed away.
- Frost Damage: If an unexpected frost occurs, ensure seedlings are hardy enough to withstand brief cold snaps or consider using frost cloth for protection.
By following these steps, you’ll create an optimal environment for milkweed growth, contributing to the resurgence of monarch butterflies in your area.
Monitoring and Caring for Milkweed Over Winter
Caring for milkweed seeds during the winter months is crucial for their successful germination in spring. Proper winter care ensures that seeds remain protected and undisturbed, allowing them to benefit from the cold stratification process necessary for breaking dormancy.
Mulching for Protection
Mulch acts as a protective blanket for milkweed seeds. It retains moisture, regulates soil temperature, and prevents erosion. Here’s how to effectively use mulch for winter protection:
- Apply a 2-3 inch layer of organic mulch (straw, shredded leaves, or wood chips) over the planting area. This insulates the seeds and maintains consistent moisture levels.
- Avoid heavy materials that can compact the soil. Lightweight organic mulch allows air to circulate while protecting the seeds.
- Check regularly for signs of erosion or displacement. Replenish mulch as needed to maintain coverage.
Winter Care Checklist
To ensure your milkweed seeds thrive through the winter, follow this checklist:
- Monitor Soil Moisture: Ensure the soil remains moist but not waterlogged. Proper watering is essential for seeds to survive the winter [13].
- Protect Against Frost: If frost is forecasted, consider using frost cloths or additional mulch to shield the seeds from extreme cold.
- Inspect for Pests: Keep an eye out for pests that may disturb the seeds. Remove any infestations promptly.
What to Expect During Winter
Understanding the winter behavior of milkweed seeds helps in managing their care:
- Cold Stratification: Seeds undergo natural cold stratification, critical for germination. This process mimics the conditions seeds would face in their native habitats [4].
- Dormancy Period: Milkweed seeds remain dormant during winter but will begin to swell and prepare for germination as temperatures rise in early spring.
- Wildlife Interaction: Even in winter, milkweed plants provide habitat for birds and small animals, as they utilize the plant fibers for nesting materials [8].
By adhering to these practices, you can effectively manage your milkweed seeds during the winter, fostering a robust environment for them to thrive come spring.
Spring Germination Expectations and Care
As temperatures rise in early spring, milkweed seeds begin to germinate, showcasing their resilience and adaptability. Understanding the signs of successful germination and providing appropriate care for emerging seedlings is crucial for fostering robust plant growth.
Signs of Successful Germination
Germination typically occurs between late spring and early summer as soil temperatures reach 65°F to 75°F. Watch for these signs:
- Seed Swelling: Seeds will absorb moisture, enlarging in size.
- Emerging Seedlings: Tiny green shoots will break through the soil surface.
- Root Development: A robust taproot will begin to establish below ground.
Mark the planting area to prevent accidental removal of seedlings, which can look similar to common weeds [1].
Nurturing Seedlings Post-Germination
Once germination occurs, focus on nurturing the seedlings to ensure optimal growth. Here’s what you need to do:
- Soil Moisture: Keep the soil consistently moist but not waterlogged. Avoid supplemental watering unless conditions are extremely dry.
- Mulching: A light layer of organic mulch can protect seedlings from harsh weather, but avoid thick layers that block sunlight [2].
- Weed Management: Control weeds that may compete for nutrients and light. Hand-pulling is effective in the early stages.
Tailor your care based on common scenarios:
- If seedlings are sparse: Consider reseeding in late spring if you notice poor germination rates.
- If seedlings appear leggy: Lack of sunlight could be an issue. Ensure they receive at least six hours of direct sunlight daily.
Utilizing these strategies not only enhances the health of your milkweed plants but also contributes to the conservation of monarch butterflies, which depend on milkweed as a vital host plant [4].
Common Issues and Troubleshooting for Milkweed Planting
Planting milkweed can lead to several challenges, especially during the fall and winter months. Understanding these common issues will help you cultivate healthy plants that support monarch butterfly populations.
Identifying Potential Problems
1. Germination Failures: Milkweed seeds often require cold stratification to break dormancy. Without this process, germination rates will plummet, especially in colder temperatures [16].
2. Overwatering Risks: Excessive moisture can lead to root rot, a common issue for milkweed. Ensure the soil drains well to avoid this problem [17].
3. Pest Infestations: Milkweed is susceptible to pests, especially during the fall. Aphids and spider mites can damage young plants, so monitoring is essential [18].
Practical Solutions for Common Issues
- Cold Stratification: If you notice low germination rates, chill seeds in the refrigerator for 30 days before planting. This simulates natural winter conditions, improving germination success.
- Water Management: Check the soil moisture regularly. If the top inch of soil is dry, it’s time to water. Avoid soggy conditions by ensuring proper drainage.
- Pest Control: Implement natural pest control methods. Introduce beneficial insects, like ladybugs, to your garden. This helps maintain a balanced ecosystem and reduces pest populations.
Troubleshooting Checklist
| Issue | Signs | Solution |
|---|---|---|
| Poor Germination | Sparse seedlings | Cold stratify seeds before planting [16]. |
| Leggy Seedlings | Tall, thin plants | Increase sunlight exposure to at least 6 hours/day. |
| Root Rot | Wilting despite watering | Improve drainage; avoid overwatering [17]. |
| Pest Infestation | Visible insects on leaves | Use beneficial insects or insecticidal soap. |
Understanding these issues and their solutions will help ensure a thriving milkweed planting, directly benefiting monarch butterflies and enhancing your garden’s biodiversity.
Comparing Fall Planting with Spring Planting
When it comes to planting milkweed, timing is crucial. Both fall and spring offer distinct advantages and challenges. Understanding these can help you make an informed decision that aligns with your gardening goals and local climate.
Advantages of Fall Planting
1. Natural Cold Stratification: Seeds benefit from the winter chill, which helps them break dormancy. This process often leads to healthier, more robust plants in the spring.
2. Lower Maintenance: Fall planting requires less oversight. Seeds naturally settle into the soil, and you can avoid the intense labor of spring planting.
3. Stronger Root Development: Transplanting young milkweed in early fall allows roots to establish before winter, promoting vigorous growth when spring arrives [19].
Benefits of Spring Planting
1. Greater Control: Spring planting allows for precise timing and spacing. You can cold-stratify seeds indoors to ensure optimal conditions for germination [20].
2. Ideal for Mild Climates: In warmer regions, spring planting avoids the risks associated with fall planting, such as seed washout or insufficient cold exposure for dormancy [21].
3. Quick Growth: With increasing sunlight and warmer temperatures, seedlings tend to grow rapidly in spring, making it easier for gardeners to manage their plants.
| Criteria | Fall Planting | Spring Planting |
|---|---|---|
| Germination Timing | Natural cold stratification leads to spring germination. | Seeds are planted directly for immediate growth. |
| Maintenance Level | Low maintenance; less intervention needed. | Requires more hands-on care and monitoring. |
| Risk Factors | Potential for seed washout from heavy rains. | Early frosts can damage young plants. |
| Root Development | Strong root systems established before winter. | Immediate growth but less root establishment. |
Decision Framework
When choosing your planting time, consider the following:
- Climate Zone: If you’re in USDA Zones 3-8, fall planting is advantageous. For Zones 9-10, spring may be more effective.
- Gardening Goals: If you prefer a low-maintenance approach, opt for fall. For those seeking control over growth conditions, spring is ideal.
- Seed Type: Decide if you’re starting from seed or transplanting young plants. This influences your timing.
By weighing these factors, you can strategically select the best time to plant milkweed, ensuring a thriving environment for monarch butterflies and enhancing your garden’s biodiversity.
Alternatives to Direct Seed Planting
For those looking to plant milkweed in fall and winter, using plugs or seedlings presents a viable alternative to direct seeding. This method not only enhances success rates but also expedites the establishment of milkweed, providing essential habitat for monarch butterflies.
When to Consider Plugs Over Seeds
Choosing between plugs and seeds depends largely on your timeline and gardening preferences. Plugs are ideal if you want quicker results. They establish faster than seeds, often flowering in the first season, while seeds may take a full year to develop and bloom. For those in USDA Zones 3-8, fall planting plugs can significantly improve germination success due to the cooler temperatures that mimic natural dormancy processes [13].
Planting Plugs Effectively
To maximize the benefits of planting plugs, follow these best practices:
- Timing: Plant plugs in early fall or spring once the soil has warmed. This timing ensures the plants can establish roots before facing extreme temperatures.
- Soil Preparation: Ensure the soil is well-drained and rich in organic matter. Amend with compost if necessary to promote healthy growth.
- Spacing: Space plugs 12-18 inches apart to allow for adequate airflow and growth. This spacing helps prevent competition for nutrients and light.
- Watering: Water thoroughly after planting. Keep the soil consistently moist for the first few weeks to support root establishment.
Real-life example: A community garden in a USDA Zone 5 area successfully transitioned from seed planting to using plugs. They reported a 30% increase in plant establishment rates, leading to a more robust population of milkweed that attracted monarchs within the first season.
By considering plugs, you can create a thriving environment for monarchs while enjoying the aesthetic benefits of milkweed in your garden sooner.
The Long-Term Benefits of Planting Milkweed
Planting milkweed in your garden goes beyond aesthetics. It plays a crucial role in supporting monarch butterfly populations and enhancing local ecosystems. Understanding these benefits is essential for every gardener committed to conservation.
Contributing to Monarch Conservation
Milkweed is the sole host plant for monarch caterpillars, providing them with the necessary nutrients to thrive. Without sufficient milkweed, the monarch population faces significant decline. Research indicates that planting milkweed can directly boost monarch numbers. For instance, a study showed that areas with abundant milkweed support up to 10 times more monarchs compared to regions without it [22].
- Key Benefits:
- Essential food source for caterpillars.
- Increases monarch reproductive success.
- Enhances migratory pathways for butterflies.
Supporting Local Ecosystems
Beyond aiding monarchs, milkweed contributes to overall biodiversity. It attracts various pollinators, including bees and hummingbirds, which are vital for plant reproduction. Studies indicate that native plants like milkweed improve local biodiversity, offering habitats for numerous species [23].
- Ecological Advantages:
- Improves soil health through deep root systems.
- Provides habitat for beneficial insects and wildlife.
- Enhances garden resilience against pests and diseases.
Choosing the Right Milkweed Variety
Selecting the appropriate milkweed variety based on your climate zone can maximize ecological impact. For example, common milkweed (Asclepias syriaca) thrives in USDA Zones 3-9, while swamp milkweed (Asclepias incarnata) is best suited for wetter conditions.
- Decision Framework:
- USDA Zone 3-4: Common Milkweed
- USDA Zone 5-7: Swamp Milkweed
- USDA Zone 8-9: Butterfly Weed (Asclepias tuberosa)
By strategically planting milkweed, you not only support monarchs but also foster a thriving ecosystem in your garden. Each milkweed plant contributes to a larger environmental cause, making your gardening efforts impactful and rewarding.
Frequently Asked Questions
These quick answers cover the most common questions about this topic, including key details, practical tips, and common concerns.
Can I plant milkweed in October?
Yes, planting milkweed in October is ideal for fall planting. This allows seeds to undergo natural cold stratification during winter, which is essential for germination in spring [4]. Ensure the planting site is prepared and the seeds are sown after the first frost for best results.
Can I just throw milkweed seeds on the ground?
While you can scatter milkweed seeds directly on the ground, it’s best to lightly rake them into the soil to ensure proper contact. This improves germination chances. Simply throwing seeds without soil contact may lead to poor germination, especially in areas with heavy rainfall or wind [7].
How cold is too cold for milkweed?
Most native milkweed species can tolerate cold temperatures down to USDA Zone 3 or 4. However, extreme cold below -20°F (-29°C) can damage young plants or seeds if they are not properly insulated. Cold stratification during winter helps seeds adapt to these conditions and promotes germination in spring [8].
Where not to plant milkweed in the fall?
Avoid planting milkweed in areas prone to heavy foot traffic, weed competition, or poor drainage. Do not plant in shaded spots or locations with heavy clay soil that retains water. These conditions can hinder seed germination and plant growth, reducing the plant’s ability to support monarchs [6].
What are the best milkweed varieties for my region?
Choose native milkweed species suited to your USDA hardiness zone. For example, common milkweed (Asclepias syriaca) is good for Zones 3-7, while swamp milkweed (Asclepias incarnata) prefers wetter soils. Selecting regional varieties ensures better survival and ecological benefits [3].
How do I care for milkweed after planting?
Keep the soil moist but not waterlogged. Mulch lightly to protect seeds from erosion and temperature fluctuations. Once established, milkweed requires minimal maintenance. Monitor for pests like aphids and remove weeds that compete for nutrients [17].
What pests should I watch for on milkweed?
Common pests include aphids, spider mites, and milkweed bugs. These insects can damage leaves and stems. Use natural controls like ladybugs or insecticidal soap to manage infestations. Healthy plants are more resistant to pests [18].
What should I know about regional planting recommendations?
Planting milkweed varies by climate zone. Native species adapted to your USDA zone have higher success rates. Consult local extension offices or native plant guides for specific timing and species recommendations to maximize ecological benefits [4].
What should I know about step-by-step visual guides or diagrams for planting techniques?
Visual aids, such as diagrams showing seed sowing depth, soil preparation, and mulching, can improve planting success. Many gardening resources or extension websites offer detailed illustrations to help you plant correctly and support germination [14].
What should I know about comprehensive seasonal care tips?
Seasonal care involves soil preparation in fall, planting at the right time, winter mulching, and monitoring seedlings in spring. Proper care ensures healthy growth and maximizes the plant’s role in supporting monarchs and pollinators throughout the year [12].
References
2. Milkweed for Monarchs: How you can help support monarch …
3. Common Milkweed (Asclepias syriaca L.)
4. Plant Milkweed for Monarchs
5. Milkweed | Home and Garden Education Center
6. Common milkweed – Cornell CALS
7. Growing Common Milkweed Plants from Seeds
8. Seed stratification: What seeds require cold treatment
9. Native Milkweed Germination Guide
11. Winter Sowing – Illinois Extension
12. Monarch & Milkweed Monitoring Project
13. How to collect and grow milkweeds to help monarchs and …
14. Milkweed Plug Planting Instructions
15. Does Germination Success Differ with Respect to Seed Mass …
16. Seed dormancy and germination vary within and among …
17. Expert Shares Black Root Rot Causing Damage to Plants
18. Common Milkweed Insects – Wisconsin Horticulture
19. Starting Plants From Seed [fact sheet] – UNH Extension
21. Fall Vegetable Gardening – What to Plant When in Central …
22. Milkweed – For More Than Monarch Butterflies
23. Monarchs and milkweeds – nativars help pollinators